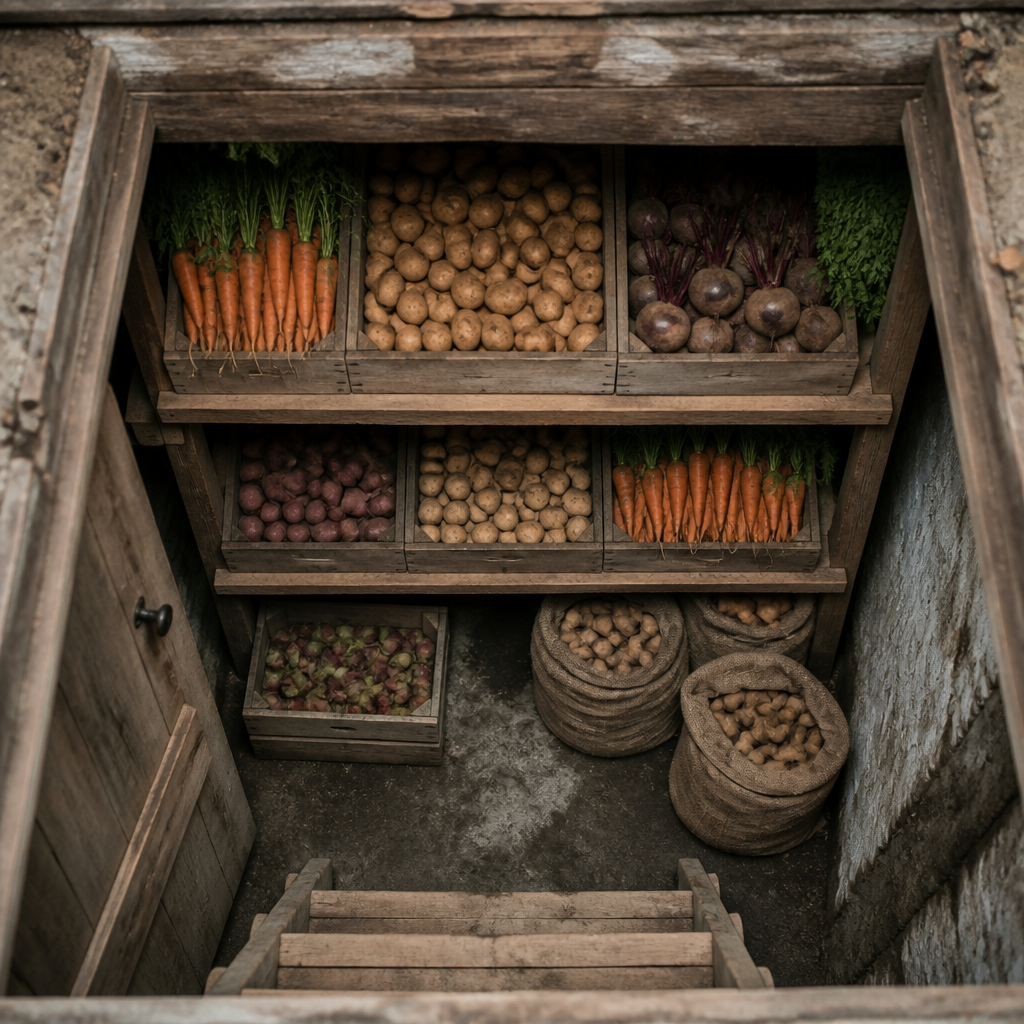
Most homesteaders overestimate what a root cellar costs and underestimate what it saves. The truth is that a functional root cellar build can be completed for well under a few hundred dollars using materials you may already own, and it will eliminate your dependence on freezers, coolers, and refrigeration for months of the year. If you grow or bulk-buy carrots, potatoes, beets, cabbage, or apples, a root cellar is not a luxury. It is the missing piece in any serious off-grid food storage system. This guide walks you through every step, from choosing the right site to stocking the shelves, with no contractor required.
Table of Contents
- Why Root Cellars Matter for Off-Grid Living
- Quick Takeaways
- Choosing the Right Site
- The Four Budget Build Types
- Root Cellar Build Comparison
- Ventilation: The Most Overlooked Detail
- Temperature and Humidity Control
- What to Store and How Long It Lasts
- Common Mistakes That Kill Root Cellars
- Frequently Asked Questions
- References
Why Root Cellars Matter for Off-Grid Living
A root cellar is the original off-grid food storage solution, and it still outperforms every modern alternative on a watt-per-pound basis. Unlike a chest freezer, a root cellar requires zero electricity, zero maintenance contracts, and zero vulnerability to grid outages. For remote property owners and homesteaders managing seasonal harvests, it is the anchor of a real food preservation strategy.
The principle is simple. Underground temperatures in most temperate North American regions stabilize at roughly 50 to 55 degrees Fahrenheit at a depth of 6 to 8 feet year-round. By using cool autumn air to pre-chill the cellar and then relying on earth mass to hold that cold through summer, you create a near-constant cool environment that keeps root vegetables, cured alliums, and many fruits alive for months without any energy input at all.
This is not just about convenience. For a family on a remote property, the ability to harvest in October and eat from that harvest through March or April is the difference between genuine food security and perpetual grocery dependence.
Quick Takeaways
| Key Insight | Explanation |
|---|---|
| Optimal temperature range | Keep your root cellar between 32 and 40°F (0 to 4°C). This is cold enough to slow spoilage dramatically but above freezing for most produce. |
| Humidity is not optional | Target 85 to 95% relative humidity. Without it, root vegetables desiccate and shrivel within weeks, especially carrots and beets. |
| North-facing slope is best | A hillside or corner with northern exposure receives the least solar radiation, keeping ground temperatures lower and more stable year-round. |
| Ventilation prevents ethylene damage | Fruits like apples emit ethylene gas that actively accelerates the spoilage of nearby vegetables. Proper two-pipe ventilation removes this gas continuously. |
| Drainage beats insulation | No amount of insulation saves a root cellar built in a flood-prone spot. Standing water destroys structure, promotes mold, and rots every crop inside. |
| Budget entry point is very low | A buried garbage can or barrel setup can be built for roughly $30 to $50 and stores a meaningful amount of produce through a cold winter. |
| Separate fruit from vegetables | Apples and pears release ethylene and absorb odors from cabbage and turnips. Partition storage zones or store fruit in a dedicated section near the exhaust vent. |
Before digging a single shovelful, understand that site selection is the most consequential decision in the entire build. A perfectly constructed root cellar in the wrong location will fail. A modest build in the right location will outperform an expensive one placed poorly.


Choosing the Right Site
The single most important variable in any root cellar build is where you put it. Get the site wrong and no amount of skilled construction will save the project. Get it right and even a simple buried barrel will function reliably for years.
Slope, Aspect, and Shade
A north-facing slope is the ideal starting point. North-facing slopes and northern basement walls receive the least direct sunlight, keeping the space naturally cooler throughout spring and summer. This matters because solar gain through soil causes temperature swings that destabilize storage conditions. If you have a natural hillside on your property with northern exposure, that is where your cellar belongs.
Beyond aspect, consider shade from existing trees or structures. A site shaded from afternoon sun on the western side will run cooler than one in full sun, all else being equal. On flat properties without a hillside, a basement corner on the north or northeast side of the house is the practical equivalent.
Drainage: The Non-Negotiable
A site with well-drained soil prevents water accumulation, which causes flooding, structural damage, and promotes mold and rot on stored crops. Before committing to a site, dig a test hole about 2 feet deep after heavy rain and observe it for 24 hours. If it holds water, move on. Low-lying areas that collect runoff are disqualifying regardless of every other advantage the site offers.
Sandy loam or gravelly soil drains well and also makes hand-digging feasible. Dense clay holds moisture and can heave under frost pressure, damaging walls if you are building with concrete block. If clay is unavoidable, add a gravel drainage trench and perforated pipe around the perimeter before backfilling.
Proximity to the House
Accessibility is a critical factor during freezing winter months. If the cellar is located too far from the home, hauling heavy crates of potatoes through knee-deep snow becomes a chore that gets neglected, and a neglected root cellar fails fast. Aim for a location within easy walking distance of the kitchen, even if that means compromising slightly on ideal slope or soil conditions.
The Four Budget Build Types
Not every homestead needs a full hillside excavation. The right build type depends on your terrain, your climate zone, and how much you need to store. Here are the four approaches that actually work at a budget price point, listed from lowest cost to highest.
1. Buried Garbage Can or Barrel (Roughly $30 to $50)
This is the easiest entry point into root cellaring. Take a metal garbage can or large plastic barrel, drill drainage holes in the bottom, and bury it in the ground with only the lid above the frost line. Pack the interior with root vegetables layered in damp sand or straw. Cover the lid with a thick mound of straw bales or insulating mulch before hard freezes arrive.
It is not glamorous and the capacity is limited, but it genuinely works in USDA hardiness zones where the ground stays cold but does not freeze solid. A single 30-gallon can will hold a meaningful quantity of carrots or beets for a small family through mid-winter. This is ideal for someone testing root cellaring before committing to a larger build.
2. Buried Refrigerator or Freezer (Roughly $50 to $150)
An old chest freezer or upright refrigerator sourced from a garage sale or Craigslist makes an effective small root cellar when buried. The insulated walls provide a degree of temperature buffering, and the sealed interior holds humidity well. Before burying, remove all electrical components, the compressor, and all cooling apparatus. None of those components will be used and the refrigerants can contaminate soil if they leak over time.
Drill holes in the unit and install short sections of PVC pipe to allow ventilation. Access above ground via a PVC pipe cap that you can open and close. This option offers better insulation than a bare barrel and a slightly larger storage capacity for similar cost.
Pro tip: When sourcing a used freezer for burial, choose a chest freezer over an upright. The lid opens against gravity, meaning cold air does not spill out every time you access it, and the lid seal holds better under soil pressure than a hinged door on an upright.
3. Basement Corner Conversion (Roughly $100 to $500)
If you have an unheated basement, you may already have 80 percent of a root cellar. Partition a corner on the north or northeast wall using 2×4 framing and rigid foam insulation. Insulate the two interior walls and the ceiling of the partition but leave the exterior foundation wall and floor uninsulated so the earth’s natural cold can enter. Install a well-fitted insulated door, and add the two-pipe ventilation system described in the ventilation section below.
This is the most practical option for homesteaders in colder climates where the basement stays naturally cold from October through April. It avoids all excavation costs and typically requires only basic carpentry skills. The main failure mode is insulating the wrong walls: insulate the interior walls and ceiling to keep warm house air out, not the foundation walls that let cold earth air in.
4. Earth-Bermed Hillside Cellar (Roughly $300 to $800 in DIY materials)
This is the classic root cellar design: a small structure built into a hillside or bermed with earth on three sides and the roof. It is more labor than the other options but provides the best temperature stability and the most storage space of any DIY build. Walls can be constructed from cinder blocks, concrete, pressure-treated timber, earthbags, or even reclaimed materials like old tires packed with earth.
Earthbag construction in particular suits homesteaders who have time but limited cash. Earthbag construction uses sandbags filled with moist soil that are tamped level and stacked as building blocks, essentially creating walls from free on-site material. The finished walls have impressive thermal mass and resist moisture well. A basic 8 by 10 foot cellar built with earthbags and scavenged lumber for the roof framing can come in well under $500 in material costs.
Pro tip: For the roof on a hillside cellar, use pressure-treated 2×8 or 2×10 joists to handle the earth load, then cover with a heavy-duty waterproof membrane before backfilling. A failing roof is the number one structural cause of root cellar abandonment. Spend the money on the membrane and on lumber grade here even if you scrimp everywhere else.

Root Cellar Build Comparison
Choosing the right build type is a matter of matching your terrain, budget, and storage needs. This table compares the three most practical options for DIY homesteaders on a limited budget.
| Build Type | Approximate DIY Cost | Best For |
|---|---|---|
| Buried barrel or garbage can | $30 to $50 | Beginners, small households, flat terrain with deep frost line. Low commitment, easy to test before scaling up. |
| Basement corner conversion | $100 to $500 | Homesteaders with an existing unheated basement. No excavation needed. Best return on investment for cold-climate builds. |
| Hillside earth-bermed cellar | $300 to $800+ | Properties with a natural north-facing slope. Maximum storage volume, best long-term temperature stability, permanent infrastructure. |
Ventilation: The Most Overlooked Detail
Improper ventilation is one of the most common mistakes people make when designing a root cellar. The instinct is to seal the structure tightly to keep it cold. That instinct is wrong, and it will spoil your harvest.
The Two-Pipe System
The standard solution is a passive two-pipe ventilation system that requires no electricity and no moving parts. Install two 4-inch diameter PVC pipes at opposite ends of the cellar. The intake pipe runs from outside down to about a foot off the floor, bringing in cool outside air at the lowest point. The exhaust pipe exits high on the opposite wall, near the ceiling, where warm and stale air naturally accumulates. This creates a convection loop: cool dense air enters low, warmer air rises and exits high. The system runs itself.
Both pipes should be capped on the outside with screened or louvered covers to keep out insects and rodents. In very cold climates, the intake pipe may need an adjustable damper so you can throttle airflow during extreme cold snaps to prevent the cellar from dropping below freezing.
Why Ethylene Gas Management Matters
Fruits like apples and pears naturally release ethylene gas as they ripen. This gas acts as a ripening hormone, and without ventilation to carry it away, a few apples will actively accelerate the spoilage of your entire potato and carrot supply. Good ventilation removes ethylene continuously. But ventilation alone is not enough if you have large quantities of fruit. Designate a separate storage zone for fruit, placed as close to the exhaust vent as possible so ethylene is removed at its source. Never store apples with potatoes in the same bin. The apples will cause the potatoes to sprout prematurely.
A root cellar built airtight to stay cold will fail faster than one with ventilation. Temperature stability matters less than air quality. Spoilage in a closed cellar is not just product loss, it cascades from one item to everything around it.
Temperature and Humidity Control
The target is a narrow band: 32 to 40°F (0 to 4°C) for temperature, and 85 to 95% relative humidity. Most root vegetables tolerate this range well. High humidity prevents vegetables from drying out, and the cool temperature slows down their natural decay process. These two conditions together do what a refrigerator does, without the electricity draw.
Monitoring Reliably
Place a min-max thermometer and a hygrometer inside the cellar from day one. Warm air rises, so temperatures at the top of the cellar will be several degrees warmer than near the floor. Use this to your advantage by storing garlic and onions, which prefer slightly drier and warmer conditions, on upper shelves, and placing humidity-loving root crops like carrots and beets in lower bins packed with damp sand.
Check the cellar at least twice a week during the first season. You are looking for temperature swings, condensation pooling on the floor, or early signs of rot on any stored produce. One rotting potato found early can be removed before it triggers a chain reaction. One rotting potato found late means losing an entire bin.
Raising Humidity Without Technology
If your cellar runs too dry, the simplest fix is storing root crops in bins or crates packed with slightly damp sand, sawdust, or peat moss. The moisture in the packing material humidifies the air around the produce. A bucket of wet gravel on the floor will also raise ambient humidity. If the cellar runs too wet and you are seeing condensation pooling, improve drainage outside the structure and add a layer of gravel to the floor rather than trying to seal out moisture from above.
What to Store and How Long It Lasts
Root cellars are not one-size-fits-all storage. Different crops have different requirements, and storing incompatible produce together shortens the shelf life of everything. Understand what each crop needs before loading the shelves.
Best Performers in Cold, Humid Conditions
Carrots, beets, parsnips, turnips, and celeriac thrive at 32 to 40°F with 90 to 95% humidity. Store them in bins of damp sand or peat moss with tops removed. Beets stored at 32°F will keep for four to six months. Carrots stored the same way last a similar duration and often taste sweeter after a few months underground, as starches convert to sugars in the cold. Potatoes prefer slightly warmer conditions, around 38 to 40°F, and slightly lower humidity, around 80 to 85%. They also need complete darkness, as light exposure causes greening and solanine production.
Alliums: Store Them High and Dry
Garlic and onions are the exception to the high-humidity rule. They need cool but dry conditions, ideally 32 to 40°F at 65 to 70% relative humidity, and good air circulation. Hang braided onion ropes from ceiling hooks or spread them in slatted crates on the highest, driest shelf. Storing onions near carrots or beets in high-humidity conditions causes neck rot within weeks.
Fruits Need Their Own Zone
Apples keep for two to six months depending on cultivar. Late-season keeping varieties like Granny Smith, Stayman Winesap, and Rome Beauty hold significantly longer than early-season types. Store at 32°F with 85 to 95% humidity, but in a dedicated section as far from vegetables as practical. Pears and quinces store similarly. Never store fruits with potatoes, turnips, or cabbage. The ethylene issue is real, and so is odor transfer. Cabbage and turnips can impart off-flavors to apples stored in proximity.
Common Mistakes That Kill Root Cellars
Most root cellar failures are predictable and preventable. These are the errors that consistently destroy first-time builds and first-season harvests.
Skipping the Drainage Test
Building without first confirming the site drains freely is the single most expensive mistake. It is not discovered until the first heavy rain or spring thaw floods the cellar. By then, the structure is already compromised and the stored harvest is lost. Dig a test hole, observe it after rain, and choose differently if water collects.
Sealing It Airtight
A sealed root cellar accumulates ethylene gas and moisture at concentrations that rapidly accelerate decay across all stored crops. This feels counterintuitive because warm air in winter can seem like the enemy, but the solution to cold loss is better insulation on the interior walls, not sealing the ventilation. Always install the two-pipe system before storing anything.
Storing Damaged Produce
A root cellar is not a rehabilitation center for bruised or wounded vegetables. Only store produce in perfect condition. Any damage, cut, or bruise becomes the entry point for fungal and bacterial rot that spreads to neighboring items. Sort rigorously before storage, and inspect weekly. The rule is simple: one bad apple in a bin of good ones means removing the bad one the moment you spot it.
Ignoring Shelf Zoning
Putting everything on the same shelf at the same height ignores the fact that temperature and humidity vary across different parts of the cellar. Garlic on the lower shelf in high humidity will rot. Carrots on the upper shelf near the door will dry out. Map your cellar’s climate zones in the first week with a thermometer and hygrometer, then assign crops accordingly.
Pro tip: Label every storage bin with the variety, harvest date, and estimated storage duration. Root cellars fill up fast in October, and by February you will not remember which bin has the oldest potatoes or which apple cultivar is the short-keeper that needs to be eaten first. A simple paper tag or marker on masking tape takes ten seconds and prevents significant waste.
Frequently Asked Questions
How deep does a root cellar need to be?
A depth of at least 10 feet is commonly recommended to ensure the structure reaches stable ground temperatures and stays below the frost line in most cold climates. In milder zones, 6 to 8 feet may be sufficient. The further north you are, the deeper you generally need to go to maintain temperatures in the 32 to 40°F target range through summer. In a basement corner conversion, depth is less relevant since you are using the foundation walls themselves as your thermal mass.
Can I build a root cellar without a hillside?
Yes. A basement corner conversion is the most practical option for flat properties. Partition the north or northeast corner of an unheated basement with 2×4 framing and rigid foam insulation on the interior walls, install a well-fitted insulated door, and add the two-pipe ventilation system. Alternatively, an above-ground insulated structure on the north side of the house, built from straw bale or heavily insulated framing with internal thermal mass, can work in cold climates where ambient winter temperatures naturally chill the space.
What is the cheapest way to build a root cellar?
The cheapest functional option is a buried metal garbage can or large plastic barrel, which can be built for $30 to $50 using a new or secondhand container, drainage holes, damp packing material like sand or straw, and a thick mulch cover for insulation. Capacity is limited to one or two bushels, but it is a genuine working root cellar at minimal cost. The next step up is sourcing a used chest freezer from a garage sale, stripping the electrical components, and burying it with PVC ventilation pipes installed, typically $50 to $150 total.
What should not be stored in a root cellar?
Avoid storing squash and pumpkins in cold, humid root cellar conditions. They prefer warm and dry storage, around 50 to 55°F at 50 to 70% relative humidity, which is almost the opposite of what a root cellar provides. Similarly, onions and garlic need low humidity and should be segregated from high-moisture crops. Never store any produce with visible mold, cuts, or bruising. Canned goods in sealed jars are fine in a root cellar but take up shelf space better used for fresh produce that cannot be preserved any other way.
How do I maintain the right humidity in my root cellar?
The most reliable method is packing root crops in bins of slightly damp sand, sawdust, or peat moss rather than storing them bare. The moisture in the packing material maintains localized humidity around the produce. A bucket of wet gravel on the floor raises ambient humidity passively. If the cellar is too wet, improve exterior drainage around the structure and consider adding a gravel floor layer. Monitoring with an inexpensive hygrometer placed near the produce is essential so you know whether to add or remove moisture sources rather than guessing.
Can I store canned goods in a root cellar?
Yes, sealed mason jars of home-canned goods store well in root cellar conditions. The cool, dark environment extends shelf quality and slows any gradual degradation of color and flavor. However, do not allow jars to freeze, as ice expansion can break the seal or the glass. Keep canned goods on shelves above the floor and away from exterior walls in very cold climates. Prioritize root cellar shelf space for fresh produce that has no other good storage option, and use a dedicated pantry area for jarred goods if space allows.
Have you built a root cellar on your homestead, or are you planning one? Share your site conditions, build type, and any lessons from your first season in the comments below.
References
- Complete guide to root cellar design, ventilation, and crop storage conditions
- Root cellar site selection, ground temperature data, and structural build guidance
- Root cellar ventilation systems and ethylene gas management explained
- University of Alaska Fairbanks extension guide to vegetable storage temperatures and root cellar conditions
- Step-by-step earthbag root cellar build for off-grid homesteaders on a tight budget
Leave a Reply