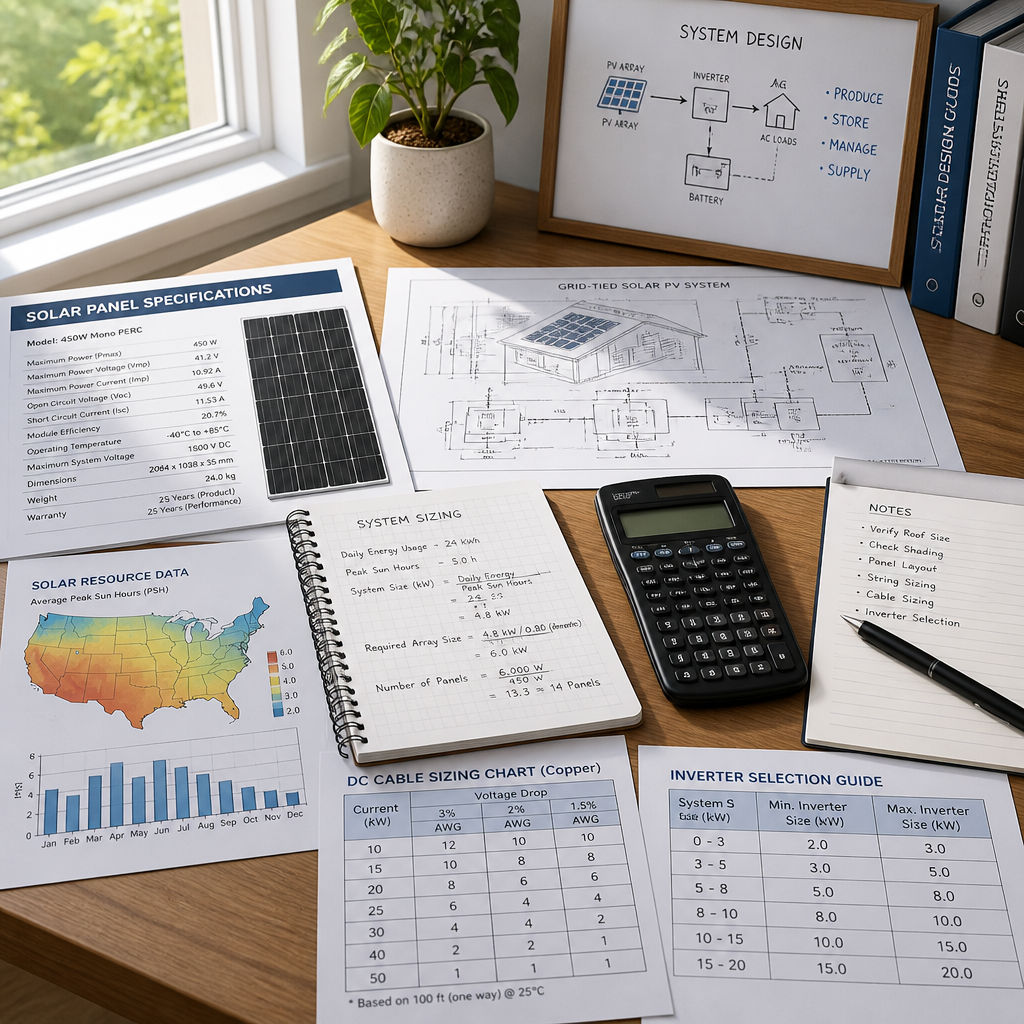
Most homesteaders who fail with solar power make the same mistake: they buy panels first and do the math second. The result is an off-grid solar system that runs dead by February, or one so oversized it cost twice what it needed to. Sizing your system correctly before you spend a single dollar is the single most important thing you can do, and it is not complicated once you understand the four numbers that drive every decision. This guide walks you through every step, from calculating your real daily load to choosing the right battery chemistry, so your homestead actually stays powered through Canadian winters and cloudy stretches alike.
Table of Contents
- Quick Takeaways
- Why Sizing Matters More Than Panel Brand
- Step 1: Calculate Your Daily Load in Watt-Hours
- Step 2: Find Your Peak Sun Hours
- Step 3: Size Your Solar Array
- Step 4: Size Your Battery Bank
- Step 5: Choose Your Charge Controller and Inverter
- Monocrystalline vs. Polycrystalline Panels: The Short Answer
- System Size Comparison: Cabin vs. Homestead
- Canadian Incentives and Rebates
- Common Beginner Mistakes That Kill Off-Grid Systems
- Frequently Asked Questions
- References
Quick Takeaways
| Key Insight | Explanation |
|---|---|
| Always size for your worst winter month | A system that handles summer sun but fails in January is not functional. Use your lowest monthly peak sun hours for all calculations. |
| LiFePO4 batteries outperform lead-acid for permanent installations | They deliver 80-90% usable depth of discharge versus 50% for AGM, and last 10 or more years versus 3-5 for lead-acid. |
| Multiply your raw daily load by 1.25 | Real-world losses from wiring, temperature, inverter efficiency, and panel degradation eat roughly 20-25% of nameplate output. |
| MPPT charge controllers are non-negotiable above 200W | PWM controllers waste 20-30% of panel output. For any serious homestead system, the MPPT efficiency gain pays back the price difference quickly. |
| Plan for 3-5 days of battery autonomy | Three days is a practical minimum for most off-grid homesteads. Five days is recommended for year-round Canadian properties with harsh winters. |
| Size your inverter for peak simultaneous load, not average | A well pump, freezer compressor, and water kettle running at the same time can spike demand far above your daily average figure. |
| The Canada Greener Homes programs are closed | The federal grant closed February 2024 and the loan closed October 2025. Provincial programs are now the primary financial tools available. |
Why Sizing Matters More Than Panel Brand
The solar industry does a fantastic job of marketing panels. Walk into any online forum and you will find passionate debates about brand efficiency ratings, cell technology, and warranty terms. What rarely gets the same attention is the one skill that determines whether your system actually works: knowing how to size every component before you buy anything.
An undersized battery bank will leave you rationing power on cloudy days. An undersized solar array will never fully charge that battery bank, which shortens its lifespan dramatically regardless of battery chemistry. An oversized inverter introduces parasitic standby losses that bleed your batteries overnight. Every component in an off-grid solar system interacts with every other component, and the sizing sequence matters. Get the sequence right, and the brand decisions become straightforward.
The sequence is: daily load first, then peak sun hours for your location, then array size, then battery bank, then charge controller, then inverter. Never in reverse order.


Step 1: Calculate Your Daily Load in Watt-Hours
This is the step most beginners rush or skip entirely. Do not guess. Pull out a notepad and list every electrical device you intend to run, then multiply its wattage by the number of hours per day you actually use it.
How to Build Your Load List
Write down each appliance, its wattage (check the label on the back or look it up online), and its daily runtime in hours. Multiply wattage by hours to get watt-hours for that device. Sum everything up.
A practical example for a modest Canadian homestead cabin: eight LED bulbs at 10W each running for five hours a day (400Wh), a chest freezer running an average of eight hours a day at 60W (480Wh), a laptop at 45W for three hours (135Wh), a water pump at 500W for fifteen minutes total (125Wh), and phone charging at 20W for two hours (40Wh). That adds up to 1,180Wh per day before any efficiency losses.
Apply the Efficiency Loss Factor
Your raw daily total is not what your solar array needs to produce. Real-world losses from wiring resistance, inverter inefficiency, battery charge and discharge losses, and panel temperature effects typically consume 20-25% of nameplate output. Multiply your raw daily load by 1.25 to get your target design load.
Using the cabin example above: 1,180Wh multiplied by 1.25 gives a design load of 1,475Wh per day. That is the number you carry into Step 2 and Step 3.
Pro tip: Refrigerators and chest freezers do not run continuously. Their compressors cycle on and off, so assume 8-12 hours of actual run time per day rather than 24 when calculating their contribution to your daily load. Overestimating freezer load is one of the most common oversizing errors in homestead solar planning.
Step 2: Find Your Peak Sun Hours
Peak sun hours (PSH) is not simply the number of daylight hours in your area. It is the number of hours per day when solar irradiance is at or above 1,000 watts per square meter, the standard test condition for panel ratings. In practice, it is the figure that converts your panel’s nameplate wattage into real daily output.
What Canadian Homesteaders Need to Know About PSH
Canada has enormous geographic variation in solar resource. Southern Ontario and southern British Columbia can see 3.5-4.5 PSH in winter months. Prairie regions like southern Alberta and Saskatchewan often see higher winter irradiance because of less cloud cover, despite the cold temperatures. Northern properties above the 55th parallel face dramatically lower winter PSH and may need a generator backup to get through December and January.
Always use your worst-month PSH figure, not the annual average. A system sized on an annual average of 4.5 PSH will be meaningfully undersized for a January with 2.5 PSH. Use NASA’s POWER database or Natural Resources Canada’s solar radiation maps to find the worst-month figure for your specific coordinates.
The single most common design failure in off-grid solar is sizing for average sun, not worst-case sun. A system that works beautifully in summer and fails every winter is not an off-grid system. It is a seasonal system that has not declared itself yet.
Step 3: Size Your Solar Array
With your adjusted daily load (Step 1) and your worst-month PSH (Step 2), the array size calculation is straightforward division with a correction factor for system efficiency.
The Array Sizing Formula
The standard formula is: Required array watts = Design load (Wh) divided by (PSH multiplied by 0.75). The 0.75 factor accounts for combined system losses including MPPT controller efficiency, battery round-trip efficiency, wiring, and temperature derating.
Using the cabin example with a design load of 1,475Wh and a worst-month PSH of 3.5 hours: 1,475 divided by (3.5 multiplied by 0.75) equals 562 watts of panels. Round up to 600W, which might be two 300W monocrystalline panels or three 200W panels depending on what your mounting situation allows.
It is always better to round up generously here. An extra 100-200W of panels costs relatively little compared to the battery bank and inverter, and it significantly reduces how hard your system has to work on marginal days.
Pro tip: Always size for at least 1.5 times your calculated minimum array capacity if your budget allows. Panels are now the cheapest component per unit of energy in most off-grid systems. Spending an extra few hundred dollars on panels saves far more in avoided battery depth-of-discharge damage over the system’s lifetime.

Step 4: Size Your Battery Bank
Your battery bank is the most expensive and most consequential component decision you will make. Get this wrong and you will either be replacing batteries every few years or rationing power through every extended cloudy stretch.
Days of Autonomy: The Governing Variable
Days of autonomy is how many consecutive days your battery bank can power your homestead with zero solar input. For year-round Canadian homesteads, plan for a minimum of three days autonomy and ideally five. Properties in regions with long overcast winters should target five to seven days of storage for critical loads.
The battery bank sizing formula is: Required battery capacity (Wh) = Design daily load multiplied by days of autonomy, divided by usable depth of discharge. For LiFePO4 batteries, use 0.85 as the usable depth of discharge. For AGM lead-acid, use 0.50.
Example: 1,475Wh per day, 4 days of autonomy, LiFePO4 batteries. Required capacity equals 1,475 multiplied by 4 divided by 0.85, which gives approximately 6,941Wh, or roughly 7kWh of battery storage. For a 48V system, that converts to about 145Ah at 48V. Two 48V 100Ah LiFePO4 batteries would cover this with a small margin.
LiFePO4 vs. Lead-Acid: Which to Choose
For permanent off-grid homesteads, lithium iron phosphate (LiFePO4) is the clear choice. They last 10 or more years, deliver 80-90% usable capacity, require no maintenance, and do not off-gas hydrogen. Lead-acid batteries, including AGM and flooded variants, are cheaper upfront but only deliver 50% usable capacity, last 3-5 years with good care, and require ventilation if flooded.
Lead-acid still makes sense for seasonal cabins used only in summer, very tight initial budgets, or as a temporary starter bank you plan to upgrade within a few years. For anyone building a permanent year-round homestead system, the math on LiFePO4’s lifetime value is straightforward. You will likely replace a lead-acid bank twice in the time a lithium bank is still performing well.
Step 5: Choose Your Charge Controller and Inverter
These two components are often treated as afterthoughts. They are not. A poor charge controller will undercharge your batteries chronically. A cheap inverter will fail under peak load at the worst possible moment, usually in a Canadian January.
Charge Controller Sizing
For any system above 200W, use an MPPT (Maximum Power Point Tracking) charge controller. MPPT controllers reach approximately 94-99% efficiency compared to around 79% for PWM controllers. The output current rating you need is calculated as: total panel watts divided by battery bank voltage, then multiplied by 1.25 for the safety factor.
For a 600W array on a 48V battery bank: 600 divided by 48 equals 12.5A, multiplied by 1.25 equals 15.6A. A 20A MPPT controller is the correct size here. Reputable brands include Victron SmartSolar (excellent Bluetooth monitoring), Epever Tracer (strong value), and Outback FlexMax for larger premium installations.
Inverter Sizing
Size your inverter to your peak simultaneous load, not your average daily consumption. Add up the wattages of every appliance that might run at the same time. A well pump, refrigerator compressor, and electric kettle running together could easily spike to 2,000-2,500W even on a modest homestead. Your inverter must handle that peak without shutting down.
Use pure sine wave inverters only for homestead applications. Modified sine wave units are cheaper but can damage motors, cause appliances to run hotter, and create noise in electronics. Victron MultiPlus and Quattro series units combine an inverter and battery charger in one unit, which simplifies generator integration significantly and is worth the extra cost for permanent installations.
Monocrystalline vs. Polycrystalline Panels: The Short Answer
This debate gets far more airtime than it deserves in 2025. The price gap between monocrystalline and polycrystalline panels has shrunk to the point where monocrystalline is almost always the better purchase. Monocrystalline panels typically achieve 20-24% efficiency, handle high temperatures better (a lower temperature coefficient means less output loss on hot days), and produce more watts per square foot of roof or ground space.
For Canadian homesteaders specifically, the temperature coefficient advantage matters in the other direction too: monocrystalline panels perform better in cold, clear winter conditions. Polycrystalline panels are slightly less efficient but were traditionally cheaper per watt. That price advantage has largely evaporated. Unless you find a surplus deal on polycrystalline that genuinely changes the economics, buy monocrystalline and move on.
A 400W monocrystalline panel produces roughly 1,200-1,700Wh per day in a location with 4-5 peak sun hours, accounting for real-world derating. That range is what you should use for planning, not the nameplate wattage under ideal test conditions.
System Size Comparison: Cabin vs. Homestead
The table below compares three common off-grid solar configurations to help you understand where your situation likely falls. Costs shown are approximate parts-only figures for DIY installations and will vary with battery chemistry choice, brand selection, and current component pricing.
| System Type | Typical Specs | Approximate DIY Cost (Parts Only) |
|---|---|---|
| Small Cabin or Seasonal Retreat | 600W-1.1kW panels, 5-10kWh battery bank, 20A MPPT, 1,000W inverter. Powers LED lighting, laptop, 12V fridge, small water pump. | Roughly CAD $2,500-$5,000 for LiFePO4 battery setup |
| Medium Off-Grid Homestead | 2-4kW panels, 15-25kWh battery bank, 40-60A MPPT, 3,000W pure sine inverter. Adds washing machine, chest freezer, well pump. | Roughly CAD $10,000-$20,000 for LiFePO4 system |
| Full Homestead with Workshop Loads | 6-12kW panels, 30-50kWh battery bank, 80A+ MPPT or multiple controllers, 5,000W+ inverter-charger. Supports shop tools, EV charging, HVAC mini-split. | Roughly CAD $30,000-$60,000 installed, depending on location and complexity |
These ranges reflect that battery storage, especially LiFePO4, drives the majority of system cost. The panels themselves are now relatively affordable per watt. If your budget is tight, prioritize a properly sized battery bank and a quality MPPT controller over a larger panel array. You can always add panels later.
Canadian Incentives and Rebates
This is an area where outdated advice actively hurts homesteaders. Many guides written before 2024 still mention the Canada Greener Homes Grant as an available program. It is not. The federal grant closed to new applicants in February 2024, and the Canada Greener Homes Loan closed on October 1, 2025. Do not budget for federal rebates you will not receive.
Provincial programs remain active and vary significantly by province. British Columbia residents may access BC Hydro rebates for eligible solar and battery storage installations. Some Alberta municipalities offer renewable energy rebates through local utilities. Net metering programs exist in most provinces, though they are only relevant to grid-tied hybrid systems rather than fully off-grid setups. Check your provincial utility and your municipal government’s current programs before finalizing your budget, and verify directly rather than relying on third-party comparison sites, which are frequently out of date on exact figures and eligibility rules.
For remote off-grid properties where grid connection costs would be prohibitive, the economics of solar often stand on their own without any incentive program. A quote for grid extension on a rural property can easily exceed the cost of a complete off-grid solar system, which makes the financial case straightforward.
Common Beginner Mistakes That Kill Off-Grid Systems
After working through the math above, there are a handful of specific errors that still catch beginners regardless of how well they understand the theory.
Underestimating Load Creep
Your load list will grow. A second fridge, a dehydrator for the harvest, power tools in the workshop, a guest for a week. Build at least 20-30% headroom into your system beyond your current calculated load. The homesteaders who regret their solar build almost always say they wish they had gone slightly bigger on the battery bank from the start.
Ignoring Generator Integration
Even a well-designed off-grid solar system needs a backup generator for extended cloudy periods. In Canadian winters, a solid week of overcast weather is entirely realistic in many regions. A propane or diesel generator that can charge your battery bank via an inverter-charger prevents damaging your batteries through chronic deep discharge. This is not a failure of your solar system. It is correct design for a northern climate.
Confusing Watts with Watt-Hours
A 400W solar panel does not produce 400Wh of energy per hour in your actual environment. It produces 400W under the specific lab conditions used for rating. In the real world, with your location’s PSH and system efficiency losses, a 400W panel might deliver 1,200-1,600Wh over a full day. This distinction is fundamental. Confuse the two and every subsequent calculation will be wrong.
Buying a PWM Controller to Save Money
For any system above 200W, a PWM charge controller is a false economy. The 20-30% efficiency gap compared to MPPT means you either accept a proportionally smaller effective array or buy more panels to compensate. The MPPT controller pays for its price premium quickly through better daily charging performance, especially in low-light and cold-morning conditions common across Canada.
Frequently Asked Questions
How many solar panels do I need for a small off-grid homestead?
There is no universal number because it depends entirely on your daily energy consumption and your location’s worst-month peak sun hours. As a rough guide, a modest homestead using 2,000-3,000Wh per day in a location with 3.5 winter peak sun hours will need roughly 1,000-1,500W of panels (approximately 3-4 panels of 400W each) to stay reliably powered. Always do the full load calculation first rather than starting with a panel count.
What is the difference between a grid-tied and an off-grid solar system?
A grid-tied system is connected to the utility grid and can export surplus power or draw from the grid when panels underperform. An off-grid solar system is entirely independent of the utility grid and relies on its battery bank for power when panels are not producing enough. Off-grid systems require more careful sizing because there is no grid to bail you out during shortfalls, which is why battery bank sizing and winter sun hours are so important.
Is LiFePO4 worth the extra upfront cost for a Canadian homestead?
For a year-round permanent installation, yes. LiFePO4 batteries deliver 80-90% usable depth of discharge versus 50% for lead-acid, last 10 or more years with good care, perform better in cold temperatures than other lithium chemistries, and require zero maintenance. The higher upfront cost is typically offset within 5-7 years when you factor in that you would likely replace a lead-acid bank at least once in that same period.
How do I account for Canadian winters when sizing my off-grid solar system?
Use the lowest monthly peak sun hours figure for your property’s coordinates, not the annual average. Find this data from Natural Resources Canada’s solar radiation maps or NASA’s POWER database. For properties north of the 55th parallel, winter solar availability may be low enough that a generator is a practical necessity rather than just a nice backup. Size your battery bank for 5-7 days of autonomy in these regions, and make sure your inverter-charger is compatible with your backup generator’s output.
What size inverter do I need for an off-grid homestead?
Size your inverter to handle your peak simultaneous load, not your average daily consumption. Identify every appliance that might run at the same time and add up their maximum wattages. A well pump starting surge, a refrigerator compressor cycling on, and kitchen appliances running together can easily reach 2,000-3,000W on a modest homestead. Buy a pure sine wave inverter with enough headroom above that peak figure, and add a further 20-25% buffer to avoid running it at maximum capacity continuously.
Can I expand my off-grid solar system later?
Yes, with planning. The most expandable approach is to install a charge controller and inverter sized slightly above your immediate needs, then add panels and batteries as budget allows. Charge controllers have a maximum panel input, and batteries in a bank ideally need to be the same age and chemistry, so mixing old and new batteries carries some risk. The cleanest upgrade path is adding a second independent battery bank and charge controller rather than mixing new batteries into an existing aged bank.
Do I need a permit for an off-grid solar installation in Canada?
Permit requirements vary by province, municipality, and system size. Fixed electrical installations above certain voltage thresholds (commonly 50V) typically fall under provincial electrical code and require permits and licensed electrician sign-off in most Canadian jurisdictions. Remote properties on Crown land or rural lots may have different requirements. Contact your local municipality and provincial electrical authority before starting any installation. Skipping permits can create insurance and property sale complications later.
If you have already sized or built your first off-grid solar system, share what you wish you had known before you started. Every homestead is different, and the specifics of your setup, your climate zone, and your load profile may help the next reader heading down this path.
We would love your feedback and any insights you would share with others. What perspective would you add?
References
- Step-by-step off-grid solar sizing guide with worked examples for cabins and homesteads
- Complete off-grid solar sizing math including component costs and honest DIY guidance
- Five-step off-grid solar sizing guide with van, cabin, and homestead worked examples
- Canadian solar incentives, rebates, and grants by province updated for 2026
- Off-grid solar for homesteads including battery autonomy, backup generator sizing, and winter planning
Leave a Reply