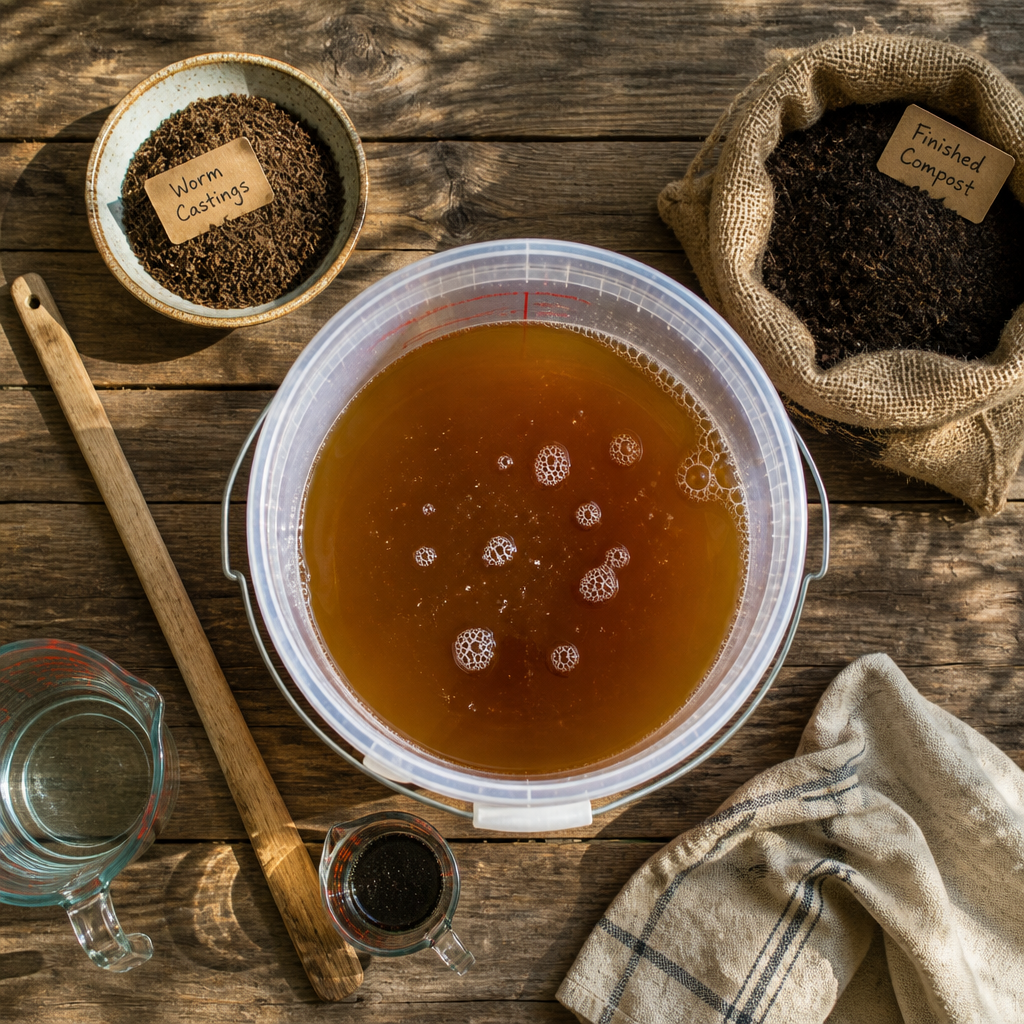
Most off-grid gardeners spend hours building a compost pile or running a worm tower, then ignore the single most powerful thing those systems can produce beyond solid compost: a living liquid fertilizer they can brew in a five-gallon bucket. A good compost tea recipe takes the beneficial microbes, enzymes, and soluble nutrients locked inside your worm castings or finished compost and suspends them in water, ready to pour directly onto roots or spray onto leaves. The result is faster than top-dressing with solids, cheaper than any store-bought liquid feed, and entirely within reach for anyone already running an off-grid homestead.
Table of Contents
- What Compost Tea Actually Is (and What It Is Not)
- Worm Casting Tea vs. Compost Pile Tea
- The Core Compost Tea Recipe, Step by Step
- Aerated vs. Passive Brewing: Which One to Use
- How to Apply Compost Tea to Your Garden
- Common Mistakes That Ruin a Batch
- Off-Grid Adaptations: No Power, No Problem
- Frequently Asked Questions
- References
What Compost Tea Actually Is (and What It Is Not)
Compost tea is a water extract made by steeping finished compost or worm castings, then applying the resulting liquid to soil or plant foliage. The steeping process pulls soluble nutrients and, when aeration is added, actively multiplies the beneficial bacteria and fungi present in the source material. The tea delivers these organisms directly to the root zone or leaf surface, where they help plants absorb nutrients and resist disease.
What compost tea is not is leachate. This distinction matters enormously on a homestead where you may be collecting drip from the bottom of a worm bin and wondering whether to use it. Worm leachate is the liquid that seeps out of a worm bin without passing through the digestive tract of the worms. It can contain unfinished organic matter and potentially harmful pathogens, and it lacks the concentrated microbial population that makes properly brewed worm casting tea so effective. Do not use raw leachate on edible crops. Brew your tea properly instead.
Genuine worm tea is intentionally brewed with oxygen to grow beneficial microbes. Leachate is simply liquid that drains out of the bin, and those two things are not interchangeable.
The confusion between leachate and tea is one of the most common sources of poor results homesteaders report. If a batch of liquid fertilizer smells foul or your bin has been running wet on half-composted food scraps, what you have is leachate, not tea. Real worm casting tea smells earthy, slightly sweet, and alive.
Worm Casting Tea vs. Compost Pile Tea
Both worm towers and traditional compost piles can feed a compost tea recipe, but they produce different brews with different strengths. Understanding the difference helps you match the right tea to the right crop stage.
Worm Casting Tea
Worm casting tea, also called vermicompost tea, is made from the castings produced by red wiggler worms processing organic matter. Worm castings are packed with beneficial microbes that have passed through the worm’s digestive system, concentrating nutrients and microbial activity in a way that raw compost cannot match. The resulting tea is gentler, highly bioavailable, and safe to use on seedlings at appropriate dilutions. For off-grid homesteaders running a worm tower, this is the most consistent and predictable liquid fertilizer you can make.
Compost Pile Tea
Tea brewed from finished heap compost is coarser and more variable, but it covers more ground per batch. A five-gallon brew made from mature compost delivers a broad spectrum of fungi, bacteria, and nutrients that suit established garden beds, fruit trees, and perennials very well. The key word here is finished. Using immature, hot-pile compost introduces pathogens and can actually harm plants. Your compost is ready for tea when it smells like forest floor, not like ammonia or rotting food.
| Feature | Worm Casting Tea | Compost Pile Tea |
|---|---|---|
| Source material | Vermicompost from worm tower or bin | Finished heap or hot compost |
| Microbial density | Very high, concentrated by worm gut | High, varies by compost maturity |
| Safe for seedlings? | Yes, dilute 1:10 | Use with caution; dilute 1:10 minimum |
| Best use case | Transplants, seedlings, houseplants, foliar spray | Established beds, fruit trees, lawn |
| Brew time (aerated) | 24 hours | 24 to 36 hours |
| Off-grid difficulty | Easy, small volume, low energy | Moderate, requires more aeration pump power |
The Core Compost Tea Recipe, Step by Step
This is the aerated version, which is the method worth learning first. It produces far more beneficial microorganisms than passive steeping because the added oxygen prevents the brew from turning anaerobic. An anaerobic brew smells bad and can harbor pathogens rather than the beneficial organisms you want.
What You Need
- A five-gallon bucket
- An aquarium air pump with air stone or bubble diffuser (a “rolling boil” of bubbles with no heat is the target)
- A mesh bag, burlap sack, cheesecloth bag, or a clean old stocking
- One to two cups of worm castings or finished compost (roughly a tenth of the bucket volume)
- Five gallons of dechlorinated water: collected rainwater, well water, or tap water left to sit uncovered for at least 24 hours so the chlorine off-gasses
- One tablespoon of unsulfured molasses (to feed the microbial population)
The Process
Fill your mesh bag with the worm castings or compost and secure it closed. Place it in the bucket. Add the five gallons of dechlorinated water and stir in the molasses until dissolved. Submerge the air stone and turn on the pump. You want vigorous bubbling throughout the entire brew, not gentle fizzing.
Let it brew for 24 hours. By the end, the water should be light brown and smell earthy, not rotten. Remove the mesh bag and set the spent castings aside to add back to your garden beds or compost pile. Turn off the pump and use the tea immediately.
Pro tip: If you are on solar power and running a small aquarium pump off a 12V system, a standard 3-to-5 watt pump draws almost nothing. Even a modest battery bank handles a 24-hour brew without stress. This makes actively aerated compost tea one of the most practical liquid fertilizer DIY options for off-grid homesteads with any kind of solar setup.

Once you remove the bag, apply the tea within four hours. The microbial population is at its peak right after brewing, and as the oxygen depletes, the balance can shift toward anaerobic bacteria. Do not brew a batch the night before and plan to use it the next evening.
Aerated vs. Passive Brewing: Which One to Use
Passive brewing, sometimes called a cold steep, is the simplest possible version: put compost or castings in a bucket of water, wait overnight, strain, and apply. This method works and requires zero equipment. The resulting liquid contains soluble nutrients extracted from the compost, and for a basic off-grid fertilizer top-up it gets the job done.
Actively aerated compost tea (often called AACT) goes further because the oxygen actively feeds and multiplies aerobic bacteria and beneficial fungi during the brewing window. The microbial population in an aerated brew can be dramatically higher than in a passive steep. Aerating the brew also reduces the risk of harmful pathogens that thrive in anaerobic conditions.
The practical choice for most homesteaders: use passive steeping when you have no pump available or want a quick fix, and use aerated brewing as your standard method whenever possible. The difference in plant response over a growing season is noticeable, particularly in soil that has been depleted or never properly inoculated with soil life.
Pro tip: Add one tablespoon of unsulfured molasses to an aerated brew to give microbes a fast-acting food source. This is not optional in an actively aerated recipe. Without a carbon food source, the microbes have little to multiply on. Skip the molasses only in passive non-aerated steeps, where you are not trying to amplify microbial populations, just extract soluble nutrients.

How to Apply Compost Tea to Your Garden
There are two main delivery methods: soil drench and foliar spray. Each serves a different purpose and the choice depends on what your plants need at that moment.
Soil Drench
Pouring compost tea directly onto the soil around plant roots is the highest-value application for most homesteads. Used as a full-strength soil drench, it pushes beneficial organisms directly into the root zone where they form symbiotic relationships with plant roots and help unlock nutrients already present in the soil. Use full-strength tea on established beds and dilute to roughly 1:5 (one part tea to five parts water) for growing plants. For seedlings, dilute to 1:10 to avoid overwhelming delicate root systems.
Foliar Spray
Spraying diluted compost tea onto leaves allows plants to absorb nutrients directly through their foliage. Apply in the early morning or evening, never during peak sun hours. Wet leaves in direct sunlight can scorch, and heat kills the beneficial microbes you worked 24 hours to cultivate. For foliar applications, strain the tea thoroughly through fine cheesecloth before loading a pump sprayer, or the particles will clog the nozzle.
A practical frequency that works for most homestead gardens: apply as a soil drench every two weeks during the growing season, and bump that to once a week for heavy-feeding crops like tomatoes, cucumbers, and corn. Apply any leftover tea to an active compost pile to accelerate decomposition rather than wasting it.
Common Mistakes That Ruin a Batch
In practice, most failed batches come down to one of three problems: wrong water, wrong timing, or wrong source material.
Using Chlorinated Tap Water Without Treating It
Chlorine in municipal tap water kills the beneficial bacteria you are trying to cultivate. Always use rainwater, well water, or tap water that has sat uncovered in a bucket for a full 24 hours to allow chlorine to off-gas. On an off-grid property with a rainwater collection system, this is a non-issue. If you are sourcing from a municipal tap, plan ahead.
Skipping Aeration or Running a Weak Pump
A weak pump that produces a few gentle bubbles is not enough. The aeration needs to be vigorous enough to create the appearance of a rolling boil throughout the entire bucket. An undersized pump produces an anaerobic pocket at the bottom of the bucket, exactly the environment you do not want. When buying a pump, choose one rated for a tank size larger than your bucket.
Using Immature or Smelly Compost
This is the mistake that produces genuinely harmful results. Hot compost that has not finished curing still contains pathogens and can introduce them directly to your edible crops via a tea application. Your source material must be fully finished, dark, crumbly, and earthy-smelling. If it smells like ammonia, it is not ready.
Waiting Too Long to Apply
Aerated compost tea has a shelf life measured in hours, not days. Once the pump stops and oxygen stops being supplied, the aerobic microbial population begins to crash. Apply the tea within four hours of finishing the brew. If you cannot use it all immediately, use the remainder to water a dry compost pile rather than letting it sit.
Off-Grid Adaptations: No Power, No Problem
For homesteaders without consistent electricity, passive brewing is a completely valid approach. A simple overnight steep in a bucket with two cups of worm castings or finished compost and five gallons of rainwater produces a useful liquid fertilizer without any pump. Stir the bucket vigorously two or three times during the steep to introduce some oxygen and help extract nutrients from the bag.
If you have a worm tower installed directly in a garden bed, the design already produces a slow passive extraction as water passes through the tower and into the surrounding soil. You can supercharge this by pouring a bucket of rainwater directly into the tower and collecting what drains out below, though be aware this is closer to a dilute leachate than a properly brewed tea. For best results, harvest your castings from the tower periodically and brew them properly in a bucket rather than relying on in-ground drainage as your primary liquid fertilizer strategy.
A gravity-fed rainwater catchment system pairs perfectly with a five-gallon compost tea setup. The collected water is already dechlorinated by nature, you have consistent supply regardless of grid access, and the whole operation costs nothing beyond the initial bucket and pump. For homesteaders who have already built out water independence, adding compost tea brewing is a genuinely low-effort upgrade to an existing system.
Frequently Asked Questions
Can I use worm leachate instead of brewed worm casting tea?
Worm leachate, the liquid that drips from the bottom of your worm bin, is not the same as brewed worm casting tea. Leachate has not been aerated, may contain unfinished organic material, and can harbour pathogens depending on the contents of the bin. It should not be used on edible crops. Properly brewed worm casting tea is always the safer and more effective choice for garden fertilization.
How much molasses should I add to a compost tea recipe?
One tablespoon of unsulfured molasses per five gallons of water is the standard ratio for an aerated brew. The molasses provides a simple carbon food source that feeds the aerobic bacteria and encourages rapid microbial multiplication during the 24-hour brewing window. Do not use sulfured molasses, as sulfur compounds can inhibit microbial growth.
How long does compost tea last after brewing?
Aerated compost tea is most potent within four hours of completing the brew, before the aerobic microbial population crashes as oxygen depletes. Use it immediately whenever possible. Passive cold-steeped tea can be used within 24 to 48 hours if kept in a cool location, but its microbial activity is lower to begin with. Never store a batch of tea for days hoping it will stay effective.
Is compost tea safe to use on vegetable seedlings?
Yes, but dilution matters. Use a 1:10 ratio of tea to dechlorinated water for seedlings and young transplants. Full-strength aerated compost tea applied directly to very young seedlings can overwhelm their root systems. As plants mature and establish, you can reduce dilution to 1:5 for regular applications.
What plants benefit most from compost tea?
Heavy feeders like tomatoes, peppers, cucumbers, squash, corn, and leafy greens show the most noticeable response to regular compost tea applications. Fruit trees, berry bushes, and perennial herbs also benefit from seasonal soil drenches. Compost tea is versatile enough to use on flowers, raised beds, potted plants, and even lawns where you want to rebuild depleted soil biology.
Why does my compost tea smell bad?
A foul or sulfurous smell means your brew has gone anaerobic. This most often happens because the aeration pump was too weak, the brew ran too long, the water was too warm, or the molasses ratio was too high and the microbial population exhausted the oxygen supply. Discard a foul-smelling batch and do not apply it to plants. Clean your bucket and pump with a dilute hydrogen peroxide solution before brewing again.
Can I brew compost tea without an air pump?
Yes. A passive cold steep using a mesh bag of worm castings or finished compost soaked overnight in dechlorinated water produces a basic liquid fertilizer. It will not contain the same high microbial density as an aerated brew, but it delivers soluble nutrients and some beneficial biology to your soil. Stirring the bucket vigorously several times during the steep helps compensate partially for the lack of continuous aeration.
Have you brewed compost tea from your worm tower or compost pile this season? Share what worked, what failed, and what your garden looked like afterward in the comments below.
References
- Actively aerated compost tea: brewing method, benefits, and application guide for home gardeners
- Master Gardeners guide to the facts about compost tea, including application rates and safety
- How worm tea and worm leachate differ, with step-by-step worm casting tea brewing instructions
- Brewing compost tea for better plant health, with dilution ratios for seedlings and mature plants
- Compost tea recipe, tips, and uses from a homesteading family perspective
Leave a Reply