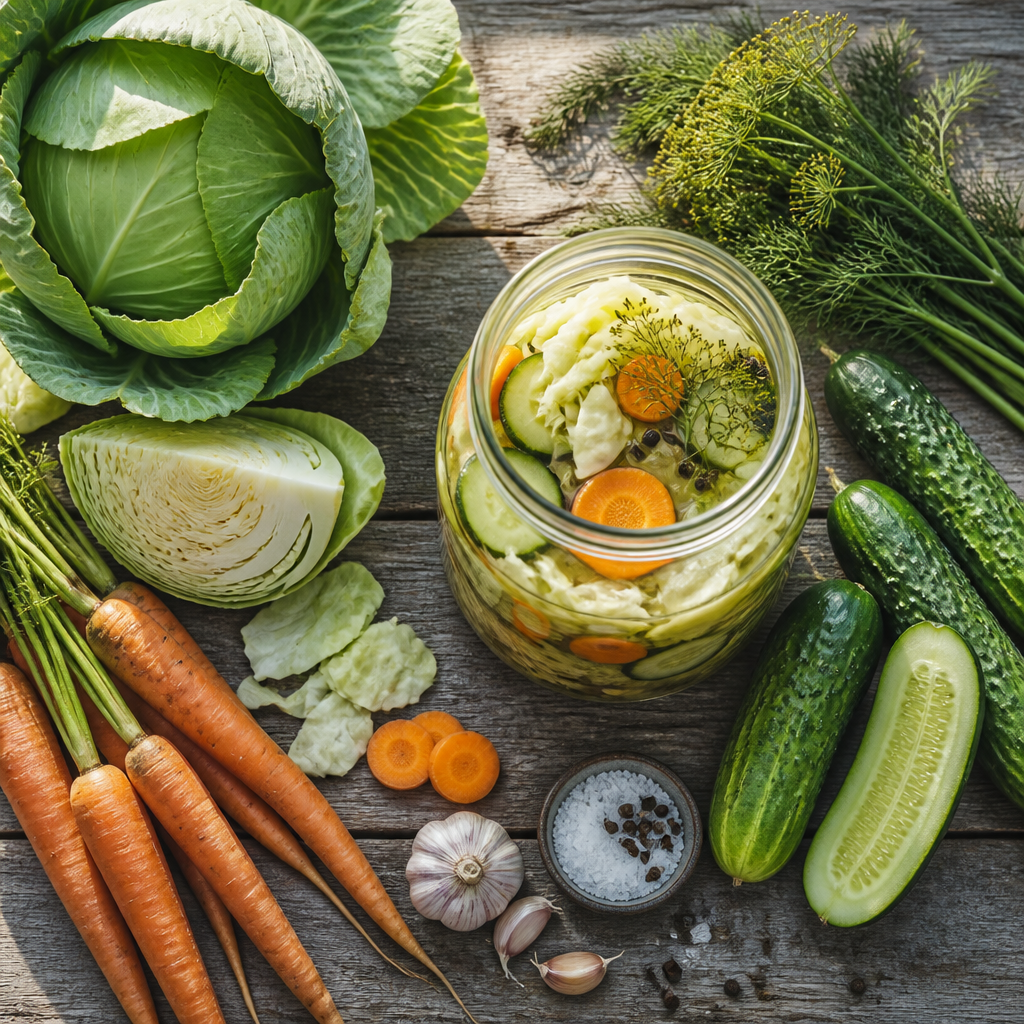
Most people assume fermentation requires crocks, airlocks, thermometers, and a dedicated pantry shelf. It does not. Fermentation at home is one of the oldest food preservation methods on the planet, and for most of human history it happened in clay pots and carved-out logs with zero specialized gear. If you grow food on your homestead or source it locally, you already have everything you need: fresh vegetables, non-iodized salt, water, and a glass jar. This guide covers the real science behind lacto-fermentation, the practical steps to get your first batch right, and the specific mistakes that ruin ferments before they even get started.
Table of Contents
- What Is Lacto-Fermentation and Why Does It Work
- The Real Health Benefits of Probiotic Foods DIY
- What You Actually Need (And What You Don’t)
- The Best Homestead Fermented Foods to Start With
- Step-by-Step: Lacto-Fermentation Guide for Beginners
- Comparing the Three Core Fermentation Methods
- Troubleshooting Your Ferments
- Frequently Asked Questions
- References
What Is Lacto-Fermentation and Why Does It Work
Lacto-fermentation is a process where naturally occurring Lactobacillus bacteria, already present on the surface of raw vegetables, convert the sugars in those vegetables into lactic acid. That lactic acid then acts as a preserving agent, dropping the pH of the environment low enough that harmful bacteria cannot survive. The process is entirely self-regulating when you get the salt ratio right.
Salt is the key variable. It creates an environment that is hostile to spoilage organisms but tolerable to lactic acid bacteria. Once those bacteria take over and produce enough lactic acid, the ferment becomes shelf-stable and safe. No vinegar, no heat, no canning equipment required.
The process is also anaerobic, meaning it happens without oxygen. This is why keeping vegetables submerged below the brine line matters more than any piece of specialty equipment. A zip-lock bag filled with brine laid on top of the vegetables in a jar does the same job as a $40 airlock.
Salt makes the environment inhospitable to unwanted bacteria while allowing Lactobacillus to thrive. The lactic acid those bacteria produce then preserves the food and creates its distinctive tangy flavor. This is the entire mechanism, and it requires nothing but time and the right conditions.
The Real Health Benefits of Probiotic Foods DIY
For homesteaders and off-grid households, the nutritional angle of fermentation is just as important as the preservation angle. Eating industrially processed food is often not an option when you live remotely, and fermented foods fill a real gap in long-term nutritional resilience.
Lactic acid bacteria (LAB) are among the best-studied probiotic organisms. Research consistently shows that LAB can produce vitamins, short-chain fatty acids, and bacteriocins, help discourage harmful bacterial growth, and support a balanced gut microbiome. Fermented foods can also improve the digestibility and nutrient absorption of proteins, which matters when your protein sources come from your own animals or garden rather than a grocery store. Some LAB strains have been shown to reduce the allergenic properties of foods by breaking down specific proteins that trigger immune responses.
There is also a practical immune health argument. Evidence suggests that fermented dairy products like kefir and yogurt may modulate gut microbiota by increasing beneficial Lactobacillus populations. That kind of systemic support is valuable when access to a doctor or pharmacy is hours away.
The bioavailability angle deserves attention too. Fermentation increases the availability of minerals in vegetables by breaking down antinutrients like phytic acid. This means the zinc, magnesium, and iron in your garden vegetables are actually more accessible after fermentation than before it.


Pro tip: If you are new to eating fermented foods regularly, start with small portions and build up gradually. The shift in gut bacteria can cause temporary bloating or digestive changes as your microbiome adjusts. This is normal and resolves within a week or two for most people.
What You Actually Need (And What You Don’t)
The fermentation industry has done an excellent job convincing people they need crocks, weights, airlocks, and ceramic fermentation vessels. You do not. Here is what genuinely matters.
Non-Negotiable Supplies
Non-iodized salt is essential. Iodized table salt interferes with the fermentation process because iodine is specifically designed to kill bacteria, including the beneficial ones you are trying to cultivate. Use sea salt, pickling salt, or kosher salt without additives. A standard brine ratio for wet ferments is roughly 1.5 tablespoons of sea salt per 2 cups of filtered water. For dry-salted ferments like sauerkraut, aim for around 2 percent salt by weight of the vegetable.
Filtered or well water matters. Chlorine in municipal tap water can inhibit lactic acid bacteria. If your homestead uses a well, you are already ahead. If you are on municipal water, let it sit uncovered overnight or use a simple carbon filter.
A glass jar with a lid works perfectly. Wide-mouth mason jars are ideal because you can pack them tightly and see what is happening inside. The lid does not need to be airtight during active fermentation. In fact, you should loosen lids slightly or burp them daily to release CO2 buildup.
What You Can Skip
Airlocks do the same job as keeping vegetables submerged below the brine. A zip-lock bag filled with brine placed on top of your packed vegetables works as a weight and an oxygen barrier simultaneously. A small clean rock, a folded cabbage leaf, or even a sealed bag of brine all work as weights.
Fermentation crocks are beautiful but not necessary. They help maintain temperature stability in a cold homestead cabin, but a jar tucked in a warm corner accomplishes the same result.
Pro tip: Organic vegetables give better fermentation results than conventionally grown ones because pesticide residue can disrupt the beneficial bacteria naturally present on vegetable surfaces. When you are growing your own produce anyway, this is a non-issue, but it matters for store-bought ingredients.
The Best Homestead Fermented Foods to Start With
Not all ferments have the same difficulty level or the same payoff for a homesteading context. Focus on ferments that use what you are already growing, store well without refrigeration during active fermentation, and have a wide margin for error.
Sauerkraut
Cabbage is the single best vegetable for a first ferment. It has abundant natural Lactobacillus on its surface, high sugar content to feed those bacteria, and enough physical structure to stay firm for weeks. Sauerkraut requires nothing more than cabbage and salt. It is a dry-brine ferment, meaning the brine comes entirely from the cabbage itself when you massage the salt into the shredded leaves.
Kimchi
Kimchi is essentially a spiced sauerkraut and uses the same core mechanism: lactic acid bacteria on the vegetables, salt to set the right environment, and time. Traditional kimchi includes napa cabbage, daikon radish, garlic, ginger, and chili. If you do not have chili or prefer a milder result, you can make white kimchi (baek-kimchi) with the same fermentation outcome. For homesteaders growing Asian-style greens, this is an excellent way to preserve large harvests.
Lacto-Fermented Pickles
Cucumbers, green beans, garlic cloves, and hot peppers all ferment well as whole or cut vegetables in a wet brine. These are simpler than sauerkraut in some ways because you are not massaging anything. You pack the vegetables into a jar, pour brine over them, weigh them down, and wait. The downside is that cucumbers can become soft if fermented too long or at too warm a temperature. Keep them in a cooler spot of your homestead and taste-test starting around day three.
Kefir
If you keep dairy animals, kefir is one of the highest-value ferments you can make. It requires kefir grains (a SCOBY of bacteria and yeasts), which you obtain once and then maintain indefinitely. Kefir grains are reusable and will last as long as you feed them milk regularly. The resulting kefir is denser in probiotic diversity than most vegetable ferments and can be used as a base for smoothies, dressings, or consumed directly.

Step-by-Step: Lacto-Fermentation Guide for Beginners
The following process applies directly to sauerkraut, which is the ideal starter ferment for any homesteader. Once you understand this method, the same principles scale to almost any vegetable.
Day 1: Prepare and Salt
Shred one medium head of cabbage thinly and place it in a large bowl. Weigh the shredded cabbage and add approximately 2 percent of that weight in non-iodized salt. If your cabbage weighs 1 kilogram, use 20 grams of salt. Massage the salt firmly into the cabbage for five to ten minutes until the cabbage releases significant liquid and becomes limp. The liquid it releases is the brine that will submerge it during fermentation.
Pack the salted cabbage tightly into a clean glass jar, pressing firmly after each addition so the brine rises above the cabbage level. The cabbage must be fully submerged. Place a weight on top to keep it below the brine, then loosely cover the jar.
Days 1 to 3: Active Fermentation
Leave the jar at room temperature, ideally between 18 and 22 degrees Celsius. You will see bubbles forming within 24 to 48 hours. This is CO2 from bacterial activity and is a sign the ferment is working. Push the cabbage back below the brine if it floats up, and burp the lid daily if it is tight-fitting.
Days 3 to 14: Taste and Decide
Start tasting at day three. A shorter ferment produces a mildly tangy sauerkraut. Leaving it longer at room temperature produces a more acidic, complex flavor. Most people find their preferred taste between days five and ten. Once it tastes right to you, move it to cold storage, which slows fermentation to a near-stop.
Temperature Matters More Than Time
A cold homestead in winter will slow fermentation significantly. A warm kitchen in summer will speed it up. Do not follow rigid timing instructions blindly. Use your senses: taste, smell, and texture tell you more than a calendar does. A properly fermented vegetable smells sour and clean, not putrid or off. Trust your nose.
Comparing the Three Core Fermentation Methods
Understanding which method suits your ingredients and goals makes a real difference in results. The three primary approaches for homestead fermented foods are dry brining, wet brining, and starter-culture fermentation.
| Method | Best For | Key Considerations |
|---|---|---|
| Dry Brining (salt massaged directly into vegetable) | Sauerkraut, kimchi, shredded beets, shredded carrots | Requires vegetables with high water content. Salt percentage by weight is critical. No added water needed. Most beginner-friendly method overall. |
| Wet Brining (vegetables submerged in salt-water solution) | Whole cucumbers, green beans, garlic, peppers, cherry tomatoes | Brine ratio approximately 1.5 tbsp sea salt per 2 cups filtered water. Vegetables must stay fully submerged. Works for any vegetable that cannot be massaged. |
| Starter Culture Fermentation (kefir grains, whey, or commercial starters) | Kefir, yogurt, sourdough, cultured butter | Requires an initial culture source. More predictable results. Culture must be maintained. Best for dairy if you keep animals. Grains are reusable indefinitely. |
Troubleshooting Your Ferments
Most fermentation problems come from one of three causes: too little salt, too much oxygen, or the wrong temperature. Knowing what you are looking at prevents you from throwing out a perfectly good ferment.
Kahm Yeast: Harmless But Annoying
A flat, white, dusty or film-like layer on top of your ferment is almost certainly kahm yeast, not mold. Kahm yeast is harmless but can produce off-flavors if left in place. Skim it off with a clean spoon before refrigerating. It tends to appear when too much oxygen reaches the surface or when sugar-rich vegetables like tomatoes are fermented. Reduce headspace in the jar and ensure vegetables stay submerged to minimize it.
Actual Mold: When to Discard
True mold is fuzzy and colored: pink, blue, green, or gray. If you see fuzzy mold on your ferment, discard the entire batch. Do not attempt to skim it and eat the rest. Pink, blue, or green fuzzy growth, a mushy texture, or a putrid smell (distinct from normal sour fermentation smell) are the hard signs that a batch has gone wrong.
A note on smell: new fermenters often mistake the normal funky sourness of active fermentation for spoilage. The difference is meaningful. A good ferment smells sour, tangy, and alive. A bad ferment smells like rot, garbage, or something chemically wrong. Your nose is accurate for this distinction.
Ferment Not Bubbling
If you see no bubbles after 48 hours at room temperature, your salt ratio was likely too high, your kitchen is too cold, or your water had enough chlorine to suppress bacterial activity. Try moving the jar somewhere warmer (above 18 degrees Celsius) and wait another 24 hours before drawing conclusions. Cold fermentation still works, it just works slowly.
Soft or Mushy Vegetables
Softness in fermented vegetables usually indicates over-fermentation, too-warm temperatures, or insufficient salt. For cucumbers specifically, trim off the blossom end before fermenting. The blossom end contains enzymes that accelerate softening. Keeping the ferment in a cooler part of the house and tasting early will catch the sweet spot before texture degrades.
Frequently Asked Questions
Do I need to sterilize my jars before fermenting?
Clean jars are necessary, but sterilization is not. Wash your jars with hot soapy water and rinse thoroughly. The salt and the acidic environment created during fermentation handle the sanitation work from that point forward. Over-cleaning with bleach or sanitizers can actually leave residues that interfere with beneficial bacteria.
How long do fermented vegetables last once they are ready?
Properly fermented vegetables stored in cold conditions (a root cellar, cold room, or refrigerator) can last for several months to over a year. The lactic acid environment continues to preserve the food after active fermentation stops. Flavor intensifies over time, so older ferments tend to be more sour. They remain safe as long as they smell clean and show no fuzzy mold.
Can I ferment vegetables from my garden without washing off the bacteria?
Yes, and this is actually one of the advantages of home-grown produce. The Lactobacillus bacteria responsible for lacto-fermentation live naturally on vegetable surfaces. A gentle rinse to remove visible soil is fine, but aggressive scrubbing or soaking in chlorinated water removes the very bacteria you want to cultivate. Organic, home-grown vegetables have a higher natural bacterial load and tend to ferment more reliably than heavily washed commercial produce.
Is fermentation at home safe without any training or certification?
Lacto-fermentation is one of the safest food preservation methods available. The acidic environment it creates is genuinely inhospitable to dangerous pathogens. Unlike canning, there is no risk of botulism from a properly salted ferment because botulinum toxin does not thrive in acidic conditions. The main safety rule is simple: if it smells genuinely bad (not just sour) or shows fuzzy colored mold, throw it out. In practice, most failed ferments are obvious and unambiguous.
What is the difference between fermented foods and pickled foods from the store?
Most commercial pickles are not fermented. They are cucumbers preserved in vinegar, which produces an acidic product without any live bacteria. Vinegar pickling is faster and shelf-stable at room temperature, but it delivers none of the probiotic benefits of lacto-fermentation. True fermented pickles are made only with salt and water, have a more complex flavor, and contain live cultures. Always check the label: real fermented pickles will say “naturally fermented” or “raw,” and you will typically find them refrigerated, not on a shelf.
Can I ferment during a Canadian winter when my homestead is cold?
Cold slows fermentation but does not stop it. A ferment that takes five days at 22 degrees Celsius might take two to three weeks at 10 degrees. Many traditional fermented foods, including Scandinavian and Eastern European varieties, were developed specifically to ferment slowly in cold climates. A cold root cellar or unheated mudroom can actually produce a more nuanced, complex flavor than fast warm-weather fermentation. The lower the temperature, the more control you have over the final result.
Have you tried fermenting your own vegetables or dairy on your homestead? Share what worked, what didn’t, and which crops from your garden gave you the best results.
References
- Lacto-fermentation basics: how to ferment vegetables at home with simple ingredients
- How lactic acid bacteria work in fermented foods and their role as probiotics
- Scientific review of lactic acid bacteria in dairy fermentation and gut health benefits
- How to ferment vegetables at home without specialized equipment
- Troubleshooting common fermentation problems: mold, kahm yeast, and failed batches
Leave a Reply