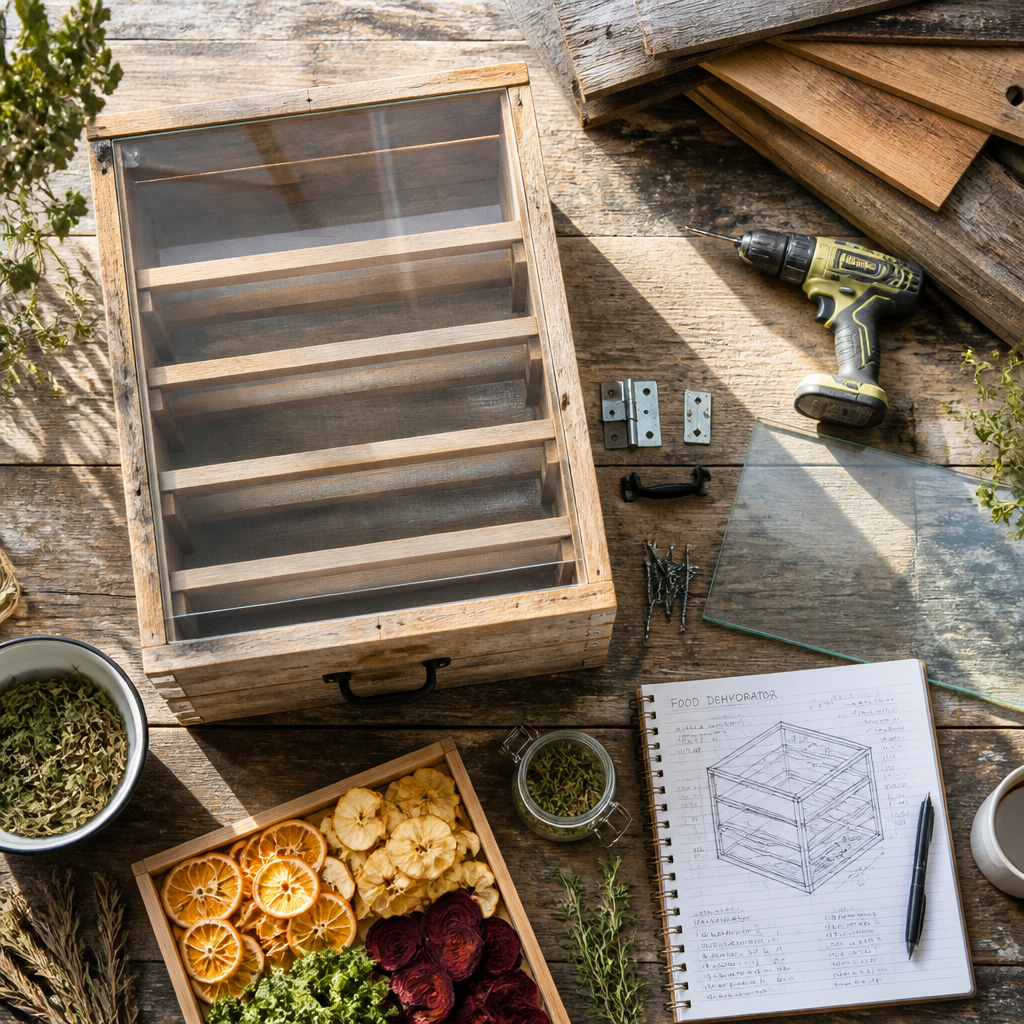
When your root cellar is full and your garden is still producing faster than you can eat it, a dehydrator stops being a kitchen gadget and becomes critical homestead infrastructure. The question most off-grid homesteaders hit at some point is whether to build their own DIY food dehydrator or invest in a commercial unit. The answer is not the same for every property or every season, but it absolutely can be answered. This guide cuts through the noise to help you make the right call for your land, your power setup, and your preservation goals.
Table of Contents
- Quick Takeaways
- Why Dehydration Matters for Off-Grid Food Preservation
- DIY Food Dehydrator Builds: Types and What They Actually Do
- Store-Bought Dehydrators for Off-Grid Use: What to Expect
- Head-to-Head Comparison: DIY Solar Build vs. Electric Cabinet vs. Portable Commercial
- Food Safety: The Non-Negotiable Factor
- Shelf Life and Storage: Making Your Harvest Last
- When DIY Wins, and When It Doesn’t
- Frequently Asked Questions
- References
Quick Takeaways
| Key Insight | Explanation |
|---|---|
| DIY solar dehydrators cost far less upfront | A basic box-style solar build can come together for $30 to $100 using reclaimed materials. A large cabinet-style DIY unit runs $100 to $300. That compares favorably to quality commercial electric dehydrators. |
| Solar builds are fully off-grid with zero operating cost | A well-designed solar dehydrator uses no electricity at all. For remote properties without robust battery banks, this is a decisive advantage for bulk-season preservation. |
| Store-bought electric units offer precise temperature control | Consistent thermostat control matters most when preserving meat. For jerky and fish, a commercial unit with a calibrated thermostat is the safer and more reliable choice. |
| Solar drying times are 2 to 5 times longer than electric | A batch that takes 6 hours in an Excalibur may take 1 to 2 full sunny days in a DIY solar unit. Plan your drying schedule around harvest volume and weather windows. |
| Ideal drying temperature falls between 110°F and 140°F | This range dehydrates food effectively while also destroying harmful bacteria, fungi, and insect eggs. Temperatures above 180°F begin cooking the food instead of drying it. |
| DIY builds can scale to any harvest volume | You can build a unit sized exactly for your garden’s output, from a small herb dryer to a large multi-tray cabinet for processing bushels of produce at once. |
| Properly stored dehydrated food lasts months to years | Dried fruits and vegetables stored in vacuum-sealed bags or Mylar with oxygen absorbers will keep for 6 to 12 months under normal conditions. Properly dried vegetables stored in cool, dark conditions can last considerably longer. |
Why Dehydration Matters for Off-Grid Food Preservation
Dehydration is one of the oldest and most reliable preservation methods available. It works by removing moisture from food, which halts bacterial growth and dramatically extends shelf life without requiring refrigeration or canning supplies. For homesteaders managing large garden harvests, foraged berries, or wild game, this is not optional knowledge. It is foundational.
For off-grid households specifically, dehydration competes with canning, fermentation, and root-cellaring as your primary preservation stack. Each method has its place, but dehydration wins on two counts: the end product is lightweight and shelf-stable without jars, lids, or a cool room. That matters when you are managing a remote property where every input costs effort to transport.
The real decision point is not whether to dehydrate. It is which tool best matches your power situation, harvest volume, and how much time you want to invest in a build project versus buying something that works out of the box.


DIY Food Dehydrator Builds: Types and What They Actually Do
There are three practical DIY dehydrator designs that suit off-grid homestead use. Understanding how each one works mechanically saves you from building the wrong one for your climate and situation.
The Solar Box Dryer
This is the entry-level build. It uses a shallow wooden box with a clear polycarbonate or glass top panel angled toward the sun. The interior is painted black or lined with heat-absorbent material to maximize solar gain. Ventilation holes at the bottom and top, covered with fine mesh, allow convective airflow to carry moisture out of the unit. Building this style costs as little as $30 to $50 using reclaimed materials, and the entire thing can be constructed with basic hand tools in a weekend.
The limitation is temperature consistency. On overcast days or in humid climates, a simple box dryer struggles to maintain adequate temperatures for safe drying of high-moisture foods. It is best suited for herbs, thin fruit slices, and leafy greens in sunny, arid conditions.
The Cabinet-Style Solar Dehydrator
This is the most practical DIY build for serious homestead use. The basic design uses a solar collector box that heats air and a separate drying chamber where hot air rises through stacked mesh trays, carrying moisture away with it. Materials typically include 2×6 lumber framing, wire mesh tray bottoms, a repurposed glass pane or polycarbonate glazing for the collector, and black interior surfaces to maximize heat absorption.
A well-built cabinet-style unit can reach 100°F to 140°F on clear days and process significantly larger batches than a simple box dryer. Building one costs roughly $100 to $300, depending on whether you are buying new lumber or using salvaged materials. For a homesteader with basic carpentry skills, this build is highly rewarding and produces a unit perfectly matched to your specific harvest volume.
The Solar-Electric Hybrid Build
This approach pairs a DIY wooden cabinet with a small 12-volt solar panel powering a low-draw fan to improve airflow. Adding active airflow directly addresses the primary weakness of passive solar designs: drying times drop considerably compared to convection-only units, and the design works more reliably in partly cloudy conditions or during humid summer harvests. The fan draw is minimal enough that a small dedicated solar panel handles it without touching your main battery bank.
Pro tip: Paint the interior of any DIY solar dehydrator flat black and add a black metal absorber plate behind the glazing panel. This single step makes the most significant difference in the temperatures your unit can reach on partly cloudy days.
Store-Bought Dehydrators for Off-Grid Use: What to Expect
Commercial electric dehydrators split into two practical categories for off-grid use: units that run efficiently enough for a well-sized solar and battery system, and stackable budget units that are acceptable for light herb drying but frustrating for anything else.
High-Capacity Electric Units
The Excalibur line is the benchmark that most serious homesteaders compare against. The nine-tray version offers horizontal airflow from a rear-mounted fan and a calibrated thermostat, which makes it highly consistent for processing large batches of everything from delicate herbs to thick-cut jerky. The thermostat control is the real differentiator: when you are preserving meat and need to hold a specific temperature for food safety, a commercial unit with a reliable thermostat is far more trustworthy than an uncontrolled solar box. The Excalibur is not solar-powered on its own, but it is well-suited to homesteads running a capable off-grid solar and battery setup where daytime power consumption is manageable.
Stackable Budget Units
The round stackable dehydrators in the $40 to $80 range are widely available and work for light-duty use. In practice, they have two persistent problems for homesteaders: uneven drying across trays because of bottom-mounted heating, and small per-batch capacity that makes processing a large garden harvest genuinely tedious. They are fine for a few bunches of herbs or a single tray of apple slices. They are not suited to bulk preservation work.
Pro tip: If you are running a commercial electric dehydrator on an off-grid solar system, run it during peak solar hours, typically mid-morning through early afternoon, to avoid drawing from your battery bank. A 600-watt dehydrator running for six peak solar hours is far easier for your system to handle than running it at night.

Head-to-Head Comparison: DIY Solar Build vs. Electric Cabinet vs. Portable Commercial
Every dehydration approach involves trade-offs. This table lays out the three most realistic options for an off-grid homesteader so you can match the right tool to your actual situation.
| Factor | DIY Solar Cabinet Build | Excalibur 9-Tray Electric | Budget Stackable (e.g., Nesco) |
|---|---|---|---|
| Upfront Cost | $100 to $300 (new materials); less with reclaimed wood | Priced around $250 to $400 depending on retailer and configuration | Roughly $40 to $80 |
| Operating Cost | Zero. Runs entirely on sunlight. | Uses 600+ watts; needs solar or battery capacity during runs | Low wattage but inconsistent output |
| Temperature Control | Variable. Dependent on sun and build quality. | Precise thermostat. Consistent across all trays. | Basic thermostat. Uneven tray-to-tray drying. |
| Capacity | Fully scalable. Build as large as your harvest demands. | Large but fixed. Nine trays handles serious batches. | Small. Practical only for light-duty use. |
| Drying Speed | 2 to 5 times slower than electric on clear days | Fast. Most batches complete in 6 to 12 hours. | Moderate but inconsistent |
| Best For | Fruits, vegetables, herbs; full off-grid situations | All foods including meat and jerky; robust solar setups | Occasional herb or fruit drying only |
| Repairability | Fully repairable with hand tools and hardware store parts | Dependent on manufacturer parts and service | Largely disposable when components fail |
Food Safety: The Non-Negotiable Factor
Food safety is the one area where DIY enthusiasm needs to be tempered by discipline. The most common preferred drying temperature range falls between 110°F and 140°F. Temperatures in this range dehydrate food effectively while also destroying harmful bacteria, fungi, insect eggs, and larvae. Temperatures above 180°F shift from drying to cooking, which changes the food’s properties and can result in a hard outer crust that traps moisture inside, a problem known as case hardening.
The critical food safety issue with solar dehydrators is that temperatures fluctuate with cloud cover, time of day, and season. A passive solar box that starts a batch of tomatoes at 130°F may drop to 90°F by mid-afternoon if clouds roll in. At temperatures below 100°F for extended periods, bacterial growth resumes rather than being suppressed. For meat, the stakes are higher: jerky and dried fish require sustained temperatures to be safely consumed, and this is where a calibrated commercial unit earns its place on a serious homestead.
A consistent drying temperature is not just a quality issue. For meat preservation especially, it is a food safety issue. If your dehydrator cannot hold a steady temperature, dry fruit and herbs with it, and use a different method for meat.
For homesteaders using a solar dehydrator, the practical solution for meat is a hybrid approach: start the jerky in a conventional oven or a commercial unit to reach the required safe internal temperature, then finish and continue drying in the solar unit. This is not a compromise, it is a rational use of available tools.
Shelf Life and Storage: Making Your Harvest Last
A dehydrator is only half the equation. How you store the finished product determines whether your work lasts weeks or years. Based on guidance from food preservation authorities, home-dehydrated food generally has a shelf life of four months to one year depending on the food type and storage conditions. Proper storage pushes that range much higher for some foods.
Practical shelf life estimates for properly dried and stored food run as follows: dried fruits and vegetables stored in vacuum-sealed bags or Mylar bags with oxygen absorbers will keep for 6 to 12 months under average conditions. Herbs stored in airtight containers can last a year or more. Jerky has the shortest shelf life at 1 to 2 months, but vacuum sealing and refrigeration or freezing extend that significantly. For long-term food security on a homestead, pairing dehydration with correct storage is the strategy that actually works.
The best storage containers for an off-grid homestead are vacuum-sealed bags, Mylar bags with oxygen absorbers, glass mason jars with desiccant packs, and food-grade buckets for bulk dried goods. Label every container with the food type and drying date. Without labels, mystery bags become a real problem within a single season.
Pro tip: Before sealing dried food for long-term storage, let it condition for 7 to 10 days in a loosely covered container. If any moisture appears on the container walls, the food needs more drying time. This single step prevents mold from ruining an otherwise well-executed preservation batch.
When DIY Wins, and When It Doesn’t
The DIY solar dehydrator wins decisively in the following situations: your property has no reliable electricity or has limited battery storage, you have a large seasonal harvest that exceeds what any single commercial unit can process cost-effectively, you have basic carpentry skills and access to reclaimed materials, and your primary preservation targets are fruits, vegetables, and herbs rather than meat.
A DIY cabinet-style solar build gives you a tool that is fully repairable with hand tools, completely free to operate, scalable to your actual harvest volume, and built to fit your specific space. That is a profile no commercial unit can match at any price point. If you have more time than money and value self-reliance above convenience, the DIY route produces the most capable and cost-effective large-scale dehydration setup available to a homesteader.
The store-bought electric unit wins when you need consistent temperature control for meat preservation, when your off-grid solar system has enough daytime generation capacity to run a 600-watt appliance without stress, when you want reliable results on demand regardless of weather, and when your preservation work is higher-value and lower-volume rather than bulk-processing a large garden surplus.
A common mistake is treating this as an either-or decision. The most capable homestead preservation setups use both: a DIY solar unit handles the bulk of the summer fruit and vegetable harvest at zero operating cost, and a commercial electric unit handles meat processing and the shoulder seasons when solar drying conditions are unreliable. If your property is in a northern climate with short, variable summers, a solar-only approach for meat is not a responsible strategy regardless of how well your build performs on good days.
The homesteaders who get the most out of dehydration are the ones who match the tool to the task rather than committing to one approach for ideological reasons. Build the solar unit. Use the commercial unit for what it does best. Your winter larder will reflect the difference.
Frequently Asked Questions
Can a DIY solar dehydrator really work in a cloudy northern climate?
It can, but with real limitations. A well-built cabinet-style solar dehydrator with a 12-volt fan powered by a small dedicated solar panel performs better in variable conditions than a passive box dryer. That said, in a short northern summer with frequent overcast days, you should expect to run fewer batches than someone in a sunny, arid climate. For northern homesteaders, a solar-electric hybrid build or a commercial electric unit for the cloudier shoulder seasons is the more practical solution for bulk preservation.
What materials do I actually need to build a DIY solar food dehydrator?
A functional cabinet-style solar dehydrator requires a wooden frame made from 2×6 lumber or salvaged wood, wire mesh for the tray bottoms, a clear polycarbonate or glass panel for the solar collector, black interior paint or a metal absorber plate to maximize heat capture, and ventilation holes covered with fine mesh to allow moisture to escape. A 12-volt fan and small solar panel are optional but significantly improve performance. The entire build is achievable with basic hand tools over one or two weekends.
Is it safe to dry meat in a DIY solar dehydrator?
It is possible but requires care. The safe approach is to pre-cook meat to the required safe internal temperature in a conventional oven or commercial dehydrator before transferring it to the solar unit to finish drying. Relying on a passive solar dehydrator alone for meat safety is risky because temperature fluctuations from cloud cover can allow the food to sit in unsafe temperature ranges for extended periods. For dedicated and reliable meat preservation, a commercial electric unit with a calibrated thermostat is the safer tool.
How long does dehydrated food actually last when stored correctly?
Dried fruits and vegetables stored in vacuum-sealed bags or Mylar bags with oxygen absorbers generally last 6 to 12 months. Dried herbs in airtight containers can maintain quality for over a year. Jerky at room temperature lasts 1 to 2 months but significantly longer when vacuum-sealed and refrigerated or frozen. The conditioning step before final sealing, where you let food rest loosely covered for 7 to 10 days and check for moisture, is critical to achieving the longer end of these shelf life ranges.
How does the cost of a DIY build compare to buying an Excalibur?
A DIY solar cabinet build using new materials typically runs $100 to $300. Built from reclaimed or salvaged materials, that cost drops to $30 to $100. A quality commercial electric unit like the Excalibur nine-tray is priced in the $250 to $400 range depending on retailer and configuration. The DIY build is cheaper upfront and has zero operating cost since it runs on sunlight. The commercial unit has higher operating costs but delivers precise temperature control and reliability on demand. For a homestead processing large volumes of fruits and vegetables with good sun exposure, the DIY build is the better financial decision over multiple seasons.
What foods are best suited to a DIY solar dehydrator?
Fruits, vegetables, and herbs are the strongest candidates. Thin-sliced apples, tomatoes, zucchini, berries, leafy herbs, and root vegetable chips all dry reliably in a well-designed solar unit during good weather. High-moisture vegetables like cucumbers may need blanching first to speed moisture release. Meat is the category that requires the most caution, and a reliable commercial unit is the safer choice for jerky and fish. Prioritize your solar build for the high-volume plant-based harvest and reserve the commercial unit for protein preservation.
Have you built your own dehydrator, or are you running a commercial unit on your off-grid setup? Share what’s working for you in the comments below, including what you’re preserving and how you’re storing it.
References
- Solar dehydrator cost breakdown and DIY plans guide covering box dryers, cabinet-style builds, and large homestead units
- Step-by-step DIY food dehydrator build guide comparing solar, electric, and hybrid approaches with cost and material details
- Off-grid food storage projects using natural preservation techniques including solar dehydrator construction basics
- Comparison of solar food dehydrators for off-grid living covering DIY plywood builds and commercial electric options like Excalibur
- How to build a solar dehydrator for long-term food storage with shelf life estimates and proper storage container guidance
Leave a Reply