Most first-time homesteaders raise their animals with confidence and then freeze up completely when fall arrives and it is time to process them. Homestead butchering is not complicated, but it is unforgiving of poor preparation. A dull knife, the wrong temperature window, or skipping the bleed-out step can ruin weeks of careful raising. This guide walks you through every stage of fall butchering on the homestead, from choosing your kill date to wrapping the final cuts for the freezer. Whether you are processing chickens, rabbits, or a market hog, the principles are the same, and getting them right once means you will do it right every year after.
Table of Contents
- Quick Takeaways
- Why Fall Is the Right Season for Homestead Butchering
- Tools and Equipment You Actually Need
- Choosing Your Animal: Chickens, Rabbits, or Pigs First
- Step-by-Step Butchering Process for Beginners
- Meat Aging and Chilling: The Step Most Beginners Skip
- Cutting, Wrapping, and Freezer Storage
- Comparing Common Homestead Butchering Methods
- Regulations and Legal Basics for Off-Grid Meat Processing in Canada
- Frequently Asked Questions
- References
Quick Takeaways
| Key Insight | Explanation |
|---|---|
| Temperature is your biggest tool | Fall butchering works because outdoor temperatures between 0°C and 4°C (32°F to 40°F) function as a natural refrigerator, keeping carcasses safe while you work and allowing proper aging without expensive equipment. |
| Bleed out fast and completely | A slow or incomplete bleed-out darkens the meat and shortens shelf life significantly. Cut the throat immediately after the animal is down and allow at least 5 to 10 minutes of full drainage before moving forward. |
| Start with chickens or rabbits, not pigs | Smaller animals teach every core skill without the physical demands of a 200-plus-pound carcass. Confidence and technique built on poultry translate directly to larger animals. |
| Sharp knives prevent injuries | More butchering injuries happen with dull knives than sharp ones because dull blades require force and slip unpredictably. Sharpen every knife before processing begins, not after it starts. |
| Rigor mortis timing matters | Do not cut and freeze meat while the carcass is still in rigor mortis. Wait until the muscles relax, typically 12 to 24 hours after slaughter, or the meat will stay permanently tough and contracted. |
| Evisceration speed protects flavor | Gut contents that sit in a warm carcass contaminate the meat quickly. Remove organs within 30 minutes of slaughter, keeping the gut sac intact to avoid spreading bacteria to the cavity. |
| Label everything with a date | Freezer-wrapped cuts without labels become a guessing game within two months. Use a marker to note cut type, animal, and date on every package before it goes in the freezer. |
Why Fall Is the Right Season for Homestead Butchering
Fall butchering is not a tradition that stuck around for sentimental reasons. It is the most practical window on the calendar for off-grid meat processing, and the reasons are entirely functional.
The most important factor is ambient temperature. When the air sits consistently between 0°C and 4°C, you have a free, reliable cold environment for chilling and hanging a carcass without needing electricity. Animals raised through spring and summer reach their peak weight by October or November, which means you get the maximum return on your feed investment at exactly the point when nature hands you a built-in cold room.
Flies and insects are largely gone by mid-fall in most of Canada, which is a practical benefit that is easy to overlook until you have tried processing a carcass in August. Fly contamination on exposed meat is a serious spoilage risk, and eliminating it by simply choosing the right month costs nothing.
The old homestead calendar was built around one reality: cold weather is the safest time to handle raw meat outdoors. Every other reason to butcher in fall is secondary to that one.
For those pursuing self-sufficient living in Canada, the fall window also aligns with the end of the growing season. You are winding down garden preservation at the same time you are filling the freezer with meat, which means your food stores for winter are built in a single productive month rather than stretched across the whole year.


Tools and Equipment You Actually Need
The internet will sell you a lot of butchering gear. Most of it is optional. A beginner needs a short, honest list of tools that handle the actual work.
The Non-Negotiable Knives
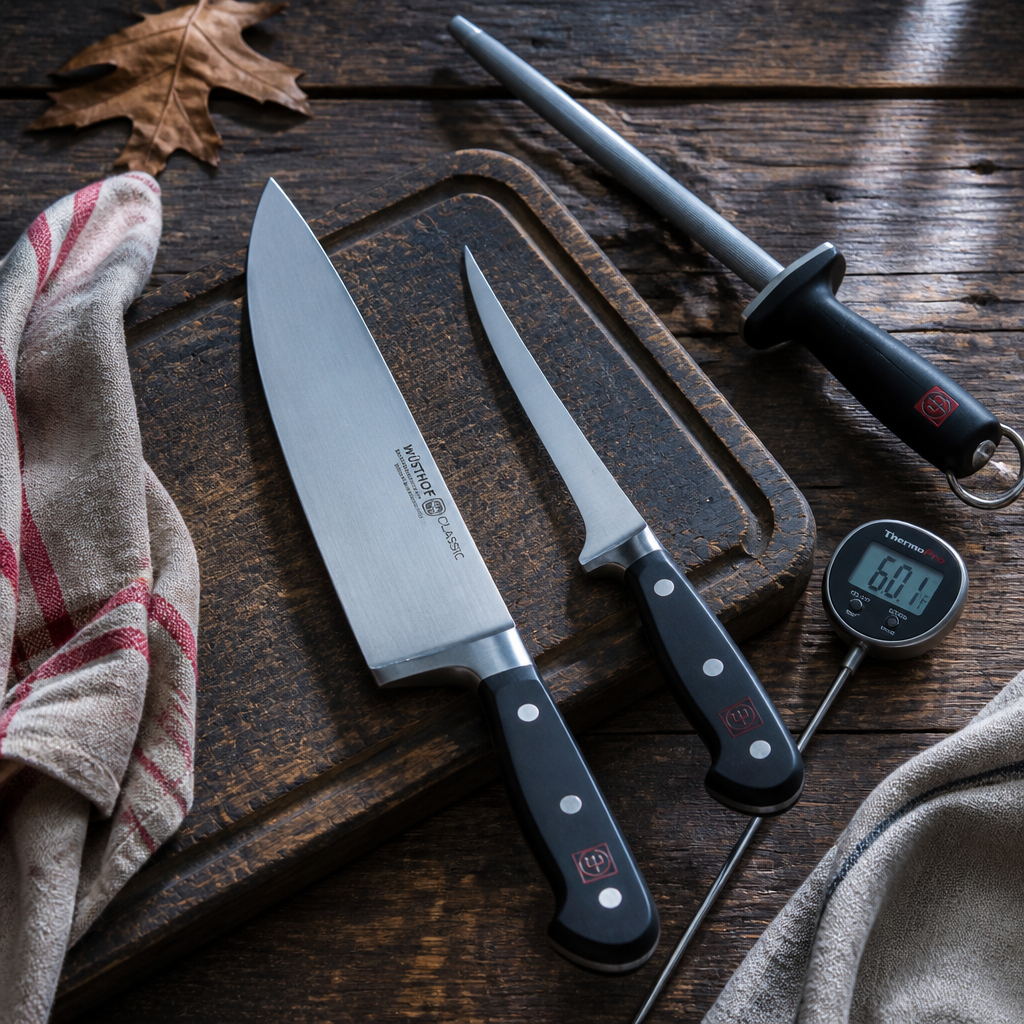
You need three knives: a sticking knife for the kill cut and bleed-out (a sharp, narrow 15 cm blade works), a skinning knife with a curved belly for pulling hide away from fat without puncturing it, and a boning knife for working around joints and separating cuts. A sharpening steel belongs on the table alongside them because knives dull during a full processing session and you will need to touch them up mid-task.
A meat cleaver or butcher’s hand saw is essential for splitting the sternum, pelvis, and bone-in cuts like shanks. Trying to chop through bone with a knife destroys the blade and the cut. A dedicated saw gives clean, precise results every time.
Hoisting and Hanging Equipment
A gambrel stick is inserted through the Achilles tendon of each hind leg and suspends the carcass so gravity does the work during bleed-out and evisceration. For pigs and larger animals, you need a hoist attached to a solid anchor point such as a heavy barn beam or a stout tree limb. Cut-resistant gloves worn on the non-cutting hand are not optional for larger animal processing.
Scalding Setup for Poultry and Pigs
If you are keeping the skin on poultry or scalding a pig for scraping rather than skinning, you need a kettle large enough to fully submerge the animal. The water temperature for chicken scalding sits around 57°C to 62°C. For pigs, scalding water runs hotter, around 65°C to 70°C, and the process loosens hair roots so they can be scraped clean. Skinning a pig is simpler and requires no scalding equipment, which is why many homesteaders choose it for their first hog.
Pro tip: Set up your work area the day before butchering day. Lay out every tool, confirm your anchor point will hold the weight of your largest animal, and walk through the sequence mentally. Time pressure during the actual process is where mistakes happen, and a pre-staged workspace removes that pressure entirely.
Choosing Your Animal: Chickens, Rabbits, or Pigs First
The first butchering decision a homesteader makes is not about technique. It is about which animal to start with, and the right answer is always the smallest one you are raising.
Meat chickens take roughly 6 to 8 weeks to raise and are the most forgiving animal to process as a beginner. They are small enough to handle alone, the process moves quickly, and a mistake on one bird does not ruin your entire day’s work. Processing a batch of 10 or 20 chickens in a single morning teaches every core skill you will use on larger animals: stunning, bleeding, scalding, evisceration, and chilling.
Meat rabbits take about 12 weeks to raise and yield roughly 1.5 kg of lean, fine-grained meat per animal. They require no scalding, the skinning process is straightforward, and their small size makes them ideal for beginner practice. Keeping two or three breeding does and a buck gives you a year-round supply of meat without the land requirements of larger livestock.
Pigs are the most rewarding fall butchering animal but also the most demanding. A market hog at 5 to 6 months weighs 100 kg or more, requires proper stunning, a fast bleed-out, and either a scalding tank or a good skinning setup. The payoff is enormous: a single pig fills a chest freezer with diverse cuts including roasts, chops, ribs, ground meat, and lard. Raise two pigs together rather than one, as paired pigs compete for feed, stay calmer, and produce better carcass quality.
Step-by-Step Butchering Process for Beginners
This sequence applies to most homestead animals. The tools and physical scale change between a chicken and a pig, but every step below happens in the same order.
Step 1: Withhold Feed
Stop feeding the animal 12 to 24 hours before slaughter. For poultry, 8 to 12 hours is enough. This empties the digestive tract and reduces the risk of gut contamination during evisceration. Water access should continue until the final hour.
Step 2: Humane Stunning and Kill
For pigs and larger livestock, a single firearm shot to the brain is the most reliable and humane method available to a homesteader. The animal loses consciousness instantly with no stress response. For poultry, a cervical dislocation or a sharp kill cone and bleed-out is standard practice. The goal in every case is speed: the faster the animal is rendered unconscious, the lower the stress hormones in the meat and the cleaner the bleed-out.
Step 3: Bleed Out
Immediately after the animal is down, cut the jugular vein and carotid artery at the base of the throat with your sticking knife. Hang the carcass on the gambrel if possible so blood drains by gravity into a bucket. Allow a full bleed-out of at least 5 to 10 minutes for small animals and longer for pigs. Do not rush this step. Retained blood in the meat promotes bacterial growth and darkens the final product.
Step 4: Skin or Scald
For poultry, dunk the carcass in scalding water and remove feathers by hand or with a mechanical plucker. For rabbits, make a cut around the hind legs and peel the hide down and off like a glove. For pigs, either scald and scrape the hair or skin the animal using a skinning knife, cutting through the hide in strips and peeling back from the fat layer. Skinning is slower but avoids the scalding setup entirely.
Step 5: Eviscerate
Open the abdominal cavity with a careful shallow cut along the belly, keeping the blade tip angled away from the gut sac. Remove the organs as a connected unit, keeping the intestines and stomach intact. Set aside the liver, heart, and kidneys if you plan to use them. Rinse the cavity with clean cold water and inspect for any contamination from gut contents. Any green or brown discoloration from digestive material must be trimmed away before the carcass goes any further.
Step 6: Chill
Get the carcass below 4°C as quickly as possible. In fall temperatures, hanging it in a shaded, ventilated area achieves this naturally. For chickens and rabbits, submersion in an ice-water bath brings the internal temperature down within an hour. For pigs, the carcass needs to hang overnight at a minimum before breaking down into primal cuts.
Pro tip: Invest in a probe thermometer and confirm internal carcass temperature before you begin cutting into primal sections. Cutting a carcass that is still warm accelerates bacterial growth and produces lower-quality meat. You are looking for a consistent internal reading below 4°C before any further processing.

Meat Aging and Chilling: The Step Most Beginners Skip
Aging meat is the practice of holding a carcass or primal cuts at temperatures between 1°C and 4°C for several days to allow natural enzymes to break down complex proteins in the muscle tissue. The result is more tender, more flavorful meat. This step is skipped by most beginners because it requires patience, but skipping it is a mistake you will taste in every roast and chop.
For beef or pork, aging for 5 to 7 days at the right temperature produces a meaningful improvement in tenderness. For venison or leaner animals with little fat cover, aging beyond a week risks drying out the exposed muscle, so a shorter hang time of 3 to 5 days is more appropriate. Aging is generally not worth doing for animals under a year old, as the meat is already naturally tender and the low fat content makes it prone to drying out.
The fall outdoor environment in Canada is ideal for this process. A shaded, ventilated barn or lean-to where temperatures hold consistently in the 1°C to 4°C range works perfectly as a natural aging space, with no refrigeration required. Check the carcass daily. The surface should develop a dry, firm pellicle (outer layer) which is normal and protects the meat beneath. Any sliminess, off odors, or mold beyond the surface indicates a problem and the affected area should be trimmed immediately.
Good air circulation matters as much as temperature. A carcass resting flat on a surface without airflow will develop surface moisture and spoil faster than one hanging freely with air moving around it.
Cutting, Wrapping, and Freezer Storage
Breaking down an aged carcass into individual cuts is where the learning curve steepens, but it is also where the practical payoff becomes real. You do not need a professional butcher’s layout to do this well. You need a clean cutting surface, sharp boning and breaking knives, a meat saw, and a clear plan for what cuts you want from the animal.
Basic Primal Breakdown
For a pig, the carcass is typically split along the spine into two halves. Each half breaks into four primal sections: shoulder, loin, belly, and leg (ham). From those primals, you cut individual roasts, chops, ribs, and belly slabs, and any trim goes into ground meat or sausage. For a beginner, following a simple diagram of the primal sections before you start is far more effective than trying to figure it out as you go.
Wrapping for the Freezer
Freezer burn is caused by air contact with exposed meat. Proper wrapping eliminates it. Wrap each cut tightly in butcher paper or plastic wrap first, then overwrap in freezer paper with the seam side down. Press out any air pockets before sealing. Vacuum sealing is superior if you have the equipment, as it extends freezer life significantly compared to paper wrapping. Label every package with the cut name, animal type, and date before it goes in the freezer. Unlabeled cuts are useless within two months when everything looks the same under frost.
Chickens and rabbits can be frozen whole or cut into pieces. Whole birds wrapped well keep for 9 to 12 months at a consistent freezer temperature. Pork cuts wrapped in freezer paper are best used within 6 months, though vacuum-sealed pork holds quality for closer to 12 months.
Comparing Common Homestead Butchering Methods
| Method | Best For | Key Advantages and Limitations |
|---|---|---|
| Skinning (no scalding) | Pigs, deer, goats, rabbits | No scalding equipment needed, faster setup, works for any size animal. The hide is not preserved for use. Easier for beginners on their first hog. |
| Scalding and Scraping | Pigs and poultry | Preserves the skin for crackling, roasting, and lard rendering. Requires a large scalding tank, precise water temperature, and more physical effort. Preferred when using every part of the animal. |
| On-Farm Mobile Processing | All livestock, especially for regulated sale | A licensed mobile slaughter unit handles the kill and bleed-out on your property, reducing animal stress from transport. Cuts are returned to you for processing. Useful where regulations require licensed slaughter for sale but you still want on-farm processing. |
Regulations and Legal Basics for Off-Grid Meat Processing in Canada
This is the section most fall butchering guides skip, and it is one that Canadian homesteaders cannot afford to ignore. Provincial regulations on on-farm slaughter vary, and the rules governing meat you can legally process for personal use differ from those covering meat you intend to sell or share outside your household.
In most Canadian provinces, slaughtering animals on your own property for personal or household consumption does not require a provincial license, provided the animals were raised on that property. The moment you sell, barter, or distribute that meat outside your immediate household, federal and provincial meat inspection requirements typically apply. Every province has its own framework, so confirming the rules in your specific province before processing is not optional.
The Canadian Food Inspection Agency (CFIA) oversees federal standards for meat intended for interprovincial sale or export, while provincial ministries of agriculture govern on-farm slaughter and local distribution rules. Some provinces have exemption programs for small farm operations that allow limited on-farm slaughter under specific conditions. Check your provincial ministry of agriculture website for the current rules in your area.
For those pursuing true off-grid meat processing as part of a self-sufficient lifestyle, processing animals for your own household is generally the least regulated activity. Building skills at that level first, before thinking about selling or sharing, is both the practical and legally straightforward starting point.
Frequently Asked Questions
What is the best outdoor temperature for fall butchering on the homestead?
The ideal outdoor temperature range for fall butchering is between 0°C and 4°C (32°F to 40°F). This range keeps the carcass cold enough to prevent bacterial growth while you work, functions as a natural aging environment, and eliminates the need for electric refrigeration during the chilling phase. Temperatures above 10°C significantly increase spoilage risk and should be avoided for outdoor processing.
Do I need to let the meat hang before cutting it up?
Yes, and this is one of the most important steps beginners skip. After slaughter, the carcass goes into rigor mortis, a state of muscle contraction that typically resolves within 12 to 24 hours. Cutting and freezing meat while it is still in rigor locks the muscle fibers in a contracted state, resulting in permanently tough meat. Wait until the rigor has fully passed before breaking down the carcass into cuts.
How do I keep the carcass clean during evisceration?
The key is keeping the gut sac completely intact when you open the abdominal cavity. Use a shallow, controlled cut along the belly with the blade tip angled away from the intestines. Work slowly and steadily. If the gut does rupture and digestive material contacts the meat, flush the area immediately with cold clean water and trim away any visibly contaminated tissue. Green or brown staining from gut contents cannot be rinsed away and must be cut out entirely.
Can I butcher a pig alone, or do I need help?
Technically possible, but strongly not recommended for a first-time butcher. A market hog at 100 kg or more requires multiple hands at the moment of slaughter, during the bleed-out, and when hoisting and securing the carcass. The safety risk of working alone with a firearm, a large animal, and a sharp knife is real. Invite an experienced butcher or a willing neighbor for your first pig and work as a team. The second time is much more manageable.
What parts of the animal should I prioritize saving as a beginner?
Start with the parts you will actually use. For a first pig, focus on getting clean pork chops, shoulder roasts, belly slabs, and a supply of ground trim. Once you are comfortable with those cuts, add ribs, hocks, and the ham in subsequent years. Organ meats, the head, trotters, and lard rendering are all valuable, but learning to do them well on your third or fourth butchering day is more realistic than trying to use every part on your first attempt.
Is home butchering legal in Canada for personal use?
In most Canadian provinces, slaughtering animals you raised on your own property for personal and household consumption is permitted without a provincial processing license. The rules change if you intend to sell, donate, or distribute the meat outside your immediate household. Provincial regulations vary significantly, so check with your provincial ministry of agriculture before processing any animal you plan to share or sell, even in small quantities to neighbors or through a farm gate.
How long can I store homestead-processed meat in the freezer?
Properly wrapped pork cuts hold good quality for approximately 6 months in a standard chest freezer. Vacuum-sealed pork can maintain quality closer to 12 months. Whole processed chickens wrapped well last 9 to 12 months. Ground meat degrades faster and is best used within 3 to 4 months. The key variable is consistent freezer temperature and airtight packaging. Freezer burn is a wrapping failure, not a temperature failure, and it ruins quality long before the meat is unsafe to eat.
If this is your first fall butchering season, share what animal you are starting with and what question is sitting at the top of your mind right now in the comments below.
References
- Step-by-step guide to processing and butchering a pig at home on the homestead
- Essential butchering equipment list for the self-reliant homesteader
- Oregon State University Extension guide to basic equipment for home meat processing
- Practical tips and animal selection advice for homestead meat butchering
- Food safety guidelines for aging and processing meat at correct temperatures
Leave a Reply