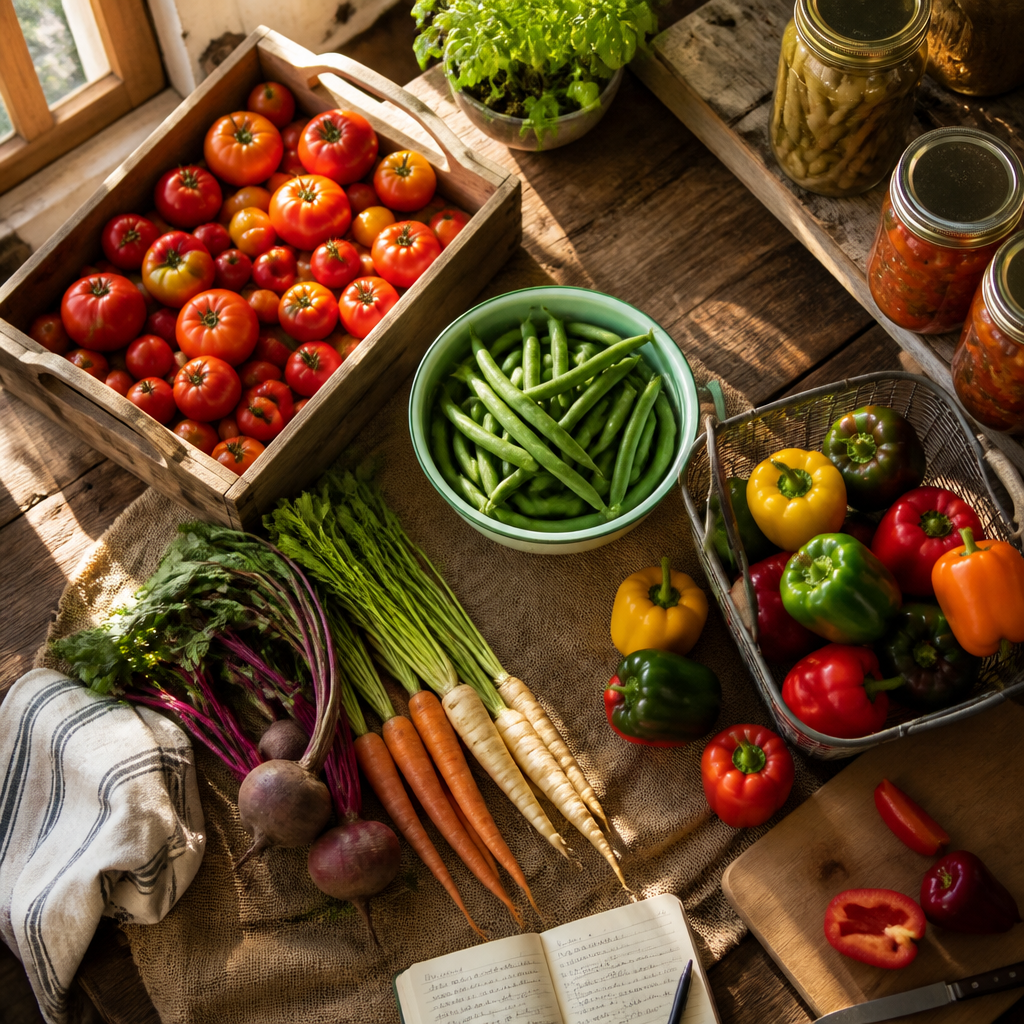
Most homesteaders figure out pretty quickly that a garden surplus is only useful if you can preserve it. Dehydrating vegetables off grid is one of the oldest, most space-efficient, and most forgiving preservation methods available, and you do not need a single watt of electricity to do it well. Whether you are running a wood stove through a Canadian winter or working under a blazing summer sun, there are at least seven solid methods to pull moisture from your harvest and lock in shelf-stable nutrition. This guide covers every practical approach, what each one does well, where each one fails, and how to pick the right method for your setup.
Table of Contents
- Quick Takeaways
- Why Dehydration Beats Other Off-Grid Preservation Methods
- Method 1: Direct Sun Drying
- Method 2: DIY Solar Box Dehydrator
- Method 3: Indirect Solar Cabinet Dehydrator
- Method 4: Wood Stove Drying
- Method 5: Air Drying and String Drying
- Method 6: Car Dash or Vehicle Heat Drying
- Method 7: Rocket Stove or Campfire Drying
- Comparing the 7 Methods Side by Side
- Preparing Vegetables for Any Dehydration Method
- Storing Dehydrated Vegetables Off Grid
- Frequently Asked Questions
- References
Quick Takeaways
| Key Insight | Explanation |
|---|---|
| Moisture content is the enemy | Vegetables must reach below 10% moisture to inhibit bacterial and mold growth. Limp, leathery texture is not enough – snap-dry is the target for long shelf life. |
| Solar dehydrators outperform open sun drying | An enclosed solar box dehydrator can reach 120°F to 150°F (49°C to 65°C) while protecting food from insects, dust, and rain. Open sun drying cannot match that consistency. |
| Wood stove drying is underused | The warm air circulating from a wood stove provides a steady, low-humidity drying environment, especially effective through the colder months when solar options are limited. |
| Uniform slicing is non-negotiable | Pieces cut to different thicknesses dry at different rates. Thicker pieces trap moisture and can rot while thinner ones are already done. Aim for ¼-inch (6 mm) slices. |
| Blanching extends shelf life for dense vegetables | Briefly boiling and cooling dense vegetables like carrots and green beans before drying deactivates enzymes that cause off-flavors and color loss during storage. |
| Airflow matters as much as heat | Without air movement, moisture re-condenses on food surfaces. Every method works best with ventilation – screens, vents, or spacing between pieces. |
| Dried vegetables take up a fraction of the storage space | Dehydrated produce occupies significantly less volume than fresh or canned equivalents, making off-grid storage in small root cellars or pantries far more practical. |
Why Dehydration Beats Other Off-Grid Preservation Methods
Canning requires jars, lids, heat, and exact processing times. Fermentation requires salt, temperature control, and monitoring. Root cellaring works only for certain vegetables and only until spring. Dehydration requires nothing more than heat and airflow, and the end product stores at room temperature for months or years without refrigeration.
Dried vegetables take up a fraction of the space of fresh or canned foods and need no special containers. For anyone managing food storage on a remote property, that compactness is a real advantage.
Dehydration is one of the oldest and most reliable preservation methods, and it does not require canning lids, freezers, or electricity. The food you dry takes up less space, lasts longer, and is easy to rehydrate for cooking.
The method also preserves nutritional value better than most people expect. Because dehydrating food uses low heat over time rather than high heat quickly, many vitamins and minerals survive the process intact.
Method 1: Direct Sun Drying
Direct sun drying is the most primitive version of this technique, and for good reason – it needs nothing you do not already have. You spread sliced vegetables on clean mesh screens or wooden racks, set them in full sun, and let the combination of heat and dry air do the work.
When it works and when it does not
Direct sun drying works well in hot, dry climates where daytime temperatures consistently exceed 85°F (30°C) and humidity stays low. It fails in humid regions or during overcast stretches. If you are in the humid Canadian interior or Pacific coast, do not count on open sun drying as your primary method.
The biggest practical risk is insects and dust. Cover trays with fine mesh or cheesecloth to keep flies off the food, and bring everything inside before dusk to prevent moisture reabsorption overnight.
Pro tip: Lay a piece of dark fabric or painted metal beneath your drying racks. The dark surface absorbs heat and radiates it upward, raising the effective drying temperature around the food without building any kind of enclosure.
Method 2: DIY Solar Box Dehydrator
A solar box dehydrator is a direct upgrade from open sun drying. The basic design is a shallow, glass- or plastic-glazed box with screened vents and mesh drying trays inside. Sunlight passes through the glazing, heats the interior, and warm air escapes through upper vents, pulling moisture with it.
Temperature and performance
A well-designed solar box dehydrator can reach temperatures between 120°F and 150°F (49°C to 65°C). These temperatures are sufficient to dehydrate most herbs, fruits, and vegetables effectively. Because the food is enclosed, it is protected from insects, rain, and dust while drying faster than it would in open air.
Building one requires basic carpentry. A rectangular frame, a sheet of plexiglass or salvaged window glass, metal mesh or screen for trays, and dark-painted metal or window screen for the absorber surface are the core materials. The total material cost is low, particularly if you are working with salvaged lumber.
Pro tip: Paint the interior walls and floor of your solar box dehydrator with flat black paint. Black absorbs more solar radiation than any other color, and that extra heat absorption measurably speeds up drying time, especially on partly cloudy days when every degree counts.


Method 3: Indirect Solar Cabinet Dehydrator
The indirect solar cabinet dehydrator is a more sophisticated design. It separates the solar collector from the drying chamber. A long, angled collector box lined with dark solar absorbers sits below and feeds pre-heated air into a vertical cabinet above, where food rests on stacked mesh trays.
Why indirect drying protects delicate vegetables
Because direct sunlight never touches the food, UV degradation of color and nutrients is reduced. The indirect design also produces more consistent temperatures across all trays, which means you get even drying results without rotating constantly.
The collector box draws in fresh air from the bottom, heats it over the absorbers, and routes it up into the drying chamber. Vents at the top of the cabinet allow the moisture-laden air to escape. This natural convection requires no fans and no electricity, yet it can process large volumes of food at once.
This design is the most practical for serious homestead food preservation. It handles large harvests, works in partially cloudy conditions better than a simple box dehydrator, and requires only basic tools to build from local lumber.
Method 4: Wood Stove Drying
For Canadian and northern homesteaders, wood stove drying is one of the most practical off-grid dehydration options available, and it is the method most people overlook. If you are already heating your home through the fall and winter with a wood stove, that radiant heat is a free drying resource.
How to set it up
The warm air circulating from a wood stove creates a steady dehydration force. You do not need special equipment. String a line or set a rack in the warm zone above or beside the stove, and hang or lay sliced vegetables there to dry slowly.
Onions, garlic, cayenne peppers, mushrooms, and herbs respond particularly well to this method. Slice them thin, spread them on a screen rack, and set the rack several feet above the stove top where the air is warm but not scorching. A consistent wood fire keeps the temperature in that zone predictable overnight.
The practical limitation is smell. Strong aromatics like onions and garlic will perfume your living space for the duration. That is a feature for some and an inconvenience for others. Plan accordingly.
Pro tip: Hang a thermometer in the drying zone near your wood stove. You want ambient air temperature between 95°F and 130°F (35°C to 54°C) for vegetable drying. If the rack is too close to the stove, the outside of the vegetable pieces will harden before the inside dries, trapping moisture and inviting mold.

Method 5: Air Drying and String Drying
Air drying, or string drying, works without any heat source at all. It relies entirely on low humidity, good airflow, and time. Vegetables and herbs are tied in bundles or threaded on strings and hung in a warm, well-ventilated space – a covered porch, a dry barn, a root cellar entrance, or an attic.
What works best with this method
This method is ideally suited to herbs, hot peppers, garlic, and small onions. These have naturally low moisture content and dry readily in moving air. Dense, high-moisture vegetables like zucchini or tomatoes are poor candidates for string drying alone because they will mold before they dry through without supplemental heat.
The key variable is humidity. In dry prairie climates, string drying is remarkably effective through late summer and fall. In coastal or humid regions, this method requires a consistently warm, dry indoor space or it simply will not work reliably.
Method 6: Car Dash or Vehicle Heat Drying
This one surprises people, but it is a legitimate technique with a practical track record among off-gridders who already use their vehicles. The interior of a vehicle parked in full sun can reach 130°F to 160°F (54°C to 71°C), which falls well within the effective dehydration temperature range for most vegetables.
Practical setup
Lay thin slices of vegetables on clean mesh trays or flat screens on the back seat or dashboard. Crack the windows slightly to allow moisture to escape and prevent the interior from becoming a humid sauna. Check and rotate food every few hours.
This method works best on hot, sunny days when you are not using the vehicle. It is a low-effort, no-build supplement to other methods, not a full-season primary strategy. It is particularly useful for processing small batches of tomatoes, mushrooms, or peppers during peak harvest when your other drying capacity is already full.
Method 7: Rocket Stove or Campfire Drying
If you already use a rocket stove for cooking or have a campfire running, you can use that heat for dehydration. Set up mesh trays or wire racks at a distance where the ambient temperature stays moderate, between 100°F and 140°F (38°C to 60°C). Direct flame contact will scorch and ruin the food.
Managing temperature without instruments
The practical challenge here is consistency. A campfire fluctuates in temperature constantly. Rocket stoves are more controlled, and their concentrated exhaust heat can be directed more predictably. Either way, this method requires more active monitoring than the others.
It works best as a fast-finish method. If you have vegetables that are mostly dry from a solar dehydrator but still have stubborn moisture at the center, a short session over a low rocket stove can complete the job without requiring another full day of sun.
Comparing the 7 Methods Side by Side
| Method | Best For | Key Limitations |
|---|---|---|
| Direct Sun Drying | Dry climates, thin slices, tomatoes, herbs | Insects, dust, humidity, inconsistent results |
| Solar Box Dehydrator | Most vegetables, medium batches | Requires build time, limited by cloud cover |
| Indirect Solar Cabinet | Large harvests, color-sensitive vegetables | More complex to build, larger footprint |
| Wood Stove Drying | Cold seasons, herbs, garlic, onions, peppers | Strong odors in living space, requires active fire |
| Air and String Drying | Herbs, hot peppers, garlic | Fails in humid climates, very slow for dense veg |
| Vehicle Heat Drying | Small batches, tomatoes, mushrooms | Inconsistent in cooler seasons, limited capacity |
| Rocket Stove or Campfire | Finishing partly-dried batches, emergency use | Temperature control difficult, constant monitoring |
Preparing Vegetables for Any Dehydration Method
No matter which method you use, preparation is where you win or lose the batch. Skipping these steps is the most common reason homesteaders end up with moldy or poor-quality dried vegetables.
Washing, slicing, and blanching
Wash all produce thoroughly and trim away any damaged spots. Cut vegetables to a uniform thickness of about ¼ inch (6 mm). Pieces cut thicker than this will trap moisture at the center while the surface appears dry. Pieces cut thinner tend to become too brittle and lose structural integrity when rehydrated.
Dense vegetables including carrots, green beans, corn, and broccoli benefit from blanching before drying. Blanching means briefly submerging them in boiling water for 2 to 4 minutes, then immediately transferring to cold water to stop the cooking. This deactivates enzymes that cause off-flavors and color loss during storage.
High-moisture vegetables like tomatoes, zucchini, and peppers do not require blanching. Slice them thin, pat them dry, and place them directly on your drying surface.
Knowing when vegetables are truly dry
The test for doneness is simple and reliable. Remove a piece and let it cool completely for a few minutes. A fully dehydrated vegetable will snap or crumble when bent, not bend and flex. If it bends, it still contains too much moisture and needs more time. This snap test prevents most spoilage in storage.
Pro tip: Condition your dried vegetables before final storage. After drying, place the batch loosely in a sealed glass jar for 7 to 10 days, shaking the jar once daily. If moisture condenses on the inside of the jar, the batch is not fully dry and needs more time. This step catches residual moisture before it causes mold in long-term storage.
Storing Dehydrated Vegetables Off Grid
Dehydrated vegetables stored in airtight glass jars, away from light and heat, will last 1 to 2 years with acceptable quality in most off-grid pantries. Metal tins and food-grade mylar bags sealed with oxygen absorbers extend that further. Avoid plastic bags for long-term storage because they are not fully moisture-proof over time.
Label every jar with the vegetable type and the drying date. It sounds obvious, but a pantry shelf full of unlabeled jars of similar-looking dried material becomes a problem within one season. Date your work as you go.
Keep your storage location cool, dry, and dark. A root cellar works well if it stays dry. A shaded interior shelf is better than a spot near a wood stove. Temperature fluctuations cause condensation cycles inside jars, which degrade quality faster than steady cool storage.
Frequently Asked Questions
What vegetables dehydrate best without electricity?
Tomatoes, hot peppers, mushrooms, garlic, onions, green beans, corn, and leafy herbs dehydrate consistently well using off-grid methods. Tomatoes and mushrooms are particularly forgiving because their cell structure releases moisture readily. Dense root vegetables like beets and carrots work well too but require blanching first and longer drying times.
How long does it take to dehydrate vegetables in a solar dehydrator?
Most sliced vegetables dry in 6 to 12 hours in a well-designed solar box dehydrator on a clear, sunny day. Denser vegetables or thicker slices may take 1 to 2 full days. Direct sun drying without an enclosure typically takes longer because temperatures are lower and airflow is less controlled. Always use the snap test to confirm dryness rather than relying on time alone.
Can you dehydrate vegetables in winter on an off-grid homestead?
Yes. Wood stove drying is specifically well suited to winter conditions. As long as you are running a fire for heat, the warm zone around the stove provides a consistent, low-humidity drying environment. This makes it possible to dry herbs, garlic, onions, and peppers harvested or purchased even in the depths of winter. Rocket stove drying is also viable year-round in covered outdoor spaces.
Is food dehydrated without electricity safe to eat?
Yes, provided the food reaches adequate drying temperatures and is dried to the correct moisture level. The target is below 10% moisture content, confirmed by the snap test. The drying method matters less than achieving that final dryness. Foods that feel leathery but still flex contain enough moisture to support mold growth over time. Always condition and test before committing a batch to long-term storage.
Do you need to blanch vegetables before dehydrating them off grid?
Dense, starchy vegetables benefit from blanching. Carrots, green beans, corn, broccoli, and similar produce should be briefly blanched to deactivate enzymes that cause color and flavor degradation during storage. Soft or high-moisture vegetables like tomatoes, peppers, zucchini, and leafy herbs do not need blanching. Skipping blanching on dense vegetables does not make them unsafe, but it will result in a product with dull color and diminished flavor after a few months in storage.
What is the biggest mistake people make when dehydrating vegetables off grid?
The most common mistake is declaring food “done” by appearance or feel before it has fully dried through. Pieces that look dry on the outside may still hold moisture at the center, especially if they were sliced unevenly. The second most common mistake is skipping the conditioning step before long-term storage. Both errors lead to mold in the jar and a lost batch. Use the snap test and always condition before sealing for storage.
How much shelf life do off-grid dehydrated vegetables actually have?
Properly dried and stored vegetables last 1 to 2 years at room temperature while retaining acceptable flavor and nutrition. Stored in airtight glass jars away from light and heat, quality holds up well through that window. Mylar bags with oxygen absorbers can extend shelf life further. Regardless of storage method, dried vegetables that smell off, show any sign of moisture or mold, or have developed a sticky texture should be discarded.
Have you tried any of these off-grid dehydration methods on your homestead? Share what has worked for you and what you would do differently.
References
- Step-by-step dehydrating food tips for off-grid and homestead food preservation
- How to build a DIY solar food dehydrator for homestead use
- Solar food dehydration and sun drying methods guide from Eartheasy
- Using a wood stove to dehydrate and rehydrate food on the homestead
- Off-grid dehydration methods overview including solar, oven, and air drying
Leave a Reply