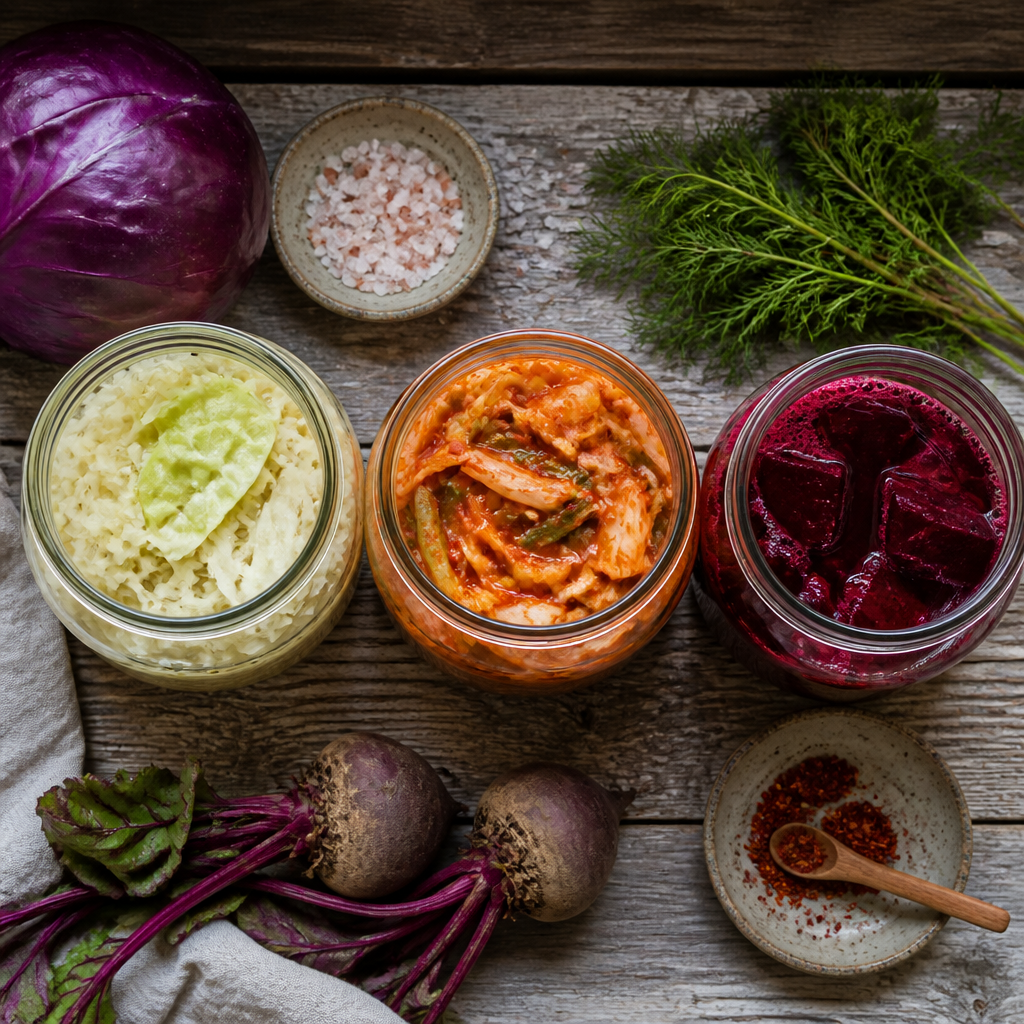
If your off-grid setup has no refrigerator, or a small one you cannot afford to fill with fermentation crocks, you do not have a preservation problem. You have a fermentation opportunity. Fermented foods off grid are not a workaround or a compromise. They are the original food preservation technology, refined over thousands of years specifically because there was no electricity. Sauerkraut, kimchi, and beet kvass can be made with cabbage, beets, salt, water, and a jar. They store for months without a single watt of power, and they deliver a density of probiotics, enzymes, and bioavailable nutrients that no canned good can match. This is the practical guide for homesteaders who want to ferment seriously and store confidently without relying on a fridge.
Table of Contents
- Quick Takeaways
- Why Lacto-Fermentation Belongs on Every Homestead
- Sauerkraut Without Refrigeration: The Method That Actually Works
- Kimchi Off Grid: Faster Ferment, Bigger Flavor
- Beet Kvass: The Forgotten Off-Grid Tonic
- Comparing Your Three Core Ferments
- Storing Ferments Without a Fridge: Root Cellars, Crocks, and Cool Corners
- Gut Health and Self-Sufficient Living: Why This Matters Beyond the Pantry
- Frequently Asked Questions
- References
Quick Takeaways
| Key Insight | Explanation |
|---|---|
| Salt is your refrigerator | The right salt ratio (roughly 2% by weight of vegetables) inhibits harmful bacteria while allowing Lactobacillus to proliferate, creating an acidic environment that preserves food without refrigeration. |
| Submerged brine is non-negotiable | Vegetables exposed to air above the brine will mold. Weight them down and keep them fully submerged throughout fermentation and storage. |
| Iodized salt kills your ferment | Iodine inhibits the lactic acid bacteria you need. Use sea salt, kosher salt, or pink Himalayan salt only. |
| A root cellar replaces a fridge for long-term storage | Finished ferments stored at 0 to 10°C (32 to 50°F) in a sealed jar will keep for six months to a year or more, with the cold slowing but not stopping fermentation. |
| Kimchi ferments faster than sauerkraut | The chili paste and aromatics in kimchi accelerate fermentation. Check flavor within 3 to 5 days at room temperature, not the 1 to 4 weeks typical for kraut. |
| Beet kvass is the simplest ferment on this list | Just chopped beets, salt, and water. No equipment beyond a mason jar. Ready in 2 to 3 days at room temperature and valuable as a daily digestive tonic. |
| Chlorinated tap water disrupts fermentation | City water or treated well water can inhibit lactic acid bacteria. Use well water, spring water, or water that has been left uncovered overnight to off-gas chlorine. |
Why Lacto-Fermentation Belongs on Every Homestead
Before modern canning and refrigeration, lacto-fermentation was how communities survived winter and kept nutrients dense through seasons when fresh produce disappeared. The process is chemically elegant: salt draws liquid out of vegetables, creating a brine in which Lactobacillus bacteria (already present on the vegetable surface) ferment sugars into lactic acid. That lactic acid drops the pH of the environment low enough to prevent spoilage pathogens from surviving, while the beneficial bacteria continue to thrive.
This is not just a quaint historical practice. For off-grid homesteaders managing their own nutrition without easy access to supplements or grocery stores, fermented foods deliver something no amount of pressure canning can. The lactic acid fermentation process preserves and often increases the bioavailability of vitamins, creates beneficial enzymes, and populates the food with live probiotic cultures that support gut health, digestion, and immune function.
The practical case is equally strong. Lacto-fermentation requires no fuel, no boiling water bath, no pressure canner, and no electricity. It requires salt, a vessel, and vegetables you likely already grow. For any homesteader investing in an organic garden or a root vegetable harvest, this is the most energy-efficient preservation method available.
Pro tip: If you are new to fermentation, start with a single quart jar of sauerkraut. You will spend under 20 minutes on preparation, learn how a healthy ferment looks and smells, and produce a product that keeps for months. There is no better entry point.


Sauerkraut Without Refrigeration: The Method That Actually Works
Sauerkraut is the most forgiving lacto-ferment for off-grid beginners. It requires two ingredients (cabbage and salt), no special equipment beyond a clean jar and a weight, and it handles a wide range of temperatures during the active fermentation phase. The finished product is one of the most shelf-stable fermented foods you can make.
The Basic Ratio and Method
Shred your cabbage finely, weigh it, and add approximately 2% of that weight in non-iodized salt. Massage the salt into the cabbage for 5 to 10 minutes until significant liquid is released. Pack it tightly into a clean jar, pressing down firmly so the cabbage sits beneath its own brine. If the brine is insufficient to fully submerge the cabbage after 24 hours, dissolve 1 teaspoon of sea salt in 1 cup of filtered or well water and add just enough to cover.
Weight the cabbage down with a clean stone, a small jar filled with water, or a zip-lock bag filled with brine. The surface must remain submerged throughout fermentation. Cover the jar loosely (a cloth, a loose lid, or an airlock lid) to allow CO2 to escape while keeping dust and insects out.
Temperature and Timing Without a Fridge
Active fermentation at room temperature (18 to 24°C / 65 to 75°F) typically takes 1 to 4 weeks depending on your ambient temperature and how sour you want the final product. Cooler temperatures produce a more complex, slower ferment. Warmer temperatures speed things up but can produce a mushier texture if left too long.
A common mistake is pulling the kraut too early because fermentation has slowed down. Slowing activity (fewer bubbles) does not mean the ferment has failed. It means the pH has dropped enough that the bacteria are producing acid more slowly. Taste it weekly and move it to cold storage when the flavor is where you want it.
Pro tip: For off-grid storage without a refrigerator, increase your salt ratio slightly to 2.5% by weight. The slightly higher salinity slows over-fermentation during warmer storage conditions and gives you a wider margin for holding the kraut at its peak flavor in a root cellar or cool pantry corner.
Kimchi Off Grid: Faster Ferment, Bigger Flavor
Kimchi is not just a Korean pantry staple. For off-grid homesteaders, it is a way to preserve napa cabbage, radishes, green onions, and whatever aromatics you have on hand in a single batch that ferments quickly and keeps well. The fermentation is faster than sauerkraut, the flavor range is broader, and the ingredient flexibility is real.
What You Need (and What You Can Substitute)
Traditional kimchi includes napa cabbage, Korean chili flakes (gochugaru), garlic, ginger, fish sauce or salted shrimp, and green onions. On a homestead where you may not have access to specialty Korean ingredients, you can substitute dried chili flakes for gochugaru, omit the fish sauce entirely (the ferment will still work, just milder and vegan-friendly), and add shredded daikon radish if you grow it.
The salt brine step is critical and different from sauerkraut. Quarter or roughly chop the napa cabbage, toss it in a generous amount of salt (more than the sauerkraut ratio), and let it sit for 1 to 2 hours until it has wilted significantly and released liquid. Rinse well, squeeze dry, then coat thoroughly in your chili paste mixture. Pack tightly into a jar, pressing down to submerge under brine.
Fermentation Timeline and Off-Grid Storage
At room temperature, kimchi typically reaches a pleasantly tangy fermentation in 3 to 5 days, significantly faster than sauerkraut. The chili, garlic, and ginger all contribute antimicrobial compounds that create a more complex fermentation environment. Check the flavor daily once bubbling begins. A common mistake is waiting as long as you would for kraut and ending up with a very sour, soft batch.
Once fermented to your taste, move the kimchi to your coolest storage location. A root cellar, unheated outbuilding, or even a buried crock will dramatically slow continued fermentation and hold it at peak flavor for months. The older the kimchi gets, the more deeply sour it becomes, which is actually desirable for cooking (soups, stews, grain porridge) even when it is past peak eating-fresh quality.

Beet Kvass: The Forgotten Off-Grid Tonic
Beet kvass is the least known of the three ferments covered here, and that is a mistake worth correcting. It requires less preparation than either sauerkraut or kimchi, produces a liquid probiotic tonic rather than a condiment, and makes excellent use of beets. Beets grow reliably in Canadian and northern climates, store easily through winter in a root cellar, and provide a fermentation substrate that is rich in natural sugars, nitrates, and earthy mineral compounds.
How to Make Beet Kvass
Scrub two to four medium beets well. You do not need to peel them unless they are not organically grown. Chop them into rough cubes, roughly filling one third of a quart mason jar. Do not grate or juice them. The surface area matters, but too much will cause the ferment to turn alcoholic rather than acidic. Add 1 to 2 tablespoons of non-iodized sea salt, then fill with filtered or well water to within an inch of the top.
Cover loosely and leave at room temperature for 2 to 3 days. You will see light bubbling and the liquid will turn a deep jewel-red. Taste it. It should be earthy, lightly salty, and pleasantly tangy. If it is still flat after 3 days, your beets may be old or your water too cold. Adding a tablespoon of brine from an active sauerkraut batch will kick-start the fermentation reliably.
How to Use and Store Kvass Off Grid
Strain off the liquid and drink a small glass (roughly 100 to 150 ml) as a daily digestive tonic, first thing in the morning or before meals. You can also use beet kvass as a base for soups, salad dressings, and grain-cooking liquid in place of stock. The beets themselves can be eaten after the first fermentation cycle.
The liquid can be stored in a cool cellar in a sealed jar for several weeks. The beet pieces can be refilled with fresh salted water for a second, milder batch. After the second batch, the beets are spent and should go to the compost. If you see white foam on the surface, that is almost certainly harmless kahm yeast. Skim it off and continue. Visible mold growth (fuzzy, colored) is the signal to discard and start again.
Comparing Your Three Core Ferments
Choosing which ferment to prioritize depends on your garden output, available storage conditions, and how you plan to use the finished product. Here is a direct comparison of the three ferments covered in this guide.
| Ferment | Active Ferment Time (Room Temp) | Key Ingredient Requirements | Best Off-Grid Storage Method | Primary Nutritional Role |
|---|---|---|---|---|
| Sauerkraut | 1 to 4 weeks | Cabbage, non-iodized salt only | Sealed jar in root cellar (0 to 10°C); keeps 6 to 12+ months | Probiotics, vitamin C, digestive enzymes, fiber |
| Kimchi | 3 to 5 days | Napa cabbage, chili, garlic, ginger, salt; fish sauce optional | Packed crock or sealed jar in cool cellar; keeps 3 to 6 months | Probiotics, vitamins A and C, antimicrobial compounds, gut diversity |
| Beet Kvass | 2 to 3 days | Beets, non-iodized salt, filtered water | Sealed jar in cool location; drink within 2 to 3 weeks for best flavor | Probiotics, beet-derived nitrates, digestive tonic, liver support |
Storing Ferments Without a Fridge: Root Cellars, Crocks, and Cool Corners
The single biggest mistake off-grid fermenters make is treating the lack of refrigeration as a problem to apologize for. It is not. Finished lacto-ferments stored in cool conditions (between 0 and 10°C / 32 to 50°F) will keep for many months and in some cases over a year. The cold slows the fermentation organisms but does not stop them, so the food continues to develop flavor slowly. Your root cellar, unheated basement, or a buried crock is doing exactly what a dedicated kimchi refrigerator does, for free.
The Buried Crock Method
Traditional cultures across northern climates buried large earthenware crocks in the ground to maintain a stable, cool temperature through summer and winter. A crock buried to a depth of 60 cm or more in a shaded location holds a remarkably stable temperature. This is one of the most reliable off-grid ferment storage solutions available, especially for large batches of sauerkraut or kimchi you plan to eat over an entire winter.
Cool Pantry and Root Cellar Management
If you have a root cellar, store finished ferments in sealed glass jars on the lowest, coolest shelves. Keep them away from ethylene-producing produce (apples, pears) which can affect flavor. Inspect jars monthly: brine should remain clear or slightly cloudy, not dark or slimy. The vegetables should remain below the brine level. If a jar lid has bulged significantly and does not release gas when opened slowly, that batch should be discarded.
For homesteaders without a proper root cellar, the coolest corner of a north-facing room, an insulated box buried in a shaded garden bed, or an unheated mudroom in a Canadian winter can all serve as functional cool storage. The key variable is temperature stability, not perfection.
Pro tip: After your ferment is at the flavor you want, transfer it to a smaller jar that is completely full with no headspace before moving it to cool storage. Air exposure at the top of a jar is the most common cause of surface mold and degraded flavor during long-term storage. A full, sealed jar keeps dramatically better than a half-empty one.
Gut Health and Self-Sufficient Living: Why This Matters Beyond the Pantry
For homesteaders and off-grid households managing their own health without easy access to medical care, gut health and self-sufficient living are not separable topics. The gut microbiome influences digestion, immune response, mental health, and the body’s ability to absorb nutrients from the whole foods you grow and eat. Lactic acid bacteria found in lacto-fermented vegetables, including multiple species of Lactobacillus, are well-documented in scientific literature for their role in supporting these systems.
Research published in peer-reviewed journals identifies Lactobacillus species as among the most important probiotic organisms for maintaining gut microbiota stability, resisting colonization by pathogens, and modulating immune response. The practical implication for a homesteader is this: a daily serving of raw, unpasteurized lacto-fermented vegetables is delivering live bacteria directly to your digestive system in a way that no heat-processed, shelf-stable product can replicate.
The fermentation process creates lactic acid, a natural preservative, and produces a living food full of enzymes and beneficial microbes that support the gut in ways that pasteurized or canned products cannot.
It is worth being direct about what fermented foods are not. They are not a cure for diagnosed digestive conditions, and they are not a substitute for medical care when it is genuinely needed. What they are is a reliable, low-cost, self-produced source of dietary probiotics that fits exactly into the nutritional philosophy of a self-sufficient household. When your nutrition plan includes lacto-fermentation homestead production at scale, you are building food security and gut health simultaneously, with the same jar of cabbage and salt.
For homesteaders who also forage wild greens, grow organic vegetables, or raise animals for dairy, the benefits compound further. Adding a few tablespoons of whey from raw milk or yogurt to a vegetable ferment inoculates it with additional beneficial bacteria. Wild-harvested greens that have not been sprayed carry their own surface microorganisms. The diversity of fermentation inputs you have access to on a working homestead is genuinely richer than what most commercial fermentation operations use.
Frequently Asked Questions
How long can sauerkraut be stored without refrigeration?
A properly made sauerkraut, with adequate salt, vegetables fully submerged in brine, stored in a sealed jar at 0 to 10°C (32 to 50°F) in a root cellar or cool storage, will keep for six months to a year or more. The critical factors are brine coverage, temperature stability, and using enough salt (at least 2% by weight). Sauerkraut at warmer ambient temperatures will continue to ferment and acidify, eventually becoming very sour but not dangerous as long as the brine remains intact.
What is the correct salt ratio for lacto-fermentation?
For most vegetable ferments, a ratio of approximately 2% salt by weight of the vegetables is standard. For off-grid storage without refrigeration, slightly higher ratios of 2 to 2.5% provide a wider safety margin. Always use non-iodized salt. Iodized salt inhibits the lactic acid bacteria responsible for fermentation and can prevent a healthy ferment from developing. Sea salt, kosher salt, and pink Himalayan salt are all suitable choices.
Can I make kimchi without specialty Korean ingredients?
Yes. The essential elements of kimchi are salted and rinsed napa cabbage, a chili-based paste, garlic, and ginger. Korean chili flakes (gochugaru) produce the most traditional flavor, but any dried chili flakes will work for a functional ferment. Fish sauce and salted shrimp can be omitted entirely for a vegan version. The fermentation biology does not depend on these ingredients; they contribute flavor and some additional fermentation compounds, but the lactic acid process will proceed without them.
Is beet kvass safe if it smells strongly earthy or fermented?
Yes. Beet kvass has an earthy, tangy, and sometimes mineral-forward aroma that surprises people who are used to milder ferments. A strong earthy smell combined with a cloudy red liquid and light sourness on the palate is normal and indicates a healthy ferment. The signals that indicate a problem are visible mold growth (fuzzy and typically colored green, black, or pink), a strongly putrid or rotten smell (distinct from earthy and sour), or a slimy texture in the liquid. White foam on the surface is almost always harmless kahm yeast and can be skimmed off.
Can I ferment vegetables without any special equipment?
Absolutely. All three ferments in this guide require nothing beyond a clean glass jar, non-iodized salt, and the vegetables themselves. A weight to keep vegetables submerged can be improvised from a zip-lock bag filled with brine, a smaller jar, or a clean stone. Airlock lids are useful but not necessary; a cloth cover or loosely placed lid that allows gas to escape works for active fermentation. The only equipment investment worth making if you plan to ferment at scale is a large ceramic crock, which enables batch sizes that will carry a household through winter.
Why does my sauerkraut have white film on top?
White film or white foam on the surface of a ferment is almost always kahm yeast, a harmless wild yeast that develops when vegetables are slightly exposed to air or when fermentation is proceeding slowly in a warm environment. It is not mold. Skim it off with a clean spoon, ensure your vegetables are fully submerged below the brine, and continue. If you see fuzzy growth in colors other than white (gray, green, black, pink), that is actual mold and the batch should be discarded. Kahm yeast affects flavor slightly but poses no health risk.
Have you experimented with fermented foods on your off-grid homestead, and what has worked best for long-term storage through your winters? Share your experience in the comments.
References
- Traditional lacto-fermented vegetable methods for homestead food preservation without refrigeration
- How to store lacto-fermented vegetables long-term without a refrigerator
- Guidelines for storing fermented foods in cool cellars and cold storage
- Practical sauerkraut storage methods using root cellars and sealed jars
- Peer-reviewed research on probiotic bacteria health benefits and gut microbiota support
Leave a Reply