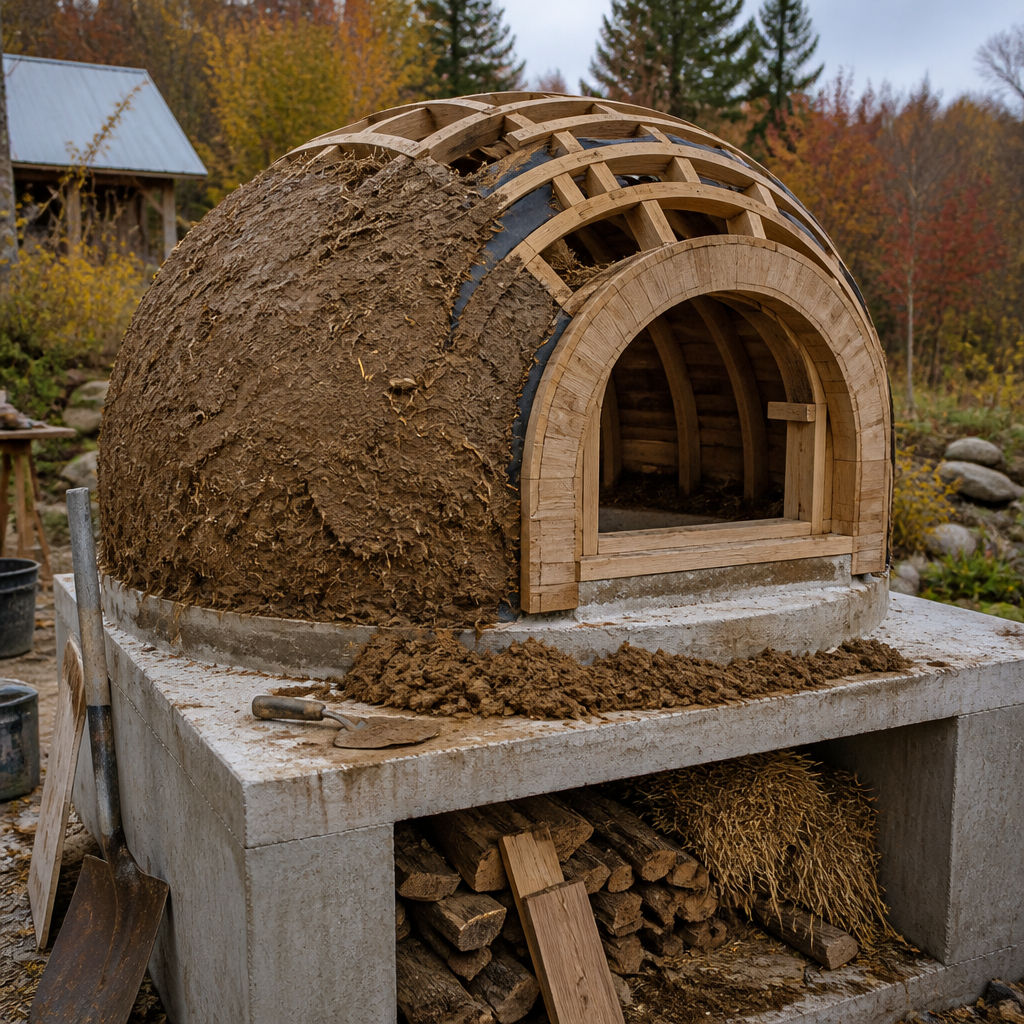
Most off-grid homesteaders discover the same thing the hard way: when the power is out, the propane runs low, or the grid simply never showed up, there is no reliable fallback for baking bread at scale. A Dutch oven on a campfire is fine for a loaf once in a while, but it is not a system. An outdoor wood fired oven DIY project is exactly that: a permanent, low-tech, fuel-flexible baking infrastructure you can build before the first hard frost and use for decades. Build it now, in the shoulder season, so it has time to cure fully before winter. Then use it all year, including in a Canadian winter, with the right shelter and firing approach.
Table of Contents
- Quick Takeaways
- Why Build Before Winter, Not After
- Choosing Your Oven Design: Cob, Brick, or Hybrid
- Materials and Sourcing for Your Off-Grid Build
- Step-by-Step Build Process
- Curing and First Fires: Do Not Rush This
- Year-Round Use in Cold Climates
- Oven Type Comparison: Cob vs. Firebrick vs. Hybrid
- Frequently Asked Questions
- References
Quick Takeaways
| Key Insight | Explanation |
|---|---|
| Build in late summer or early fall | The cob dome needs 4 to 6 weeks of warm, dry weather to cure before it can handle the thermal shock of a full firing. Rushing the cure in wet autumn conditions causes cracking that compromises the dome. |
| The firebrick hearth is non-negotiable | The floor of the oven takes more punishment than any other part. Standard red brick will eventually crack under repeated thermal cycling at high temperatures. Firebrick is denser and handles the heat correctly. |
| Insulation under the hearth is as important as insulation above it | Without 4 to 6 inches of insulating material under the firebrick floor, heat drains into the foundation and your fuel consumption doubles. Use perlite, vermiculite, or even empty glass bottles set in a clay-sawdust mix. |
| The dome-to-door height ratio controls draft and heat | The door opening should be roughly 63 percent of the interior dome height. Get this wrong and you will fight smoke or lose heat every single firing. |
| A permanent roof shelter doubles oven lifespan | Rain is the primary cause of cob oven failure. A simple 4-post corrugated metal roof over the oven keeps it dry between firings and makes winter use practical in Canadian conditions. |
| Hardwood species determine heat output and burn time | Dense hardwoods like oak, maple, and ash produce a sustained coal bed at high temperature. Softwoods ignite faster but burn too quickly for the long heat-up a bread bake requires. Use softwood only to start the fire. |
| One firing feeds multiple baking rounds | Because the thermal mass stores heat for hours after the fire is removed, a single two-hour firing can yield a pizza session, then two or three loaves of bread as the oven descends through temperature ranges. Plan your baking order around descending heat. |
The economics of a wood fired oven on a homestead are straightforward once you stop treating it as a luxury and start treating it as infrastructure. A well-insulated cob oven built from local materials can cost under $100 in purchased supplies if you source clay, sand, and straw from your own land or nearby. The real cost is time, spread over a few weekends. That time investment, made before freeze-up, pays back in every loaf of bread and every pizza you pull from it for the next ten or twenty years of off grid baking.


Why Build Before Winter, Not After
The instinct is to wait: wait until spring, when the ground thaws and the weather cooperates and you have more energy after a long heating season. That instinct costs you a full year of use and, more importantly, it ignores how cob cures.
Cob is a mix of clay, sand, and straw. When you build the dome, it is essentially wet mud packed into shape around a sand form. It needs to dry slowly and thoroughly, which means weeks of ambient warmth and low humidity. A dome built in late August or early September in most of Canada will dry correctly before the rains of October arrive. A dome built in April sits through wet spring weather and dries unevenly, which causes surface cracking that you then spend the first season patching.
Building before winter also gives you the shelter installation window. You want the oven covered before the first snowfall, not after. Snow sitting on an uncured or newly cured cob dome is not catastrophic, but repeated freeze-thaw cycles in the outer cob layer will open cracks faster than anything else. Get the roof up while you can still work comfortably outside.
Pro tip: Mark your build start date by counting backward from your first expected hard frost. You need at minimum six weeks of above-freezing daytime temperatures after the final cob layer goes on. In most of central and northern Canada, that means a late July or August start date is ideal.
Choosing Your Oven Design: Cob, Brick, or Hybrid
Three design approaches dominate the DIY wood oven world, and each makes different tradeoffs that matter on an off-grid homestead. The right choice depends on what you have available, how often you plan to fire the oven, and how much you value longevity versus speed of build.
Pure Cob Oven
A cob oven uses clay mixed with sand for the thermal mass dome, with a separate outer insulating layer made from clay, sand, and a high proportion of straw or sawdust. The floor is set on firebricks laid over an insulation base. The dome is shaped over a wet sand form, which is scooped out once the cob dries. This is the fastest and cheapest build, uses almost entirely natural and often on-site materials, and produces a highly functional oven. A well-built example produces an interior 24 to 26 inches across and bakes two to three loaves per firing.
The downside is durability under freeze-thaw cycling. Without a good permanent shelter and a well-applied outer lime or earthen plaster finish, a pure cob oven in a cold Canadian climate will need patching every one to two years. That is manageable work, but it is work.
Full Firebrick Oven
A firebrick oven is built entirely from firebrick and refractory mortar. It is more durable under repeated high-temperature firings, handles freeze-thaw better than raw cob, and can be pushed to higher temperatures more aggressively. The tradeoff is cost: firebrick runs considerably more than raw clay and sand, the build requires more masonry skill, and construction time is longer. For a homesteader who intends to fire the oven multiple times per week year-round, firebrick is worth the investment.
Hybrid Oven
A hybrid oven uses firebrick for the floor and the first few courses of the dome walls, then transitions to cob for the upper dome and insulating outer shell. This approach gives you the durability where the thermal stress is highest (the floor and lower dome walls) while keeping the build accessible and affordable. It is the design most experienced off-grid builders settle on because it combines the practical strengths of both approaches without the full cost of an all-brick build.
Materials and Sourcing for Your Off-Grid Build
Getting your materials sourced before you start is the single biggest factor in whether your build finishes before cold weather arrives. A half-built oven that sits open through an October rainstorm is a problem you do not want.
Clay
If your property has clay-heavy soil, dig it and use it. Test it first: roll a small amount between your palms into a pencil-thick rope. If it holds together cleanly without crumbling, the clay content is sufficient. You can also use bagged fire clay from a masonry supply store, which gives you consistent quality but adds cost. The standard thermal mass mix ratio is roughly 1 part clay to 3 parts sand, though the exact ratio depends on your clay’s composition. If your initial test bricks crack heavily as they dry, add more sand.
Sand
Use coarse builder’s sand or masonry sand, not fine play sand. Fine sand packs too tightly and does not give the mix the right texture. A standard cob oven build requires roughly half a cubic yard of sand for the mix plus additional sand for the dome form itself.
Firebrick and Insulation
You need medium to high-duty firebricks for the hearth floor. These are denser than standard red clay brick and handle repeated temperature cycling without spalling. For the insulation layer beneath the hearth, perlite or vermiculite mixed with Portland cement works well. Alternatively, empty wine or beer bottles laid on their sides and packed in a clay-sawdust mortar create an effective and zero-cost insulating layer. Four to six inches of insulation between the firebrick floor and the foundation is the minimum for efficient heat retention.
Straw
Dry straw is added to the outer insulating cob layer. It acts as a fiber reinforcement that knits the mix together and adds insulating value by trapping air in its hollow stems. Use dry, clean straw, not hay (hay contains seeds and breaks down faster). Two bales is usually enough for a standard oven.
Pro tip: Source your sand and clay first, do the test brick before any other work, and let the test bricks dry for a full week before judging the mix. Making a small adjustment to the clay-to-sand ratio on paper is free. Rebuilding a cracked dome is not.
Step-by-Step Build Process
The build follows a logical sequence from the ground up. Do not skip steps or reorder them. Each layer needs to be complete and partially set before the next one goes on.
Step 1: Foundation
Build a solid, level base at a working height of roughly 36 to 40 inches. Stacked cinder blocks, urbanite (broken concrete), or dry-stacked stone all work. The foundation does not need to be mortared if it is well packed and level, but a mortared base is more stable for a permanent installation. Size the top of the foundation to accommodate the oven floor footprint plus a few inches around the perimeter for working space.
Step 2: Insulation Layer and Firebrick Hearth
On top of the foundation, build your insulation layer to at least 4 inches of depth using perlite, vermiculite, or glass bottles in clay-sawdust mortar. This layer is critical. Without it, heat from the firebrick floor drains into the masonry below and you consume far more wood to reach baking temperature. Level the insulation layer precisely, then lay your firebricks dry on top, butted tightly together with no mortar between them. The lack of mortar between hearth bricks allows for minor thermal expansion without cracking.
Step 3: Sand Form
Dampen your coarse sand and mound it on the hearth into a dome shape. The interior of a good bread oven is typically 24 to 26 inches across and about 16 inches high at the crown. For a pizza-focused oven, widen the base to 32 to 36 inches and keep the dome height lower, around 12 to 14 inches. Pack the sand form firmly. Cover it entirely with wet newspaper, which will signal where the sand ends and the cob begins when you dig it out later.
Step 4: Thermal Mass Layer
Mix your thermal cob at a 1 part clay to 2 or 3 parts sand ratio, with enough water to make a stiff but workable mix. Apply it over the newspaper-covered sand form at 3 to 4 inches of thickness throughout. Work from the base up toward the crown, pressing firmly so there are no voids. Score the surface lightly before it sets to help the insulating layer bond.
Step 5: Insulating Outer Layer
Mix a looser, straw-heavy cob for the outer insulating layer. The proportion of straw goes up significantly here: you want a mix that is visibly fibrous. Apply this in a 3 to 4 inch layer over the thermal mass layer. This outer layer is what keeps heat inside the dome during the long baking window after the fire is removed. Do not skip it in the interest of speed.
Step 6: Door Opening and Door
Cut or carve the door opening before the cob has fully hardened. The door height should be approximately 63 percent of the interior dome height. For a 16-inch dome, that means a door opening of roughly 10 inches high. Width is typically 14 to 16 inches. Cut a wooden door from hardwood at least 2 inches thick, shaped to fit the opening with a slight gap for airflow. The door is used to retain heat during baking after the fire is raked out, not during the fire itself.

Curing and First Fires: Do Not Rush This
Curing is where most first-time builders make their biggest mistake. The dome looks done, the weather is warm, and the temptation to fire it up immediately is strong. Resist it completely.
The cob dome needs to lose all its structural moisture before it can handle fire. That process takes at minimum two to four weeks of open-air drying in warm weather. Cracking during drying is normal and expected at the surface. Small surface cracks, up to about 3 mm wide, can be filled with a thin clay slip and are not a structural problem. Large cracks that go deep through the thermal mass layer need to be addressed before firing by wetting and repacking them with fresh cob.
Once the dome is dry to the touch throughout, begin a series of small curing fires. Start with a handful of kindling, not a full fire. Run four to six progressively larger fires over several days, each one burning a bit longer and hotter than the last. This drives out the remaining moisture in stages and prevents the steam pressure from popping the dome. After the curing sequence, you will often see the surface crack slightly more. Seal those cracks with clay slip before your first real bake.
The oven will remain warm and at a consistent temperature for hours after the fire is removed. One fire cooks an abundance of food before the oven cools down. That is the entire point of thermal mass: you are not just burning wood, you are charging a heat battery.
Year-Round Use in Cold Climates
A cob oven built under a permanent shelter works in winter. It requires adjustment, but it works. Canadian off-grid homesteaders using wood fired ovens through winter report that cold ambient temperatures simply mean more wood and longer firing times, not an inability to bake. The physics are the same: you are heating a thermal mass until it reaches baking temperature, and the mass holds that temperature regardless of what is happening outside.
What Changes in Winter
In cold weather, the oven walls start cold and take longer to reach baking temperature. A summer firing might bring the dome up to temperature in 90 minutes. In winter, plan for two to two-and-a-half hours. Use denser hardwood like oak, maple, or ash for the sustained coal bed needed to push the dome temperature. Dense hardwoods produce the long-burning heat that thermal mass baking requires. Softwoods like pine or spruce ignite fast and are useful for starting the fire, but they burn too quickly to build the deep heat a bread bake needs.
Shelter Design for Canadian Winters
A simple four-post corrugated metal roof is the minimum effective shelter. It keeps snow off the dome and keeps rain from saturating the cob between firings. Without a roof, a cob oven in a high-precipitation or high-snowfall area degrades rapidly. The shelter does not need to be elaborate: four pressure-treated posts, a simple frame, and corrugated steel roofing panels is a one-day construction project that extends the oven’s functional life by years. If you want to push winter use further, add a windbreak on the prevailing wind side to cut heat loss from the door area during firing.
Seasonal Baking Strategy
For wood oven build Canada purposes, the most efficient use pattern treats the oven as a batch processor, not a daily appliance. In autumn, fire twice a week and use the descending heat sequence deliberately: pizza or flatbread first at the highest temperature right after the fire is raked out, then bread loaves as the dome cools to 400 to 450 degrees Fahrenheit, then slow-roasted root vegetables or dried herbs as the temperature drops further. This approach extracts maximum food value from every firing and keeps baking costs extremely low. In winter, reduce to once a week and plan larger batches.
Pro tip: Keep a simple surface thermometer, either an infrared point-and-shoot or an oven thermometer placed inside, so you are actually tracking dome temperature rather than guessing. Knowing that the dome is at 700°F versus 450°F versus 300°F changes exactly what goes in and when. Guessing costs you overbaked or underbaked results and wastes fuel.
Oven Type Comparison: Cob vs. Firebrick vs. Hybrid
| Feature | Pure Cob Oven | Full Firebrick Oven | Hybrid Cob-Brick Oven |
|---|---|---|---|
| Approximate materials cost | Under $80 if clay is on-site | $300 to $600+ depending on brick quantity | $100 to $200 for most builds |
| Build time (weekends) | 2 to 3 weekends | 4 to 6 weekends | 3 to 4 weekends |
| Skill level required | Beginner friendly | Masonry experience helpful | Beginner to intermediate |
| Freeze-thaw durability | Moderate, requires shelter and annual patching | High, minimal maintenance if built correctly | Good, especially with lime plaster finish |
| Maximum temperature | 700 to 750°F achievable | 900°F+ possible | 700 to 800°F typical |
| Best use case | Bread, roasting, occasional pizza | High-frequency use, pizza focus | Bread, pizza, all-purpose homestead baking |
| Off-grid materials accessibility | Excellent, most materials are on-site | Requires purchasing firebrick and mortar | Good, only hearth bricks need purchasing |
For most cob oven homestead applications in Canada, the hybrid approach is the practical winner. It uses the durability of firebrick where it matters most (the floor) and the low-cost natural building approach for everything else. The pure cob oven is the right choice if you want to build this weekend with what is already on your property. The full firebrick oven makes sense only if you plan to fire the oven three or more times per week over a long season, a use pattern more common in small-scale commercial baking operations than on a typical homestead.
Frequently Asked Questions
How long does a DIY cob oven last?
A well-built cob oven under a permanent shelter with a good outer lime or earthen plaster finish can last ten to twenty years with minimal maintenance. Without a shelter, freeze-thaw damage in a Canadian climate will require annual patching and can cause structural failure within five years. The firebrick hearth floor typically outlasts the dome by many years. The dome is the part that needs periodic repair, not the foundation or the floor.
Can I bake bread in a wood fired oven in winter in Canada?
Yes. The oven itself functions the same way regardless of outdoor temperature. What changes is the firing time and wood consumption. In cold weather, the dome takes longer to reach baking temperature and you will use more wood to get there. Plan for roughly 30 to 60 extra minutes of firing time in freezing conditions compared to summer. A shelter that blocks wind and precipitation makes winter use significantly more comfortable and efficient.
What is the correct clay-to-sand ratio for the thermal mass layer?
The standard starting ratio is 1 part clay to 2 to 3 parts coarse sand by volume. The exact right ratio depends on your clay’s composition, specifically how much silt it contains. If your test bricks crack heavily during drying, add more sand. If they crumble and feel weak, add more clay. Always make test bricks and let them dry fully before committing to the mix. This step takes one extra day and saves you from rebuilding a cracked dome.
Do I need firebricks for the whole oven or just the floor?
For a cob or hybrid oven, firebricks are essential for the floor and beneficial for the first course or two of the lower dome walls. The upper dome can be built from cob. Firebricks on the floor handle the direct contact with burning wood and scraping from a peel, which standard red brick cannot do reliably over many firings. The dome walls experience radiant heat rather than direct contact, which cob handles well. Using firebrick throughout the dome is an option but adds cost without proportional benefit on a homestead-use oven.
How do I use the oven after the fire is out?
Rake out the live coals and embers into a metal ash pan. Brush the hearth floor clean with a wet rag or a damp natural fiber brush. Check the dome temperature and insert your baking items. Place the wooden door in the opening to trap heat inside. The thermal mass releases stored heat evenly over the next two to four hours, dropping through temperature ranges that suit different foods in sequence. Pizza and flatbread go in first when the dome is hottest, bread goes in as it drops to 400 to 500°F, and long slow-cook items like baked beans or roasted root vegetables go in last as the heat settles below 300°F.
How do I protect a cob oven between firings in a wet climate?
A permanent roof shelter is the best protection and should be considered part of the build, not an optional add-on. If a permanent shelter is not yet built, cover the dome with a tarp weighted down at the edges whenever the oven is not in use. Apply a lime wash or earthen plaster coat to the outer surface once or twice a year to seal hairline cracks before water infiltrates. Keep the door in place when not firing to prevent rain from entering through the opening and saturating the hearth floor.
Have you built your own outdoor wood fired oven, or are you planning a build this season? Share what design you chose and what worked best for your climate in the comments below.
References
- Complete off-grid cob oven build guide with firing data and cost breakdown
- Step-by-step earth oven construction guide with dome dimensions and material ratios
- Hybrid brick-and-cob outdoor bread and pizza oven build for off-grid homesteads
- Step-by-step guide to building a simple wood fired outdoor oven
- Comprehensive cob oven building guide covering materials, insulation, and dome construction
Leave a Reply