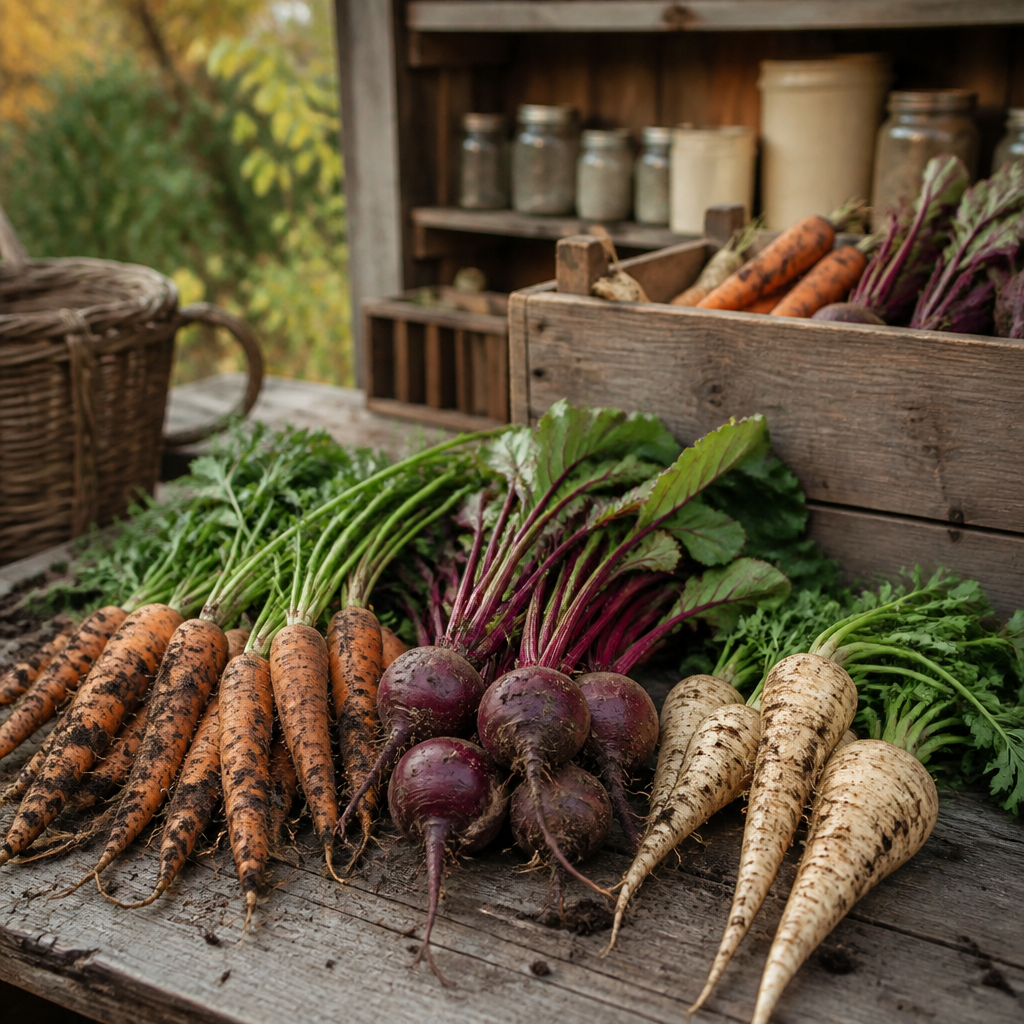
You harvested a serious amount of carrots, beets, and parsnips this fall, and now you are staring at them wondering where they go without a root cellar in the ground. Root vegetable storage without a root cellar is one of the most practical challenges on a small off-grid property, especially when digging a full underground cellar is not feasible due to rocky soil, high water tables, or simply limited time and budget. The good news is that you do not need a traditional root cellar to keep your harvest viable for months. You need the right conditions: cold, moist, and dark. Six proven alternatives can deliver those conditions on almost any homestead.
Table of Contents
- Quick Takeaways
- Why Root Cellars Are Hard to Build on Small Off-Grid Properties
- What Root Vegetables Actually Need to Stay Fresh
- 6 Alternatives for Root Vegetable Storage, No Root Cellar Required
- Comparison of the Top 3 Methods for Small Off-Grid Properties
- Common Mistakes That Destroy Your Stored Harvest
- Frequently Asked Questions
- References
Quick Takeaways
| Key Insight | Explanation |
|---|---|
| Temperature range matters most | Most root vegetables store best between 32°F and 40°F (0°C to 4.5°C) with high humidity. Any method that hits that range consistently works. |
| In-ground storage is free and effective | Leaving carrots, beets, and parsnips in the ground under a thick mulch layer extends harvest into late winter in most Canadian climate zones without any structures. |
| A buried metal trash can beats many fancy setups | A galvanized metal trash can buried to lid-level, layered with straw, mimics root cellar conditions reliably and costs almost nothing to build. |
| Packing material is not optional | Sand, moist sawdust, or peat moss packed around root vegetables prevents moisture loss that causes shriveling. Dry storage is for garlic and onions, not carrots. |
| Never wash before storing | Washing introduces surface moisture that accelerates rot. Brush off loose soil and clip tops to about 1 inch. Wash only at the point of eating. |
| Insulated coolers are a legitimate tool | Old chest coolers placed in an unheated garage or outbuilding buffer temperature swings and maintain enough humidity for short-to-medium-term storage of several weeks to a few months. |
| One bad vegetable ruins the batch | Check stored vegetables every two to three weeks. Remove any soft, rotting, or sprouting specimens immediately to prevent the decay from spreading to neighbours. |
Why Root Cellars Are Hard to Build on Small Off-Grid Properties
A traditional root cellar is genuinely the gold standard for long-term off-grid food storage on a small property. The problem is that excavation on many rural Canadian lots means fighting with bedrock, clay hardpan, or a water table that sits frustratingly close to the surface. Even where soil cooperates, digging and lining a proper cellar can require heavy machinery and several thousand dollars before the first carrot goes inside.
On a small homestead, those resources often go toward water systems, fencing, or a reliable power setup first. That is a reasonable priority call. The alternatives below are not consolation prizes. Several of them have been used for centuries before the poured-concrete root cellar became common, and they work because they use the earth itself, or well-chosen above-ground spaces, to replicate the same thermal and humidity conditions.
Pro tip: Before committing to any storage method, measure the overnight low temperatures in your candidate locations for a full week in October and November. A spot that reads 38°F at 2 a.m. is genuinely useful. A spot that swings from 28°F to 55°F between night and afternoon is going to freeze and then rot your vegetables in turns.


What Root Vegetables Actually Need to Stay Fresh
Understanding what root vegetables need makes every storage method easier to evaluate. The requirements are not complicated, but they are specific. Most root crops fall into the “cold and very moist” category: temperature just above freezing, between 32°F and 40°F (0°C to 4.5°C), and relative humidity at 90 to 95 percent. This applies to carrots, beets, parsnips, turnips, kohlrabi, and rutabaga.
Potatoes are slightly different. They need a curing period first: two weeks at 50°F to 60°F with humidity around 85 to 90 percent. After curing, they store best at roughly 40°F in the dark. Light causes potatoes to turn green and produce solanine, which is mildly toxic. Keep them in the dark at all times.
Garlic and onions sit at the other end of the spectrum. They want cool and dry: 32°F to 35°F and only 60 to 70 percent relative humidity. Do not pack them in moist sand alongside your carrots. A slatted crate in an unheated shed or a hanging mesh bag in a cool room is what they need.
The core principle of root vegetable storage is not complex: replicate the stable, cold, moist underground environment that these crops evolved to survive in. Every method below is just a different engineering approach to that same target.
6 Alternatives for Root Vegetable Storage, No Root Cellar Required
1. Leave Them in the Ground Under Heavy Mulch
The simplest approach for in-ground vegetable storage is to do nothing at harvest time. Carrots, beets, parsnips, turnips, and winter radishes can stay in the ground well past the first frosts if you protect them with a thick insulating mulch layer. Apply 12 to 18 inches of straw, dry leaves, or a combination of both directly over the bed before the ground freezes hard. Mark the rows clearly with stakes so you can find them under snow.
In practice, this works extremely well in Canadian growing zones where the ground freezes slowly. Once covered, the soil temperature under the mulch stabilizes and the roots stay in near-perfect cold-moist conditions. The limitation is access: once the ground freezes solid, you cannot dig without a serious effort until spring thaw. Harvest what you need in batches before that freeze locks in, and leave the rest in place as a living storage system.
Parsnips and carrots actually improve in flavour after a frost because the cold converts some of their starch to sugar. If you have never left a row of parsnips in the ground through a light freeze and pulled them in January, do that this year.
2. Buried Metal Trash Can (The Garbage Can Root Cellar)
A galvanized metal trash can buried in a well-drained spot is one of the most reliable homestead harvest preservation tools that most people overlook. Dig a hole slightly larger than the can diameter, deep enough so the lid sits about 6 inches below soil level. Drill a few drainage holes in the bottom of the can before burying it. Layer vegetables inside with straw or dry leaves between layers to prevent touching.
Metal is the right material here. It is far more rodent-resistant than plastic buckets, which can be chewed through. Once the lid is on and covered with a tarp weighted with a rock or board, the contents stay close to ambient soil temperature, which in most of Canada remains in the 32°F to 40°F range through winter at a foot below the surface. Mark the location well because a buried can is genuinely hard to find under 18 inches of snow.
A critical warning: never use a container that previously held pesticides, fuel, or any chemical product. The residue transfers to your vegetables regardless of how well you think you cleaned it. Buy a new galvanized can if you are uncertain about the history of a used one.
3. In-Ground Pit or Trench Storage
For larger quantities than a single trash can holds, a dug pit or trench is the traditional answer. Dig a trench approximately one foot deep in well-drained soil. If your soil drains poorly, line the bottom with a layer of gravel topped by sand before adding vegetables. Place root vegetables in the trench without touching each other, cover with straw or leaves for insulation, and top with a thick layer of soil. A simple wooden board or sheet of plywood over the top keeps excess rain and snow from compacting the insulating layer.
A straw-filled air vent built into a mound-style pit helps prevent anaerobic conditions from building up, which can accelerate rot. Place the vent on the side away from prevailing wind. Once you open a pit or mound and expose vegetables to air, move all of them to a secondary storage location: open storage spoils much faster than closed pit storage, often within one to two weeks.
4. Unheated Outbuilding with Insulated Bins
If you have an unheated shed, outbuilding, or detached garage, you have the shell of a workable storage space already. The challenge is temperature swing. An uninsulated structure in a Canadian winter can hit well below freezing on a cold night, which will freeze and then thaw your vegetables in cycles that destroy them quickly. The solution is to insulate the storage containers rather than the whole building.
Chest coolers (old ones work perfectly), heavy-duty insulated totes, or wooden boxes lined with rigid foam insulation buffer the produce from sharp temperature swings. Pack your root vegetables in these containers surrounded by moist sand or sawdust, close the lid, and the thermal mass of the soil-packed produce combined with the insulation keeps internal temperatures stable even when outside drops sharply overnight. This method works well for storage periods of several weeks to a couple of months, depending on how cold your winters get.
Pro tip: Avoid storing root vegetables in sheds or outbuildings where gasoline, paint, or other chemicals are kept. Root vegetables absorb vapours through their skin, and carrots stored near a gas can will taste like gasoline. A dedicated food storage section, even just a separate corner behind a partition, solves this.
5. Basement Cold Room or Unheated Interior Space
If your off-grid cabin or home has a basement or crawlspace, sectioning off a corner as a cold room gives you indoor root vegetable storage that is nearly as good as a dedicated root cellar. The key is to insulate the interior walls that face the heated part of the house while leaving the exterior walls uninsulated so the cold from outside can permeate. A vent to the outside that can be opened or closed lets you regulate temperature. Closets on north-facing exterior walls in minimally heated rooms can come very close to actual root cellar conditions without any construction.
For small off-grid properties where the main structure is a cabin with no basement, look at mudrooms, unheated entryways, or even a north-facing corner of a utility room. These spaces rarely hit the 32°F to 40°F sweet spot perfectly, but they work well enough for storage through most of fall and into early winter, particularly for short-to-medium storage crops like kohlrabi and turnips.
6. Dedicated Secondary Refrigerator
This option requires power, which means it fits off-grid setups with a solar or wind system running a chest fridge or small refrigerator. A dedicated refrigerator running at around 35°F to 38°F is one of the most consistent and reliable storage methods available. Store root vegetables in perforated bags or open containers to maintain humidity while allowing enough airflow to prevent anaerobic rot. This works especially well for carrots, beets, and parsnips.
The limitation is volume. A single refrigerator holds far less than a buried trash can or a pit, so it suits smaller harvests or functions well as overflow storage alongside one of the other methods above. For homesteads running a solar setup, a chest-style fridge consumes significantly less power than an upright model because cold air does not fall out every time the door opens.

Comparison of the Top 3 Methods for Small Off-Grid Properties
| Method | Best For | Key Limitations |
|---|---|---|
| In-Ground Mulch Storage (leave in soil) | Carrots, parsnips, beets in loose well-drained garden beds; no cost; best flavour retention | Access blocked once ground freezes hard; does not work in wet, compacted, or rocky soils; requires planning before freeze-up |
| Buried Metal Trash Can | Medium quantities of mixed root vegetables; properties with any accessible diggable soil; very low cost; rodent-resistant | Limited to one can’s volume per unit; requires drainage holes and dry site selection; hard to access under deep snow |
| Insulated Bins in Unheated Outbuilding | Homesteads with an existing shed or garage; works for potatoes, carrots, beets; scalable volume | Temperature management less precise than in-ground methods; requires monitoring in extreme cold; chemical fume contamination risk |
Common Mistakes That Destroy Your Stored Harvest
The most common mistake is storing damaged or washed vegetables. Any cut, bruise, or soft spot becomes a rot entry point within a week or two at storage temperatures. Harvest carefully with a garden fork rather than a spade, which cuts roots. Brush off loose soil and clip tops to about 1 inch. Do not wash. A vegetable with field dirt on it stores far better than a clean, wet one.
The second most common mistake is mixing crops that have different requirements in the same container. Apples and pears give off ethylene gas that causes carrots to become bitter and accelerates sprouting in potatoes. Keep fruits and vegetables in entirely separate storage locations if possible. Within vegetables, garlic and onions need dry conditions while everything else needs moisture, so do not pack them together.
Checking stored vegetables regularly is not optional. Plan a brief inspection every two to three weeks. A single rotting carrot releases enough moisture and biological material to trigger a chain reaction through neighbouring vegetables within days at cold storage temperatures. Pull it out the moment you find it. The same applies to any vegetable that has started to sprout vigorously, which is drawing energy away from its flesh and shortening storage life fast.
Finally, do not start with warm soil. If you are using in-ground mulch storage, apply the mulch only after the top inch or so of soil has cooled with autumn temperatures. Mulching warm ground traps heat that encourages the wrong microbiological activity and pre-conditions your vegetables for early rot rather than long cold storage.
Frequently Asked Questions
How long can carrots and beets actually last without a root cellar?
Carrots stored properly in moist sand or sawdust at temperatures between 32°F and 35°F can last 4 to 6 months. Beets stored under similar cold and moist conditions typically last 3 to 5 months. Left in the ground under thick mulch in a Canadian climate, both crops often last well into late winter before quality declines significantly. The key variables are starting quality (harvest undamaged produce), consistent temperature, and adequate humidity to prevent shriveling.
Can I store potatoes and carrots together in the same buried container?
You can store them in the same pit or buried can in a pinch, but they are not ideal companions. Potatoes need slightly warmer storage than carrots (around 38°F to 40°F versus 32°F to 35°F) and lower humidity. More practically, separating them by crop makes it much easier to retrieve what you want without disturbing the entire batch. If space forces you to combine them, layer them separately with straw between layers and check frequently.
What is the best packing material for in-ground or container storage?
Moist sand, moist sawdust (from untreated wood), and peat moss are the three most reliable packing materials. All three maintain the high humidity that root vegetables need while still allowing some airflow to prevent anaerobic conditions. Avoid aromatic sawdust from cedar or pine, which can transfer off-flavours to stored vegetables. Straw works well as an insulating layer between vegetables but is less effective than sand or sawdust for individual humidity management around each root.
Do I need to cure all root vegetables before long-term storage?
Potatoes are the main crop that requires curing: two weeks at 50°F to 60°F with high humidity to harden their skin and heal any harvest cuts. Carrots, beets, parsnips, and turnips do not need a formal curing period, but they benefit from a day or two of drying in a cool, shaded location to allow cut surfaces on trimmed tops to dry slightly. This brief air-drying step reduces surface rot without removing the natural moisture that keeps these vegetables firm in long-term storage.
What is the biggest risk with buried container storage in a wet climate?
Water intrusion is the main risk. A buried trash can or wooden box sitting in saturated soil will eventually take on water, which drowns the vegetables or creates the waterlogged anaerobic environment that accelerates rot rapidly. Drill drainage holes in the bottom of any buried container, select a raised or sloped site that sheds water naturally, and add a gravel and sand drainage layer under the container in any soil that holds water. A tarp over the lid or top prevents rain from pooling directly on the entry point.
Can I use this approach in a mild climate where the ground does not freeze hard?
Yes, and in some ways mild climates are easier. In-ground mulch storage works even better where ground temperatures stay in the 35°F to 45°F range through winter without freezing solid, because you can access the crop at any time. The challenge in mild climates is preventing the opposite problem: if winter soil temperatures stay above 45°F to 50°F, root vegetables continue to grow slowly and lose quality faster. Add more insulating mulch to keep soil temperatures down, or move to basement or cooler storage if ambient soil is too warm.
Have you tried any of these root vegetable storage methods on your own property, and what worked or surprised you most? Share your experience in the comments below.
References
- University of Alaska Fairbanks Extension: vegetable storage temperature and humidity requirements by crop
- Iowa State University Extension: how to store winter storage vegetables including carrots, beets, and potatoes
- The Old Farmer’s Almanac: storing your harvest without a root cellar, grouped by temperature and moisture needs
- Planter Garden Blog: in-ground trench storage, in-row mulch storage, and other root cellaring alternatives
- Cornell Cooperative Extension: indoor and outdoor cold storage methods including buried containers and mound storage
Leave a Reply