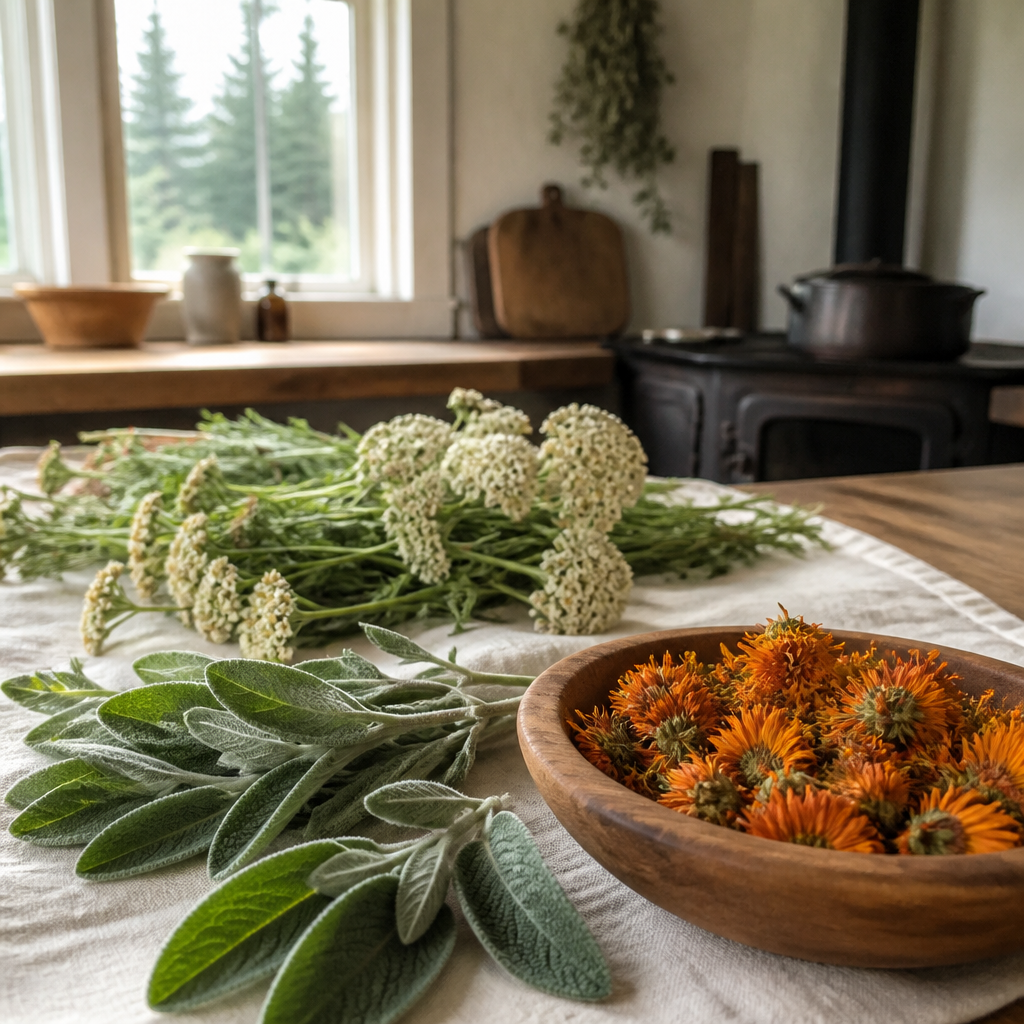
Every autumn, the same problem shows up on my kitchen table: a basket of calendula, sage, and yarrow that looks perfect until it turns to mold in a sealed jar three weeks later. Medicinal herb drying on a homestead is less about hanging bundles from a beam and more about controlling three conditions, heat, humidity, and air movement, long enough to keep the plant’s active oils intact. Get that right and you can build a working homestead apothecary that carries you through a long Canadian winter. Get it wrong and you throw away a summer of effort. This guide covers how I harvest, dry, store, and turn herbs into tinctures when the nearest pharmacy is a long drive away.
Table of Contents
- Quick Takeaways
- Why Drying Method Decides Potency
- Harvest Timing for Stronger Medicinal Herbs
- Preparing Herbs Without Losing Them
- Air-Drying Bundles, Screens, and Dust Control
- Dehydrators and Low-Heat Drying
- Testing Dryness and Storing in Glass
- Tincture Making With Dried Herbs
- Comparing Drying Methods for Your Apothecary
- Safety, Dosage Caution, and Shelf Life
- Frequently Asked Questions
- References
Quick Takeaways
| Key Insight | Explanation |
|---|---|
| Harvest before flowers fully open | New leaves at the tip of the plant carry the most concentrated flavor, while flowering herbs tend to taste bitter. |
| Pick mid-morning, after the dew dries | Herbs hold more essential oils on a sunny day once dew has evaporated, and wet leaves slow drying and invite mold. |
| Dry tender herbs fast | Basil, tarragon, lemon balm, and mint have high moisture content and will mold if they sit in humid air. |
| Hang woody herbs for 3 to 4 weeks | Sage, thyme, and similar herbs need weeks of hanging before the leaves are dry enough to strip and store. |
| Test every jar for condensation | Water bubbles on the inside of a sealed jar mean the herb is still damp and needs more drying before it is stored. |
| Start tinctures with dried herb | Dried material makes it easier to control alcohol strength in the finished tincture than fresh herb does. |
Why Drying Method Decides Potency
The flavor of an herb comes from oils held in the plant’s cell walls, and those oils are exactly what you are trying to save. Heat, low humidity, and air movement are the three conditions that pull moisture out without cooking the material. Miss one and you get either mold or a dull, dusty product that has lost most of what made it worth harvesting.

Most homesteaders reach first for whatever equipment they already own. That is fine for some herbs and a mistake for others. Penn State Extension groups drying into air-drying, seed harvesting, dehydrator drying, and microwave drying, and notes that sun drying and oven drying have real limitations. In my experience, sun is unpredictable across a Canadian summer, and most home ovens cannot hold a low enough temperature to avoid scorching.
Medicinal use raises the stakes. A herb you dry for a tea or a tincture is not a spice jar item where a little lost color is acceptable. You want to keep the compounds you harvested for, which means drying quickly enough to prevent spoilage while staying gentle enough not to burn them off.
A herb that is dried well keeps its character. A herb that is dried badly keeps only its label.
Harvest Timing for Stronger Medicinal Herbs
Harvest timing matters more than any drying technique you will learn. Most herbs are at their best just before the flowers first open, when the new leaves at the tip of the plant hold the most concentrated flavor. Once flowering takes over, many herbs turn somewhat bitter, which is a problem for teas and a bigger problem for a tincture you plan to take by the dropper.
Choosing the Right Hour of the Day
Pick on a sunny day in mid-morning, after the dew has evaporated. Wet leaves carry surface water that slows drying and gives mold a head start, so avoid cutting right after rain or heavy dew. Once the leaves are dry to the touch, you can bring them in and start the process within the hour.
Cutting Above the Leaf Pair
Use clean scissors and cut each stem just above a leaf or pair of leaves. Leave 4 to 6 inches (10 to 15 cm) of stem so the plant can regrow, which matters on a homestead where you may harvest the same bed several times a season. Harvest seeds only when they are mature, not while they are still green.
Pro tip: Keep a small notebook by the back door and record the date, time of day, and plant stage for each harvest. Within two seasons you will know your own best window better than any general guide can tell you.
Preparing Herbs Without Losing Them
Clean work starts before the herbs come inside. Wash your hands with soap and warm water, wipe down the counter and utensils, and strip out any bruised, soiled, or imperfect leaves. Check seed heads and flower clusters closely for insects before they go anywhere near your storage jars.
Rinse Less Than You Think
Rinse stems in cool water, shake off the excess, and pat them dry with a paper towel. A salad spinner removes surface water faster, which helps when you have a full basket and a short afternoon. Every drop you leave behind is time the herb spends in the risky zone where mold can start.
Sorting Woody Herbs From Tender Ones
Sage, thyme, and winter savory are the forgiving ones. They are woody and relatively low in moisture, so they dry reliably in small bundles. Basil, tarragon, lemon balm, and the mints hold far more water in their leaves, so dry them as a separate batch with faster airflow. Mixing the two on one rack is the most common mistake I see, and it usually ends with the tender herbs going moldy while the woody ones are still damp.
Air-Drying Bundles, Screens, and Dust Control
Air-drying works when you control humidity and airflow. A kitchen that is steamy from cooking, or a damp basement, will ruin a bundle, so test the spot before you commit the harvest. A dry room with a fan running nearby is far more reliable than a corner that looks convenient but never gets a breeze.
Hanging Bundles the Right Way
Gather stems into a small cluster and tie them tightly. A rubber band works well because it tightens as the stems shrink, which keeps the bundle from falling apart. Hang bundles away from the sink, stove, and dishwasher, where moisture builds up in the air.

One homestead garden blog I rely on ties a string around the base of the stems and hangs them upside down. Its authors argue that this concentrates oils and flavors into the leaves, and they usually leave herbs at least three to four weeks before processing them. I agree with the timeline. Rushing it leaves hidden moisture in the stems that shows up later as spoilage.
Screens and Paper Bag Dust Shields
Small-leaved herbs can lie flat on a fine stainless steel or food-safe plastic screen, or on paper towels. Once they are dry, strip the leaves from the stem for storage. For dust control, cover bundles with a paper bag punched with holes so air can still move through.
When you are drying seedy herbs, position the bag so it catches seeds as they fall. When you are drying leafy herbs, place the bag over the bundle as a dust shield rather than sealing it. Sealed bags trap humidity, and humidity is what you are trying to get rid of.
Dehydrators and Low-Heat Drying
A dehydrator is the right tool when your room humidity is high or when you need a batch finished in a few days rather than a month. The trade-off is potency. The homestead blog I cited earlier argues that a dehydrator does not concentrate oils to the same level as hanging, which leaves the herb slightly less potent. It also warns that over-dehydrating pushes herbs into a flat, less flavorful product.
Set It Low and Check Often
Use the lowest setting your dehydrator offers and check the batch regularly. Over-drying drives off the aromatic compounds you wanted to keep, and you cannot put them back. Pull the herbs when the leaves crumble and the stems snap, not when a timer says so.
Why Ovens Fall Short
Most home ovens cannot hold a stable low temperature with the door cracked for airflow. Hot spots scorch the edges of leaves while the centers stay damp. I treat the oven as a last resort for a wet week, and I check every tray frequently rather than walking away from it.
Microwave, Vacuum, and Freeze Drying
A recent review of drying techniques for medicinal plants surveys newer methods, including microwave, vacuum, freeze, and refractance window drying. Those methods are worth understanding, particularly if you are building a small processing operation. Most homesteads will not have the equipment, so I treat them as reference points rather than everyday tools.
Testing Dryness and Storing in Glass
Dry herbs should feel brittle. Stems should snap cleanly, and leaves should crumble between your fingers without any soft or leathery spots. If a stem bends instead of breaking, it is not finished, and storing it now is a gamble you will probably lose.
Storage is where many homestead apothecaries fail. Air is the enemy, and any moisture left in the batch will spoil it from the inside out. Good storage depends on getting the drying right first.
The Condensation Test
Seal the dried herbs in a clean glass jar and watch the inside walls over the next few days. Tiny water bubbles on the glass mean the herb is still damp. Take the material out, dry it further on a plate lined with parchment, and test again. Improperly dried herbs can spoil quickly, so do not skip this step.
Pro tip: Put a small square of parchment and a spoonful of dried herb into a spare jar as a test batch before you fill your main storage containers. Watch it for a few days, and if it stays clear, the rest of the batch is probably safe to store.
Glass, Light, and Labels
Glass is the right container for herbs. Use airtight jars, keep them away from direct sun, and label every jar with the plant, the part used, the harvest date, and the drying method. Herbs stored this way can last for years with little degradation, but in practice I rotate the oldest jars first and use the rest within a season or two.
Tincture Making With Dried Herbs
A tincture is a herb extracted in alcohol, and it is one of the most useful products an off-grid household can keep. It stores at room temperature, does not need refrigeration, and does not depend on power to stay usable. The herb you start with matters, and dried material gives you more control over the outcome than fresh.

Choosing Your Alcohol
Most home tinctures use a neutral spirit or vodka at a common bottle strength. Stronger alcohol extracts resins and some compounds more readily, while weaker alcohol suits more delicate, water-soluble material. Pick one strength for each batch and write it on the label, because changing the bottle strength changes the result even when the herb weight stays the same.
Simple Maceration at Home
Fill a clean jar with dried herb, cover it fully with alcohol, seal it, and keep it in a dark cupboard. Shake it daily during the steep. Steep for the length of time your trusted recipe specifies, then strain through cloth or a fine filter, press the plant material, and bottle the liquid in amber glass.
Why Dried Herb Gives You More Control
Fresh plant material carries a lot of water, and that water dilutes the alcohol you added, which makes the final strength harder to predict. Dried herb carries far less water, so the alcohol you measure is the alcohol you get. For a homestead making tinctures for the first time, that predictability is worth more than any small gain in freshness.
Comparing Drying Methods for Your Apothecary
Use the table below to match a drying method to the herbs you grow and the conditions in your home. These are my working assessments from drying my own herbs, combined with the guidance in the sources cited in this article.
| Drying Method | Best For | Main Risk |
|---|---|---|
| Air-drying in hanging bundles | Woody herbs such as sage, thyme, and winter savory | Mold in humid rooms and dust contamination |
| Screen or paper towel drying | Small-leaved herbs and flowers that need to lie flat | Slow in humid rooms and needs regular turning |
| Dehydrator on the lowest setting | Tender herbs such as basil and mint when time is short | Over-drying and a slightly lower oil concentration |
| Oven drying | Emergency drying during a wet week | Hot spots, scorched edges, and uneven drying |
If I were setting up a homestead apothecary from scratch, I would hang the woody herbs, lay the small-leaved herbs on screens, and reserve the dehydrator for the tender ones. That combination covers most of the garden without relying on a single method that fails in certain weather.
Safety, Dosage Caution, and Shelf Life
Positive identification comes before any drying or tincture work. Confirm each plant with a reliable field guide or a knowledgeable local expert, and never harvest a plant you cannot name with certainty. Some look-alike species are toxic, and a dried stem can be nearly impossible to tell apart from its dangerous neighbor.
Speak with a health professional before using any herb medicinally, especially if you take prescription medications, are pregnant, or manage a chronic condition. Some herbs interact with common drugs, and a homemade tincture has no label telling you what is inside. Start with small amounts and keep notes on how your body responds.
Pro tip: Label each tincture with the herb, the alcohol strength, the date, and the batch number. When a bottle has a problem, that label tells you exactly which batch to set aside and which herb to check.
Shelf life depends on how well the herb was dried, how well the alcohol was matched to the plant, and how the bottle is stored. Keep finished tinctures in amber glass, out of direct light, and inspect them before each use for cloudiness, odd smells, or sediment that was not there before.
Frequently Asked Questions
How long does medicinal herb drying take?
Hanging woody herbs usually takes three to four weeks, and some bundles need longer in a humid season. A dehydrator finishes much faster, but you should check batches often rather than following a fixed time.
Can I dry garden herbs and store them in spice jars?
Yes, as long as the herbs are fully dry and kept in airtight glass away from light. The condensation test is the simplest way to confirm they are ready, because any bubbles on the jar walls mean the batch needs more drying.
Is dried or fresh herb better for tinctures?
For most home tincture making, dried herb is easier to work with because it carries less water and gives you more predictable alcohol strength. Fresh herb can still be used, but the final product is harder to measure and more prone to spoiling if it is not handled carefully.
Which herbs are best for air-drying?
Woody herbs like sage, thyme, and winter savory are the most forgiving choices for air-drying. Tender herbs such as basil, mint, and lemon balm are better suited to a screen with strong airflow or a dehydrator on low heat.
Is it safe to take homemade herbal tinctures?
Homemade tinctures can be used safely only when the plant is positively identified, the dose is kept small, and the herb has been checked against your current medications. Talk with a health professional before starting, especially if you are pregnant or take prescription drugs.
Tell us which herb has given you the most trouble on your drying rack and what finally fixed it, because the most useful notes on any homestead apothecary come from people who have lost a batch and learned from it.
We would love your feedback and any insights you would share with others. What perspective would you add?
References
- Penn State Extension guide to harvesting, preparing, and drying herbs
- Homestead blog on natural herb drying times and airtight glass storage
- Review of novel techniques for drying medicinal plants
Leave a Reply