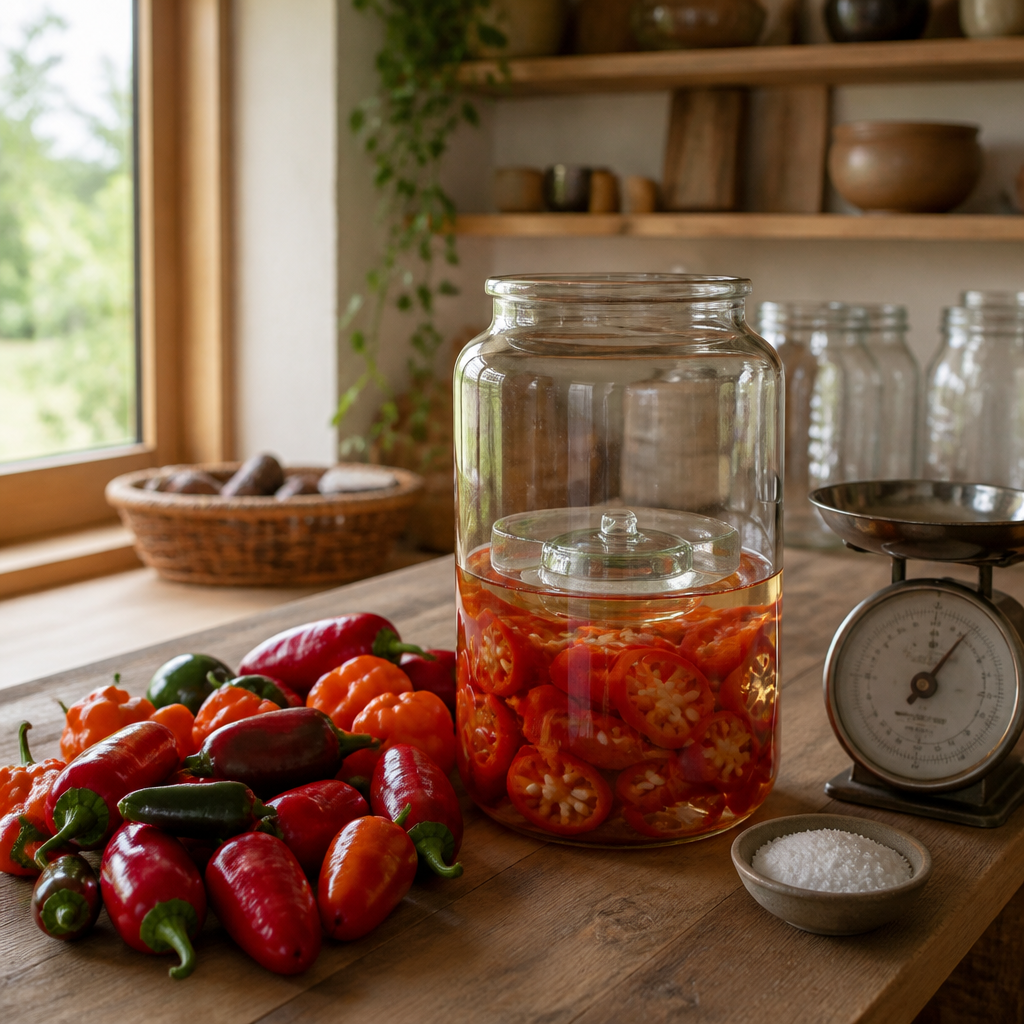
Every fall, the pepper plants finish all at once. You are left with a crate of jalapeños, a few stubborn habaneros, and a frost forecast that makes waiting impossible. Most people reach for a canner, but a lacto-fermented hot sauce gets the same peppers into jars with nothing more than salt, water, and patience. The sauce keeps for months, needs no power during the ferment, and gets more complex as it ages. Here is how to do it on a homestead, step by step, and where it tends to go wrong.
Table of Contents
- Quick Takeaways
- Why Fermentation Beats a Canner for Fall Peppers
- Picking and Prepping Fall Peppers
- The Brine Ratio That Makes or Breaks Your Ferment
- Fermenting Without a Canner or Special Gear
- Blending, Vinegar, and Finishing the Sauce
- Comparing Fall Pepper Preservation Methods
- Storage, Mold, and Safety Checks
- Frequently Asked Questions
- References
Quick Takeaways
| Key Insight | Explanation |
|---|---|
| Measure your brine by weight | A ratio of 3 g of salt per 100 g of water is repeatable. Cup measures change with how you pack the salt, so batches drift apart. |
| Keep every piece under the liquid | Peppers that poke above the brine are where mold starts. Weigh them down with a small glass or a sealed bag of brine. |
| Hold the vinegar until the ferment is done | Vinegar added at the start works against the bacteria you want working. Stir it in after fermentation, when the sauce is finished. |
| Ferment warm and quiet, then refrigerate | The ferment needs no electricity, just a cool, dark shelf. Cold storage after that slows change and keeps the flavor sharp. |
| Harvest firm, unbruised peppers before a hard frost | Split or soft peppers spoil faster and invite the wrong organisms. Pick the best fruit first and ferment it while it is still sound. |
| Taste at set intervals | Flavor builds over weeks. Tasting at one week and again at four tells you what your particular peppers actually do. |
Why Fermentation Beats a Canner for Fall Peppers
A water-bath canner means a full pot on the stove for an hour or more, plus jars, lids, and careful timing. On an off-grid kitchen, that is a lot of fuel and attention for a few quarts of sauce. A ferment needs salt, water, a jar, and a cool spot out of direct sun.

The Feasting at Home fermented hot sauce recipe makes the same point. Its author describes about 20 minutes of hands-on time, no special equipment, and a preference for fermenting over canning because canning requires more work. That matches what I have seen in practice. Once the peppers are chopped, the rest is mostly waiting.
The same recipe argues that canning destroys the live bacteria in fermented food, and that fermented sauce keeps developing flavor while canned sauce stops. The second half is accurate in the sense that heat processing ends live cultures, so a canned sauce is a shelf-stable condiment rather than a living ferment. Whether the bacteria in a jar of sauce meaningfully affect your gut is a question the sauce cannot answer. Treat it as a flavorful preserved food, not a supplement.
A ferment is a living jar. The bacteria keep working in the cold, so a sauce made in October can taste noticeably different by February.
Online fermentation communities are split on the goal. A Reddit discussion on fermenting hot sauce for flavor or for live bacteria asks whether adding vinegar and pasteurizing defeats the purpose. Other groups debate whether cooking a sauce after fermentation destroys its probiotic benefit. My view is simple: if your goal is a winter pantry condiment, flavor and shelf stability are the point. If you want live cultures, skip the cooking and the vinegar, and keep the jar cold.
Picking and Prepping Fall Peppers
Fall peppers fall into two groups for fermenting: the ones you pick at full color and the ones you pick green before frost. Full color peppers are sweeter and more complex. Green peppers can ripen on a windowsill, but they lose sugar along the way, so they make a sharper and less rounded sauce. If frost is coming, pick everything you can use and ripen the best of the rest indoors.
Choosing Your Pepper Mix
The Feasting at Home recipe builds its sauce around medium heat chilies such as red jalapeños or red Padrón peppers. It suggests adding bell peppers in similar colors to mellow the heat, or using green jalapeños or serranos for a green sauce. If you are working with habaneros, mellow them with orange or yellow bell peppers. The same source notes that the heat will soften as the sauce ages, so a batch that tastes too hot on day one often settles down by month two.
In practice, I aim for roughly two parts mild or sweet peppers to one part hot peppers when the hot ones are unpredictable. That gives you a sauce you can taste during the ferment without flinching. Reader comments on the recipe mention mixing chili and bell pepper ratios across several batches, which is the best way to learn what your garden produces.
Cutting, Slitting, and Adding the Aromatics
For hot sauce, chop the peppers rather than fermenting them whole. Chopped peppers release their own juices, and the brine reaches every piece quickly. If you want to ferment whole small peppers, slit each one so the brine can get inside. Forum discussions on preserving peppers without a water bath describe the same approach, cutting rings or slits so the liquid penetrates.
The recipe also includes carrots, which add sweetness and help the ferment along, plus shallots or onion and garlic for savory depth. Chop these fine so they break down into the sauce evenly. Remove the stems and seeds from the hot peppers if you want less heat, but know that most of the capsaicin sits in the membranes.
Pro tip: Wear gloves when you chop habaneros and any hot pepper. Capsaicin lingers on bare hands for hours, and touching your eyes afterward is the most common way people learn this the hard way.
The Brine Ratio That Makes or Breaks Your Ferment
Salt is the single factor you control completely, and it is where most failed ferments start. The Feasting at Home recipe calls for 1 and 1/4 teaspoons of salt per cup of warm water, or 3 grams of salt per 100 grams of water. The gram version is the one to use. A teaspoon of fine salt and a teaspoon of coarse salt weigh very different amounts, so volume measures drift from batch to batch.
Doing the Math on a Kitchen Scale
A 3 percent brine means 30 grams of salt for every 1,000 grams of water. Weigh the water in your jar or in a bowl, then weigh the salt. If you use a 1,500 gram batch of brine, that is 45 grams of salt. Write the numbers on the jar lid so next season you can repeat exactly what worked.
Warm water helps the salt dissolve completely. Let the brine cool to room temperature before pouring it over the peppers, because hot brine will start cooking the vegetables and soften the texture. A common mistake is pouring in a brine that is still warm and then wondering why the sauce tastes flat.
Choosing Salt and Water for Off-Grid Use
The recipe suggests finely ground sea salt or pink Himalayan salt, and filtered water. Many fermenters avoid iodized table salt because its additives can cloud the brine. If your water comes from a well, rain catchment, or spring, test it or boil and cool it before use, since the mineral and microbial content can differ from city supply. Chlorinated water can slow the ferment, so dechlorinate it first if you are unsure.
Too little salt leaves room for spoilage organisms to take over. Too much salt slows the lactic acid bacteria you need. Stay close to the 3 percent figure, and you will avoid both problems.
Fermenting Without a Canner or Special Gear
You do not need a fermentation crock or an airlock system to make a good hot sauce. Wide-mouth quart jars work well. Pack the chopped peppers, carrots, aromatics, and garlic into the jar, leaving a few centimeters of headspace, then pour the cooled brine over the top until everything is submerged.
Keeping Everything Under the Brine
Anything above the liquid is a problem. The simplest weight is a small glass that fits inside the jar mouth, pressing the pepper pieces below the surface. Some fermenters fill a small zip bag with brine, seal it, and set it on top. Check the jar daily during the first week, and push down any floating bits with a clean spoon.
Use a loose lid or a lid with a valve if you have one, so the gas produced by the bacteria can escape. A tight screw lid can crack a jar or push brine out. A fermentation site’s condiments collection shows several fermented jalapeño and pepper recipes built on the same brine-and-weight method, which is a good reference if you want to see different setups.
Finding a Cool, Dark Spot
Ferment at a steady room temperature away from direct sun. A pantry, a cellar corner, or a closet on the north side of the house usually works. Hotter rooms ferment faster and can turn soft or harsh, while very cold rooms slow the process to a crawl.
Off grid, this is the big advantage. The ferment itself draws zero electricity, and the only cold storage you need comes after the sauce is finished. Plan the first two weeks around a shelf you can check daily, and you will catch problems early.
Pro tip: Label each jar with the date, the pepper mix, and the salt weight. A short log turns one good batch into a repeatable recipe, and it tells you why a later batch behaved differently.
Blending, Vinegar, and Finishing the Sauce
When the sauce has bubbled, slowed, and tasted sour and balanced to you, it is ready to finish. The bubbling will slow over time, the smell will shift from fresh pepper to something tangier, and the flavor will round out. Those are your signals, not a fixed calendar.
Blending and Straining
Blend the peppers with some of their brine until smooth. Keep the brine you pour off, since it is the base for thinning the sauce later. If you want a thicker, chunkier texture, blend only briefly. For a smooth bottle sauce, strain through a fine sieve and press the solids to recover as much liquid as possible.
Taste as you go. Add brine a spoonful at a time if the sauce is too thick, and expect the flavor to be more intense than you think after blending, since the aromatics concentrate.
Adding Vinegar After Fermenting
The Feasting at Home recipe suggests adding one to three tablespoons of apple cider vinegar after fermenting, to taste. That timing matters. Vinegar added at the start can suppress the bacteria you are trying to grow, so stir it in once the ferment is complete. Vinegar also sharpens the finished sauce and lowers its pH, which makes it more stable in the fridge.
Once you add vinegar, you are no longer making a purely live product. That is fine, but be honest about what the jar is. A vinegar-finished sauce is a flavorful condiment with a fermented base, and it should stay refrigerated.
Adjusting Heat and Adding Seasonings
Add seasonings after fermenting, not before. The recipe lists herbs such as oregano, cilantro, and celery leaves, plus spices including cumin, coriander, chipotle powder, smoked paprika, and allspice. Add powdered spices a little at a time, because they can dominate quickly. Warm spices like cumin and chipotle pair well with a red jalapeño base, while cilantro and celery leaves brighten a green sauce.
If the sauce tastes too hot, do not dilute it with water alone. Add more brine or a little sweet bell pepper puree, which keeps the fermented flavor intact.
Comparing Fall Pepper Preservation Methods
Fermentation is not the only way to keep a pepper harvest. It is the one I reach for first when I have a crate of mixed peppers and no spare power. The table below compares it with the two other methods most homesteaders use for fall peppers.
| Method | Power and Equipment | Best Use and Trade-Off |
|---|---|---|
| Lacto-fermented hot sauce | Salt, water, jars, and a cool shelf. No power during the ferment, only refrigeration afterward. | Complex, living flavor that builds over months. Needs daily checks during the first week. |
| Vinegar hot sauce with water-bath canning | Stove, canner, jars, and lids. Sustained heat for a long time. | Shelf-stable without refrigeration once sealed. Heat ends live cultures, and the fresh pepper flavor is usually flatter. |
| Freezing chopped peppers | Freezer that runs all winter, plus bags or containers. | Fast and simple, keeps texture for cooking. The freezer draws power all season, which is a real burden on a small solar system. |
In practice, I ferment the peppers I want to eat as sauce, freeze the surplus I plan to cook with, and dry the thick-walled ones for powder. Matching the method to the pepper matters more than matching it to a trend. A thin-walled jalapeño makes a better ferment than a thick-walled pepper that will take forever to soften.
If your off-grid setup has limited battery capacity, fermentation is the most power-efficient choice. Canning is possible but demands fuel, and freezing demands electricity for months. Choose based on what your system can support through winter, not on what looks best in a photo.
Storage, Mold, and Safety Checks
A jar of ferment is a small ecosystem, so it needs checking. Most problems are visible and easy to sort out if you know what you are looking at. The key is to separate harmless surface growth from spoilage before you throw out a good batch.

Kahm Yeast Versus Mold
Kahm yeast forms a thin, flat, white or cream film on the surface. It is harmless but can taste unpleasant and dull the flavor. Skim it off, make sure everything is back under the brine, and keep going. Fuzzy growth in any color, especially green, blue, black, or fuzzy white that sits on top like cotton, means the batch should be discarded.
A common mistake is skimming a moldy surface and keeping the jar. Mold roots can extend below the surface, so the safe call is to toss the jar.
Smell and Texture Checks
A healthy ferment smells sour, tangy, and vinegary, sometimes funky. A putrid, rotten, or sewage-like smell is a reason to discard the batch. Trust your nose, and do not taste anything that smells wrong. Texture also tells you something. Slimy pepper pieces, as opposed to just soft ones, are a warning sign.
Refrigerating and Keeping the Sauce
Once fermentation is complete and the sauce is finished, refrigerate it. Cold storage slows the ongoing changes in the bottle, but the sauce keeps evolving in the fridge, which is part of its appeal. Many fermenters keep a sauce for several months refrigerated, though quality and color fade over time. Do not store a fermented sauce on the shelf unless you have added enough acid and followed a tested process for shelf stability.
Pro tip: Keep a small bottle of brine in the fridge alongside your sauce. If the sauce thickens too much over winter, a spoonful of brine loosens it without adding water, which can dilute the flavor and weaken the keeping quality.
Frequently Asked Questions
Can I make lacto-fermented hot sauce without a canner or special equipment?
Yes. You need peppers, carrots, aromatics, salt, water, a jar, and a weight to keep everything under the brine. The Feasting at Home recipe describes about 20 minutes of hands-on time with no special gear.
How long does lacto-fermented hot sauce take to ferment?
It depends on your kitchen temperature. Plan on one to several weeks at a steady room temperature, and taste it every few days once the bubbling slows. Stop when the flavor is sour and balanced to you.
Do I need to cook the sauce after fermenting?
No, and if you want live cultures, you should not. Cooking or canning ends the bacteria. Blend the sauce, add vinegar if you like, and refrigerate it.
Why did my fermented hot sauce turn bitter or flat?
The most common causes are a brine that was measured by volume and came out too weak or too strong, peppers that were bruised or past their peak, and a jar that sat too warm. Weigh your salt next time and start with fresh, firm peppers.
Can I make fermented hot sauce with only bell peppers?
Yes. You will get a mild, sweet sauce that is closer to a condiment than a hot sauce. Keep the carrot and garlic, since they add body and help the ferment, and blend it thick if you want a spread.
Is it safe to keep fermented hot sauce on the shelf?
Keep it refrigerated. Unless you have added enough vinegar and followed a tested process for shelf-stable acidified foods, room temperature storage is not a safe plan.
Have you fermented a batch of fall peppers yet, and how did your sauce change after a few months in the fridge?
References
- Fermented hot sauce recipe with brine ratios and ingredient swaps
- Collection of fermented condiment recipes including jalapeño and giardiniera
- Community discussion on fermenting hot sauce for flavor versus live cultures
- Forum thread on preserving peppers without a water bath
Leave a Reply