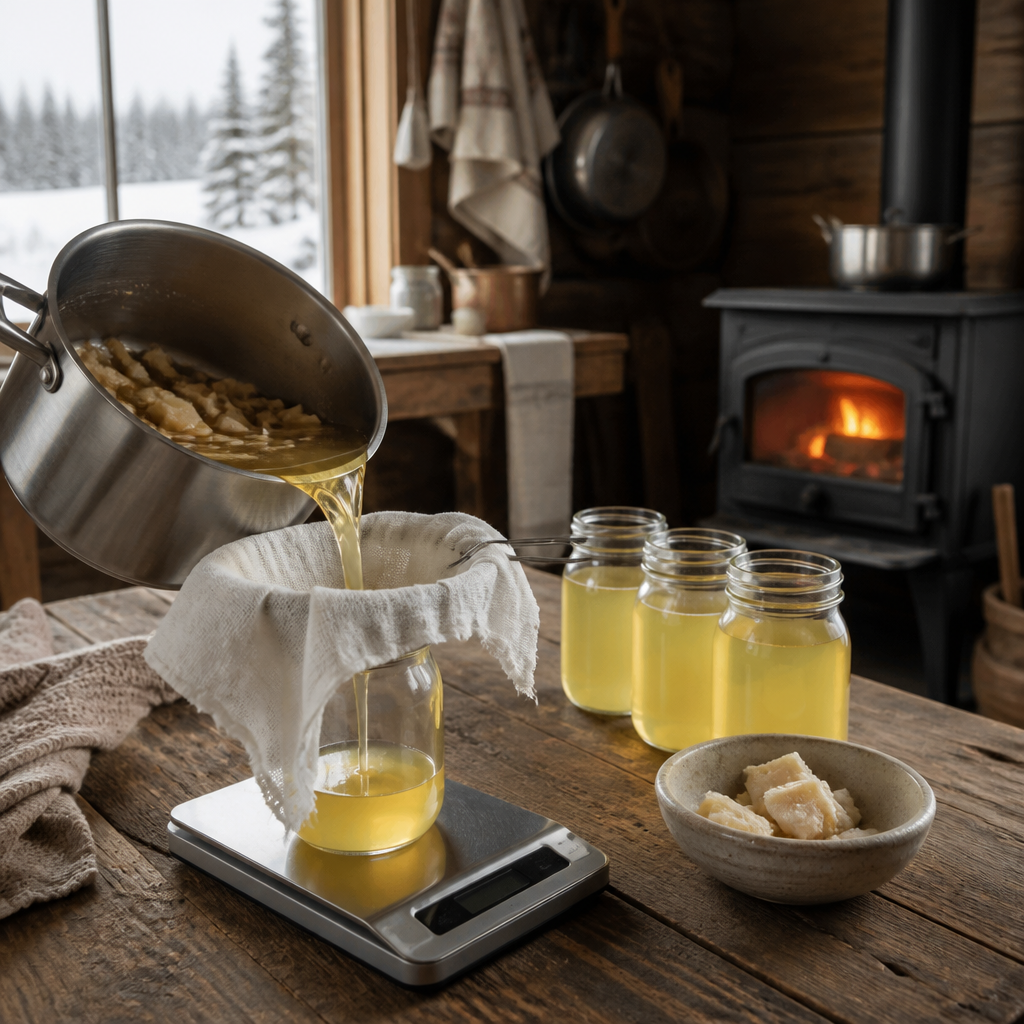
Every winter, a homestead that makes its own soap keeps money in the cash tin and cuts down on plastic bottles, and a lard soap recipe off-grid is one of the cleanest ways to do it. The fat comes from your own pig or from the butcher, the lye is a single purchased ingredient, and the batch needs only a kitchen, a scale, and a cool room to cure in. Most recipes online assume a grid-connected kitchen with a stand mixer and a fridge. This guide is written for the cabin with a woodstove, a battery-powered stick blender, and a shelf of jars waiting for rendered fat.
Table of Contents
- Quick Takeaways
- Why Lard Works for the Homestead
- Rendering Lard for Soap
- Lye Safety Before You Start
- The Cold Process Lard Soap Recipe
- Batching Lard Soap in Winter
- Curing and Testing Your Bars
- Choosing Your Soap Method
- Frequently Asked Questions
- References
Quick Takeaways
| Key Insight | Explanation |
|---|---|
| Render lard on a cold day | Cold air keeps raw fat firm and easy to handle. Render in one session, strain it while it is still liquid, and jar it the same day. |
| Buy commercial lye | Lye leached from wood ashes is unpredictable. Sodium hydroxide from a hardware store gives you a dependable, measurable result. |
| Calculate every batch | Enter your exact fat weights into a lye calculator and use the output. Do not reuse a lye amount from an old batch or a blog post. |
| Use distilled water | Distilled water is the most common choice for the lye solution. Stock gallons indoors so they do not freeze in the shed. |
| Start with a balanced blend | A split of roughly a third lard, a third olive oil, and a third coconut oil is a sound starting point for a firm, lathering bar. |
| Cure for four to six weeks | Cold process bars need time to harden and mellow. Test before you give any away, and keep the lye gear on until the cleanup is finished. |
| Keep waste near zero | Press cracklings for cooking, and remelt soap trimmings and test bars through rebatching instead of throwing them out. |
Why Lard Works for the Homestead
Lard is rendered pork fat, and it has been the workhorse of homemade soap for as long as people have kept pigs. On a homestead, it is the fat you already have. Once you butcher, you have a steady source of raw fat, and rendering it into soap-ready lard turns a kitchen byproduct into a product you can use all year.

What Lard Brings to the Bar
Lard-based bars tend to feel creamy and gentle on the skin. In practice, a bar made with a high share of lard can lather less vigorously than one loaded with coconut oil, which is why most makers blend it with other oils. Lard is a good base, but it works best as one part of a recipe rather than the whole thing.
The bar you end up with depends on the rendered fat’s quality. Fat that was rendered clean, strained well, and stored cold will give a consistent batch. Fat that sat warm or was rendered with bits of meat in it can turn rancid or smell off, and that smell does not wash out of the finished soap.
Fats Beyond the Hog Barn
Homestead soap does not have to start and end with pork. Chicken, duck, and goose fat, known as schmaltz, can be rendered and used in soap, though you will usually collect it in smaller quantities. Tallow from cattle and sheep is another traditional choice, and wild fats such as deer or bear fat can also be rendered for soap making if you handle them carefully.
Pro tip: Label every jar of rendered fat with the animal, the date, and the rendering batch. When one bar behaves differently from the next, that label tells you which fat to suspect first.
Rendering Lard for Soap
Rendering is where a lard soap batch is won or lost, long before any lye gets measured. Clean, well-rendered fat gives you a predictable bar, and sloppy rendering gives you a soap that smells like the pig pen. Winter is the best time to do this work because the cold keeps raw fat firm while you cut and handle it.
A Cold Weather Rendering Routine
Keep the raw fat chilled until you are ready to work. Cut it into small cubes so it melts evenly, then render it low and slow in a heavy pot or on a dependable heat source. Stir it occasionally, and never leave a hot pot unattended, because a woodstove or propane burner that drifts out of control is a serious hazard in a remote cabin.
Strain the liquid fat through cheesecloth or a fine mesh while it is still fluid. Pour it into clean jars and let it cool with the lids off until it sets, then seal and store it somewhere cold and dark. Lard that goes into storage still warm or with moisture in it is the most common reason a batch smells off months later.
Cracklings and Other Zero-Waste Leftovers
The solid bits left after straining are cracklings, and they are worth keeping. Press them in a clean cloth to squeeze out the last of the fat, then salt them lightly and use them in cornbread or biscuits. Any cracklings you do not eat can go to livestock or pets in small amounts, as long as they are not salted heavily.
The fat-rich liquid that settles below the lard in the rendering pot can be skimmed and used the same way. Nothing from the rendering should end up in the trash if you can avoid it, and that habit is what keeps a homestead soap operation close to zero waste.
Lye Safety Before You Start
Lye is the one ingredient in this recipe that can hurt you badly, and it deserves respect every time you open the container. Sodium hydroxide is caustic and can cause severe burns to skin and eyes. Treat the first batch and the fiftieth batch with the same level of care, because experienced makers are the ones who get careless.
Gear You Wear From Start to Finish
Wear long sleeves, long pants, and closed shoes whenever you make soap. Goggles should protect your eyes from the moment you open the lye container until the last dish is washed. Rubber gloves protect your hands, and you should work in a well-ventilated space with animals and children kept out of the area.
Do not treat cleanup as a separate job. Lye residue on counters, scales, and buckets is still caustic, so keep the gear on while you scrub, and do not let the dog lick the bucket. A mistake during cleanup is still a mistake, and it can happen after the soap is already poured.
Why Wood-Ash Lye Is a Gamble
Historically, lye was made by pouring water through wood ashes, and some homesteaders still try it with cold hardwood ashes and rainwater. The problem is that the strength of homemade lye is unpredictable, so you cannot calculate a reliable recipe from it. Commercial sodium hydroxide from a hardware store is inexpensive and far more dependable for modern homesteaders.
A common mistake is trying to save a few dollars on lye and then ending up with a soap that is too harsh, too soft, or too caustic to use. If you want a true zero-waste lye process, you can build that later, but for a winter batch where the soap has to be right, buy the lye and use it correctly.
The lye does not know you have made soap before. Keep the same gear, the same ventilation, and the same measuring discipline on every batch.
The Cold Process Lard Soap Recipe
The cold process method is the best fit for a homestead because it lets you use fresh rendered fat with full control over the recipe. You mix lye with water, mix fat with oils, combine the two, and let saponification turn the batch into soap. There is no need for a crockpot or stove time, which matters when you are running on a small battery or woodstove.
Ingredients and a Starting Ratio
Start with a simple blend of lard, olive oil, and coconut oil at roughly one third each by weight. This split is a sound starting point for a firm, lathering bar that cures well. Use distilled water for the lye solution, and keep the weights exact, since a kitchen scale that drifts a few grams can change the outcome.
Do not copy a lye amount from a previous batch or from a blog post, including this one. Enter your exact fat weights into a reputable lye calculator, and use the sodium hydroxide amount it returns for your specific oils. Each fat has its own saponification value, and that is why the calculator, not an old note, should decide the lye.
Mixing the Lye Solution and the Fats
Put on your full safety gear and work in a ventilated space. Measure the distilled water into a heat-safe container, then add the lye slowly to the water, never the other way around. Stir gently and let the solution cool, because it gets hot quickly and gives off fumes.
Warm the lard and oils together until they are a pourable liquid at a similar temperature to the lye solution. Pour the lye solution slowly into the fats while stirring, and avoid splashing. The aim is a smooth, controlled combination, not a fast whip.
Reaching Trace and Pouring the Batch
Use a stick blender in short bursts until the mixture reaches trace, which looks like thin pudding that leaves a faint trail when you drizzle it across the surface. Stir in any scent or additives at this point, then pour the batch into a lined mold. Cover it with a board or towel and wrap it so it stays warm during the first day of saponification.
Pro tip: Write the date, the fat weights, and the calculator settings on the mold lid with a permanent marker. When the soap is ready to cut a week later, you will know exactly what went into it.

Batching Lard Soap in Winter
Winter is the right season for lard soap because you have time, cold fat, and a need for a stockpile of bars for the year ahead. It is also the season that tests your setup. Cold rooms slow the reaction, lard firms up quickly, and water can freeze in a shed. Plan for those conditions before you start.
Keeping Fats and Lye Water in Range
Lard turns solid when the shop is cold, so warm it gently in a water bath until it is fully liquid before you combine it with the lye. If the room is cold, keep the mixing bowl wrapped and the fat container covered. A batch that goes into the mold cold can seize, and a seized batch is harder to pour cleanly.
The lye solution needs ventilation, but it also needs a stable temperature. Mix it in a space that is sheltered from wind but still airy, such as a porch with the door propped open or a shop with a fan running. Sealing yourself into an unheated room with fumes is not a good trade for a warmer bar.
Protecting Distilled Water and Short Days
Distilled water is easy to forget about in winter. Stock gallons indoors so they do not freeze in an outbuilding, because a jug that freezes can crack and waste your supply. Keep the lye and the scale in a dry, indoor spot so that moisture does not get into the containers.
Short daylight also changes the schedule. Plan your batch for a day with enough hours to finish rendering, mixing, and cleanup without rushing. A common mistake is starting a batch late in the afternoon and then trying to clean up by lamplight, which is exactly when lye accidents happen.
Curing and Testing Your Bars
Cutting and curing are where the soap earns its keep. Fresh cold process bars are still soft and may be caustic, so they need time before anyone uses them. Patience at this stage is what separates a bar that lathers and lasts from one that feels harsh on the first wash.
The Four to Six Week Cure
Cold process soap needs a four to six week cure to harden and mellow into a lovely lather. Unmold the bars once they are firm enough to cut, then set them on racks with air moving around every side. Keep them in a warm, dry room rather than a damp shed, because a cold, humid space slows the cure and can invite mold on the surface.
Resist the urge to rush the process. A bar that looks firm on day three can still be soft in the middle, and a cured bar will last noticeably longer in the shower than one cut and used too early.

Testing a Bar Before You Share It
Before you give bars to family or sell them at a market, test them. Many makers use pH strips to check that a cured bar is no longer strongly alkaline, and a bar that stings or feels slick in a way that is unusual should be set aside for rebatching. Trust the test, not the calendar alone.
Label cured bars with the batch date and the fat blend so you can track which combinations hold up best over the winter. This is also the point to decide whether a batch is ready for daily use or should go into a guest bathroom where it will be used less.
Choosing Your Soap Method
Cold process with rendered lard is not the only way to make soap on a homestead, and the right choice depends on your power supply, your time, and how much waste you are willing to accept. The table below compares the three approaches most homesteaders consider.
| Method | Best Fit | Main Drawback |
|---|---|---|
| Cold process with rendered lard | Full control over fat sources and near-zero waste on a homestead | Requires careful lye handling and a four to six week cure |
| Hot process in a slow cooker | Faster results, with bars usable sooner after pouring | Needs steady electricity and close attention, since the soap can scorch |
| Rebatching scraps and test bars | Recovering trimmed bars, failed batches, and offcuts | Adds an extra step, and rebatched bars can come out grainy |
For most off-grid households, cold process is the right default because it works with a woodstove or a small solar setup and produces the most useful bar from your own fat. Hot process makes sense when you need soap quickly and have a reliable power source. Rebatching belongs in every routine, because it turns mistakes and offcuts into usable soap instead of trash.
Pro tip: Keep a small notebook in the soap area and record the temperature of the room, the fat blend, and how long each batch took to reach trace. Over two or three winters, that notebook will tell you more than any single recipe can.
Frequently Asked Questions
Can I make lard soap without a lye calculator?
You can, but it is a poor idea. A lye calculator uses the exact weights and saponification values of your fats to tell you how much sodium hydroxide to use, and a guess can leave you with soap that is too caustic or too soft. Use the calculator every time, even for a small test batch.
Is homemade wood-ash lye good enough for lard soap?
Homemade lye from wood ashes is unpredictable, because its strength depends on the ash and the water. For a soap you plan to use on your skin, buy commercial sodium hydroxide from a hardware store and measure it accurately. It is inexpensive, and it removes the guesswork from the batch.
Why does my lard soap feel soft after a few weeks?
Softness usually means the bar needs more cure time, a different oil blend, or both. Lard alone can produce a bar that lathers less than you expect, so blending in olive or coconut oil often helps. Check the cure time first, because many bars need the full four to six weeks before they firm up.
Can I render lard in the summer and still make good soap?
Yes, but summer rendering is harder to keep clean. Warm weather speeds up spoilage, so you need to strain the fat carefully, cool it quickly, and store it in a cold place. Winter rendering is easier on the fat and on your routine, which is why many homesteaders save their soap batching for the colder months.
What should I do with soap that feels too harsh?
Set it aside and do not use it on skin. Harsh bars can be rebatched, which means grating the soap and melting it with a small amount of liquid so it can be reformed. Rebatching does not fully fix a soap that is still caustic, so test the bar before you try to rescue it.
What fat or ratio has worked best in your winter batches, and where did your first attempt go wrong? Share your experience in the comments so other homesteaders can learn from it.
References
- Off-grid soap making guide covering lye safety and homestead fats
- Comparison of cold process and melt-and-pour soap making
- Old-fashioned method for making lard soap on a budget
- Step-by-step beginner guide to cold process soap
Leave a Reply