Running a generator in brutal cold snaps can turn into a real headache. Picture this: it’s -20°F or lower outside, and your power goes out. You need reliable backup, but keeping the generator inside a porch means dealing with exhaust fumes and noise. That’s where a through-the-wall exhaust kit shines. It lets you vent fumes safely outside while cutting down on racket with a built-in silencer. In this guide, I’ll walk you through a real install on a Champion 3400W inverter generator. You’ll get step-by-step tips to make your setup safe and quiet for those harsh winter months.
Section 1: Unboxing and Inventory of the Through-the-Wall Exhaust System
You just got your kit in the mail. Time to crack it open and see what you’re working with. This step builds confidence before you dive into the install. Everything looks sturdy right from the start.
Assessing Kit Components and Build Quality
The box holds a few key pieces that scream heavy-duty. First, there’s the main exhaust pipe, built to snake through your wall without fuss. Then come the U-bolts and clamps for a rock-solid hold. The flange plate fits snug against the outside wall, and the muffler attaches at the end to tame the roar. Don’t forget the metal tape for sealing joints tight. It all feels tough, like it can handle freezing temps without cracking. I laid out each part on the porch to double-check nothing was missing.
- Exhaust pipe: Flexible enough for bends but rigid where it counts.
- Mounting hardware: Includes bolts and plates for easy setup.
- Muffler: Shiny and compact, promised to drop noise levels.
- Extra bits: Tape and basic pics for guidance, no thick manual needed.
This kit seems universal, but always match it to your generator model.
Understanding Generator Specific Compatibility
Not every kit fits every machine. For my Champion 3400W, the adapter bolts right onto the exhaust port. You might need to tweak for other brands. The big thing? Pull out the old spark arrestor first. It blocks a flush fit otherwise. Reuse those screws to lock the new plate in place. Check your generator’s manual for port size—most are standard, but measure twice. This ensures fumes go out, not back in your space.
Why bother? A bad fit means leaks or poor venting. In cold weather, you can’t afford that. Test the pieces dry before sealing anything.
Preparation: Initial Generator Access
Start by popping off the end cover on your generator. Mine had a bunch of screws, nothing too tricky. Just grab a screwdriver and work steady. This gives you clear access to the exhaust spot. Without it, fitting the adapter turns into a fight. Lay the cover aside safely— you’ll put it back soon. Clean any dirt around the port while you’re in there. It makes the whole job smoother.
Once open, eye the exhaust flange. That’s your starting point. A quick wipe keeps things pro.
Section 2: Mounting the Exhaust Adapter and Enhancing the Seal
Now things get hands-on. You attach the adapter to your generator. This link keeps exhaust flowing right. Seal it well to avoid any hot spots inside.
Sealing Best Practices for High-Temperature Connections
The kit seals tight on its own, but add high-temp silicone for extra peace. I dabbed some around the adapter edge before bolting. It squeezes in place, blocking any gaps. Heat from exhaust can reach high, so this stops leaks. Think of it like caulk for your car’s tailpipe—simple but smart. Go light; too much squishes out and wastes. Let it set a minute before the next step.
This boost helps in cold weather too. It fights condensation that might form in freezes.
Securing the Adapter Plate to the Generator Housing
Slide the adapter over the port. Line up the holes with your old screws. Tighten them firm but not overkill—snug is best. The plate sits flush now, no wobbles. If the pipe sticks out far, note that for wall planning. Reattach the cover once secure. It all nests back like it belongs.
Test wiggle it gently. No give means you’re good. This step locks in safety for runs in -30°F chills.
Determining Exterior Pipe Positioning
Figure where the pipe exits the wall. From the generator, it bends up and out. Mark that spot inside and outside. The pipe needs room to curve without kinks. Eye the path—avoid wires or insulation. A slight angle helps the muffler sit right outside. Sketch it quick if needed.
This planning saves headaches later. Poor aim means recutting or bends that clog flow.
Section 3: Precision Wall Penetration for Safe Venting
Cutting into your wall feels big, but it’s straightforward with care. You need a clean 3-inch hole for the pipe. Align it perfect to keep exhaust aimed away from doors or windows.
Marking and Drilling the Pilot Hole Location
Grab a pencil and mark the exit point outside. Match it to your inside generator spot. Drill a small pilot hole first—easy to see through. Use a bit that punches wood or siding without splintering. For my setup, it lined up with the porch frame. Double-check from both sides. A laser level helps if you have one, but eyeball works fine.
This tiny hole guides the big cut. Miss it, and you chase shadows.
Navigating Structural Elements During Drilling
Walls hide surprises like 2×4 studs. Mine hit one, so I cut right through—plenty of support left. Use a hole saw for the 3-inch circle. Go slow to avoid binding. Battery died on me mid-way; always charge tools first. Dust flies, so wear a mask. Once through, peek inside to confirm straight.
Studs add strength, not problems. Just adapt your angle if needed.
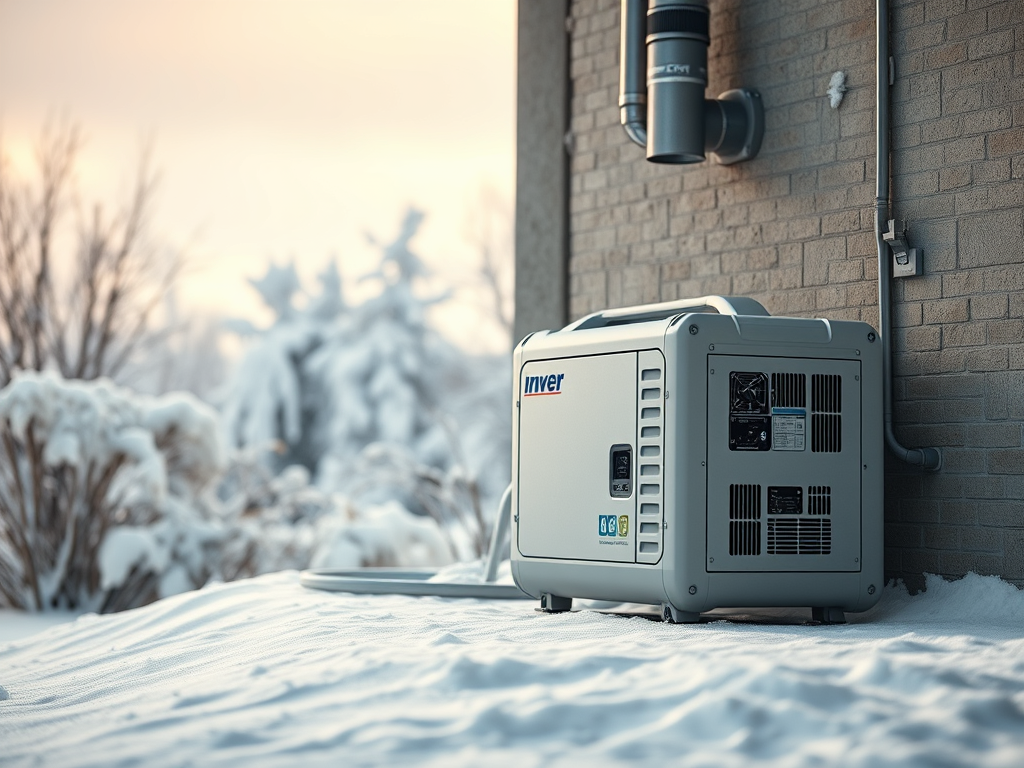
Installing the Exterior Flange and Spark Arrestor Muffler
Push the pipe through the hole. It might be snug—wiggle gentle. Bolt the flange plate outside with roofing screws; they grip wood better than the kit’s metal ones. Attach the muffler to the end—it sticks out just enough. Tighten everything down. The spark arrestor fits in the muffler path for fire safety.
Step back and check level. It looks clean now, ready for inside work.
Section 4: Final Assembly, Sealing, and System Testing
Wrap up the connections inside. Then fire it up to see if it hums. This proves your through-the-wall exhaust kit works for real.
Securing Internal Pipe Connections
Hook the pipe to the adapter. Wrap metal tape around the joint for an airtight seal. Clamp U-bolts tight—no play allowed. It bends to fit the wall path smooth. If a storm brews, hustle here. Mine sealed quick, no drips or gaps.
This keeps fumes out and efficiency high. Double-wrap if you’re paranoid.
Initial Startup and Load Testing Protocol
Prime the generator and pull the cord. It roars to life—listen for odd sounds. Check the output: mine hit 1300 watts fast, charging batteries to 95%. The sun helped earlier, but this proves backup power. Let it run a bit under load. No smoke or shakes means success.
Watch gauges close at first. It builds trust in your setup.
Thermal Safety Verification: Monitoring Heat Transfer
Grab a thermometer to spot-check temps. The exhaust pipe hit 374°F inside, hot as expected. But the wall spot stayed at 122°F—cool enough. Outside, the plate read 35°F, no fire risk to wood. Muffler exhaust topped 50°F, but air cools it quick. Inside air? Just 40°C near the wall.
Low transfer means safe runs in cold. Keep tabs ongoing, though.
Conclusion: Achieving Quiet, Reliable Cold-Weather Generator Operation
This through-the-wall exhaust kit install nailed it for my Champion generator. Noise dropped big with the silencer—quiet enough to hear but not annoy. In -30°F weather, it starts every time without freeze worries. Fumes vent safe outside, and heat stays contained. I only run it when home, but the setup shines for outages.
Add a carbon monoxide detector inside—non-negotiable. Monitor temps and seals regular. If you’re prepping for winter blackouts, grab a kit like this and follow these steps. Your home stays powered, cozy, and calm. What’s your go-to for cold weather backups? Share in the comments. See the kit on Amazon: HERE
Leave a Reply