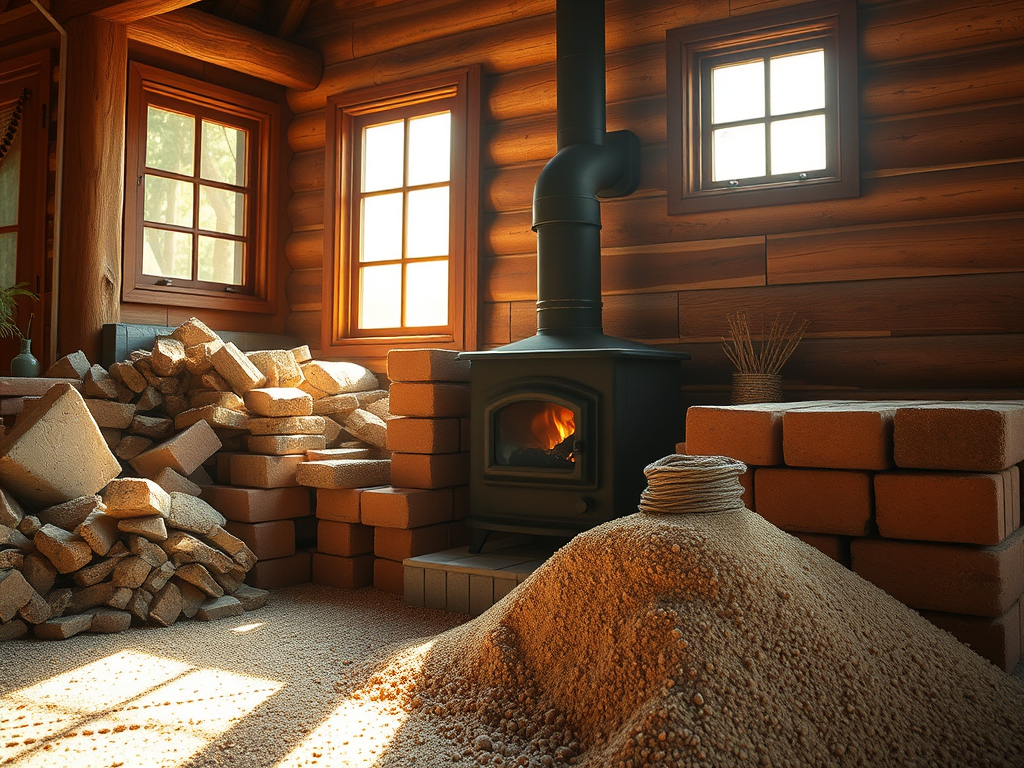
Building Massive Thermal Mass with Repurposed Bricks and Gravel
Imagine waking up on a crisp fall morning in your off-grid cabin, only to find the chill has crept back in overnight. You stoke the woodstove again, feeding it logs just to chase away the cold before the day starts. This cycle drains your wood supply and your energy, but there’s a smarter way to keep the warmth lingering long after the fire fades.
Off-grid living demands clever tricks to hold onto heat without constant work. Thermal mass steps in as that hero material—it soaks up heat from your stove and releases it slowly over hours. In this project, we grab cheap bricks, blocks, gravel, and sand to build a solid heat bank around the stove. The aim? Turn short bursts of fire into all-night comfort, cutting down on fuel and hassle.
I scored over 200 bricks from a local seller at just $2.50 each—way under the full price. These go toward multiple jobs, like fortifying a root cellar and boosting the greenhouse base. Today, we focus on wrapping the stove in this setup to create a safe, efficient heat trap that pays off through winter.
Section 1: Sourcing High-Value Materials on a Budget
Finding the right stuff for off-grid builds often means hunting deals that save cash without skimping on quality. You can turn scrap into gold by spotting overlooked materials nearby. This approach keeps costs low while building something that lasts.
Smart Sourcing: Finding Discounted Bricks and Blocks
I picked up around 220 bricks from a guy in the neighborhood for about $2.50 apiece. That’s roughly a third of what new ones run, making it a steal for big projects. He even tossed in 46 larger blocks without the center split, perfect for sturdy walls.
These extras fit right into plans for the root cellar and greenhouse foundation. You never know how many you’ll need until you’re knee-deep in the build, so stocking up makes sense. Hunt local ads or ask around—folks often offload extras cheap to clear space.
This mindset stretches your budget far. Why pay retail when repurposed items work just as well? It feels good to recycle while cutting waste.
Inventorying Necessary Fill Materials: Gravel and Sand

Gravel and sand form the backbone of any thermal mass setup—they pack tight and hold heat without cracking. I dug into my own pile out back, which has grown over time from other digs. Plenty left for filling block voids and stabilizing structures.
Coarse gravel drains well and mixes easily with sand for a dense fill. Aim for clean aggregates that won’t shift or trap moisture. From the greenhouse excavation, I had extra dirt, but gravel and sand are the stars here.
Stockpiling these basics pays off across projects. Think of them as the filler that turns hollow blocks into heavy heat absorbers. No need to buy new if you’ve got a yard full of resources.
Material Preparation: Cleaning the Aggregate
Before packing it in, sift your gravel and sand to ditch sticks, leaves, or junk. Organic bits can rot or smoke when heated, messing up the clean burn you want. I ran mine through a simple screen, shaking out the debris for pure, workable material.
This step takes time but boosts safety and performance. Wet spots or hydrocarbons might cause issues down the line, so keep it simple and dry. Once cleaned, it’s ready to pour, creating a solid core that traps warmth.
Pro tip: Do this in batches to avoid overload. A wheelbarrow works great for sifting on-site. Clean fill means your thermal mass stays efficient for years.
Section 2: Strategic Placement for Optimal Heat Absorption
Where you put your thermal mass matters most—it needs to catch the stove’s glow directly. Poor spots waste heat; smart ones multiply it. We place these walls close but safe, turning raw fire into stored energy.
Designing the Stove Firewall for Safety and Efficiency
The stove board near the fire gets scorching hot, which worries me in tight quarters. To fix that, I plan a barrier of cinder blocks rising along the sides. This wall shields nearby surfaces while soaking up extra heat.
Nicer bricks face outward for a polished look, but the core stays tough and functional. Enclose the setup so heat bounces around inside the mass instead of escaping. It’s like wrapping the stove in a cozy blanket that holds the warmth.
Safety comes first in off-grid spots— this prevents sparks or burns. Build it tall enough to cover hot zones, and you’ll sleep easier at night.
Utilizing Thermal Mass Around the Heat Source
Flank the stove with vertical strips of blocks to grab radiant heat head-on. When the fire roars, these walls warm evenly, turning into a giant battery for your cabin. Stack them high along both sides for max coverage.
The design uses half blocks at the base for stability, then full ones up top. This setup directs heat upward and inward, away from drafts. Picture it as a heat sponge right where you need it most.
In fall’s tricky weather, this placement shines—jacket on one minute, off the next. It smooths those swings, keeping things steady.
Integrating Existing Water Storage as Thermal Mass

Water beats most materials at holding heat, so I lean on my tanks for extra punch. A 45-gallon one sits gravity-fed near the stove, warming up during the day. It trickles that stored energy out slowly into the night.
Out back, a 150-gallon tank does the same, pulling double duty for water and warmth. These aren’t new additions; they’ve been there, now boosted by the block walls. Water’s high capacity means it radiates longer than stone alone.
Tie them into your stove area for a full system. It’s free thermal mass if you’ve already got the setup. This combo keeps the cabin toasty without extra effort.
Section 3: Construction Techniques for Maximum Density
Building tight means every block and scoop counts toward better heat retention. Rush it, and gaps let warmth slip away. Take it step by step for a rock-solid result that works hard all season.
Building the Core Structure with Cinder Blocks
Start with cinder blocks for the frame—they’re cheap and hollow, ideal for filling later. I mixed half blocks at the bottom for a level base, then stacked full ones up the sides. This creates tall pillars that hug the stove without crowding it.
Keep rows straight with a level; wobbles waste space. Go vertical to catch rising heat, aiming for full coverage on hot sides. It’s straightforward labor that builds real value.
Once stacked, the skeleton looks simple but strong. Add your fills next, and it transforms into a heat powerhouse.
Filling the Cavities: The Density Factor
Pour the sifted gravel and sand mix into each block’s core for ultimate density. One column took about five gallons—pack it firm to eliminate air pockets. This tight fill ensures even heat spread and slow release.
Layer gravel first for drainage, then top with sand to lock it in. Tamp down as you go to settle everything. Dense material means better performance, like a full thermos versus a leaky one.
Test by shaking; no rattle means it’s set. This step turns basic blocks into thermal anchors.
Aesthetic and Functional Topping
Cap the walls with cleaned-up bricks for a neat finish that adds more mass. I placed a few rocks on top temporarily, but the bricks seal it nicely. They look good and hold extra heat, blending form with function.
Wipe off dirt before stacking to keep things tidy. This layer protects the fill below and boosts overall capacity. It’s the polish that makes the whole build shine.
In a cabin, these touches matter—practical yet inviting. Your space warms up without looking like a junkyard.
Section 4: Measuring and Validating Thermal Performance
Proof comes from real tests, not guesses. Track temps to see how your work pays off. Early signs show this setup cuts cold mornings for good.
Empirical Results Before Full Completion
Even half-done, the bricks held heat well last night. The fire died around midnight, but the cabin stayed at 22°C till I rose at 7 AM. Outside hovered at 15°C, proving the mass’s early wins.
I added gravel after being away five hours, and inside still felt cozy. No full fill yet, but it’s clear: this cuts restart efforts. Simple monitoring with a thermometer tells the story.
These numbers build confidence. Small changes yield big comfort gains.
The Physics of Dissipation: Water vs. Rock
Water tops the list for thermal mass—it stores more per pound than rock. But gravel and bricks shine in solid builds, releasing heat steadily overnight. Together, they create a balanced system that outlasts fire alone.
My tanks warm slow but last long, while the blocks kick in quick. It’s like pairing a slow cooker with a hot plate. This mix handles winter’s demands without waste.
Understand the basics, and you’ll tweak for your spot. Rock for fast uptake, water for endurance.
Projected Wood Savings and Operational Changes
With full thermal mass, the stove might run just half as often. Less wood chopped, stacked, or burned means more time enjoying the cabin. Fires go longer between feeds, easing daily chores.
Expect warmer nights without babysitting the blaze. This setup turns efficiency into everyday ease. Savings add up over cold months.
Conclusion: Implementing Your Own Thermal Mass System
This build shows how repurposed bricks, gravel, and smart placement slash off-grid heating woes. You gain safety around the stove, steady warmth through the night, and big cuts in wood use. It’s passive power that fits any cabin setup.
Grab local deals on blocks and dig your own fills to start cheap. Test small, then scale—your comfort will thank you. Have you added thermal mass to your off-grid home? Share in the comments what worked for you. Let’s swap tips for cozier winters ahead.
Visit my YouTube Channel
Leave a Reply